Must-Read for Java Developers: Step-by-Step Guide to Jenkins + Maven Repository + Docker Repository + Deployment + Auto-Update POM Version - Complete CI/CD Pipeline
1. Introduction
It took me 4 whole days to get this entire pipeline working... After completing it, I deployed all my previous APIs using this approach, which greatly reduced the time I needed for deployment. It was definitely worth it.
Compared to my previous article One-Click Docker Image Deployment for SpringBoot Projects Using Jenkins, this integrates more content and is more dynamic.
1.1 Features Implemented
- One build completes all the following operations:
checkout code → build jar package → push package to nexus → build docker image → push image to repositories → deploy → update pom.xml version
The reason I didn't include SonarQube or Murphy Security stages is because I put that part in GitHub Actions triggered when code is committed.
Without further ado, let's start the tutorial.
2. Setup Process
2.1 Prerequisites
Environment setup:
- A simple Spring Boot project using Java 17. I've prepared this - I suggest cloning it locally first: https://github.com/MingGH/demo-springboot-simple
- Alibaba Cloud account (for pushing nexus and docker images)
- A computer or server with Docker installed. If you have difficulty installing Docker on a server, refer to this blog: Install Using Official Script
2.2 Install Jenkins via Docker
Create a directory to store Jenkins data:
mkdir -p /dockerData/jenkins/jenkins-data
Navigate to /dockerData/jenkins directory and create a Dockerfile:
cd /dockerData/jenkins
vim Dockerfile
Copy the following content into the Dockerfile:
FROM jenkins/jenkins:2.375.1
USER root
RUN apt-get update && apt-get install -y lsb-release
RUN curl -fsSLo /usr/share/keyrings/docker-archive-keyring.asc \
  https://download.docker.com/linux/debian/gpg
RUN echo "deb [arch=$(dpkg --print-architecture) \
  signed-by=/usr/share/keyrings/docker-archive-keyring.asc] \
  https://download.docker.com/linux/debian \
  $(lsb_release -cs) stable" > /etc/apt/sources.list.d/docker.list
RUN apt-get update && apt-get install -y docker-ce-cli
USER jenkins
RUN jenkins-plugin-cli --plugins "blueocean:1.26.0 docker-workflow:563.vd5d2e5c4007f"
Build the image from the Dockerfile:
docker build -t myjenkins-blueocean:2.375.1-1 .
After building, use docker images to see the newly built image.
Run a Jenkins container:
docker run \
  -u root \
  --name jenkins \
  --restart=on-failure \
  --detach \
  --publish 8080:8080 \
  --publish 50000:50000 \
  --volume /etc/localtime:/etc/localtime \
  --volume /var/run/docker.sock:/var/run/docker.sock -v /usr/bin/docker:/usr/bin/docker \
  --volume /dockerData/jenkins/jenkins-data:/var/jenkins_home \
  myjenkins-blueocean:2.375.1-1
Parameter explanations:
-u root- Run processes in the container as root user--restart=on-failure- Restart the container if it exits due to an error--detach- Keep the container running in the background--publish 8080:8080- Map host port 8080 to container port 8080--publish 50000:50000- Map host port 50000 to container port 50000--volume /etc/localtime:/etc/localtime- Sync container time with host--volume /var/run/docker.sock:/var/run/docker.sock -v /usr/bin/docker:/usr/bin/docker- Mount host's/var/run/docker.sockto container, allowing Jenkins container to call host's Docker to create other containers for CI/CD--volume /dockerData/jenkins/jenkins-data:/var/jenkins_home- Mount Jenkins container data to host directory
Solving "ECDSA host key is known for github.com and you have requested strict checking" Issue
After successful startup, wait - there's one more step. Enter the Jenkins container to configure SSH. Without this configuration, you'll get the exception "ECDSA host key is known for github.com and you have requested strict checking" when pulling code. You can find more detailed explanation in this article: Jenkins Pipeline Throws Exception: No ECDSA host key is known for github.com
Enter the Jenkins container and execute:
docker exec -it -u root jenkins /bin/bash
mkdir -p /root/.ssh
cd ~/.ssh/
touch known_hosts
ssh-keyscan github.com >> ~/.ssh/known_hosts
You'll see the following output, indicating success:
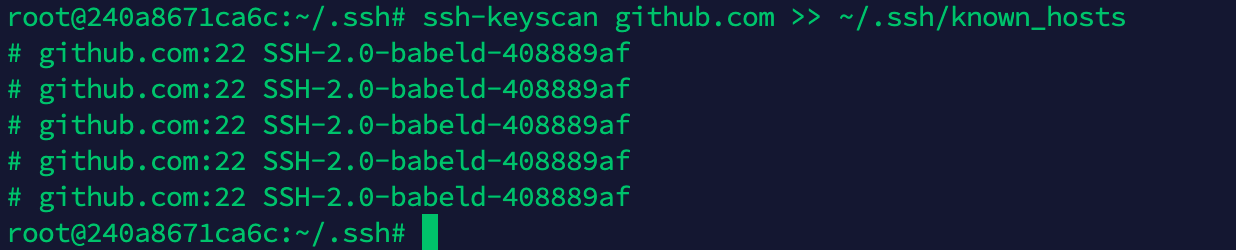
Then type exit to exit the container.
If you're using a cloud server, you need to open security group ports in the cloud console to access it.
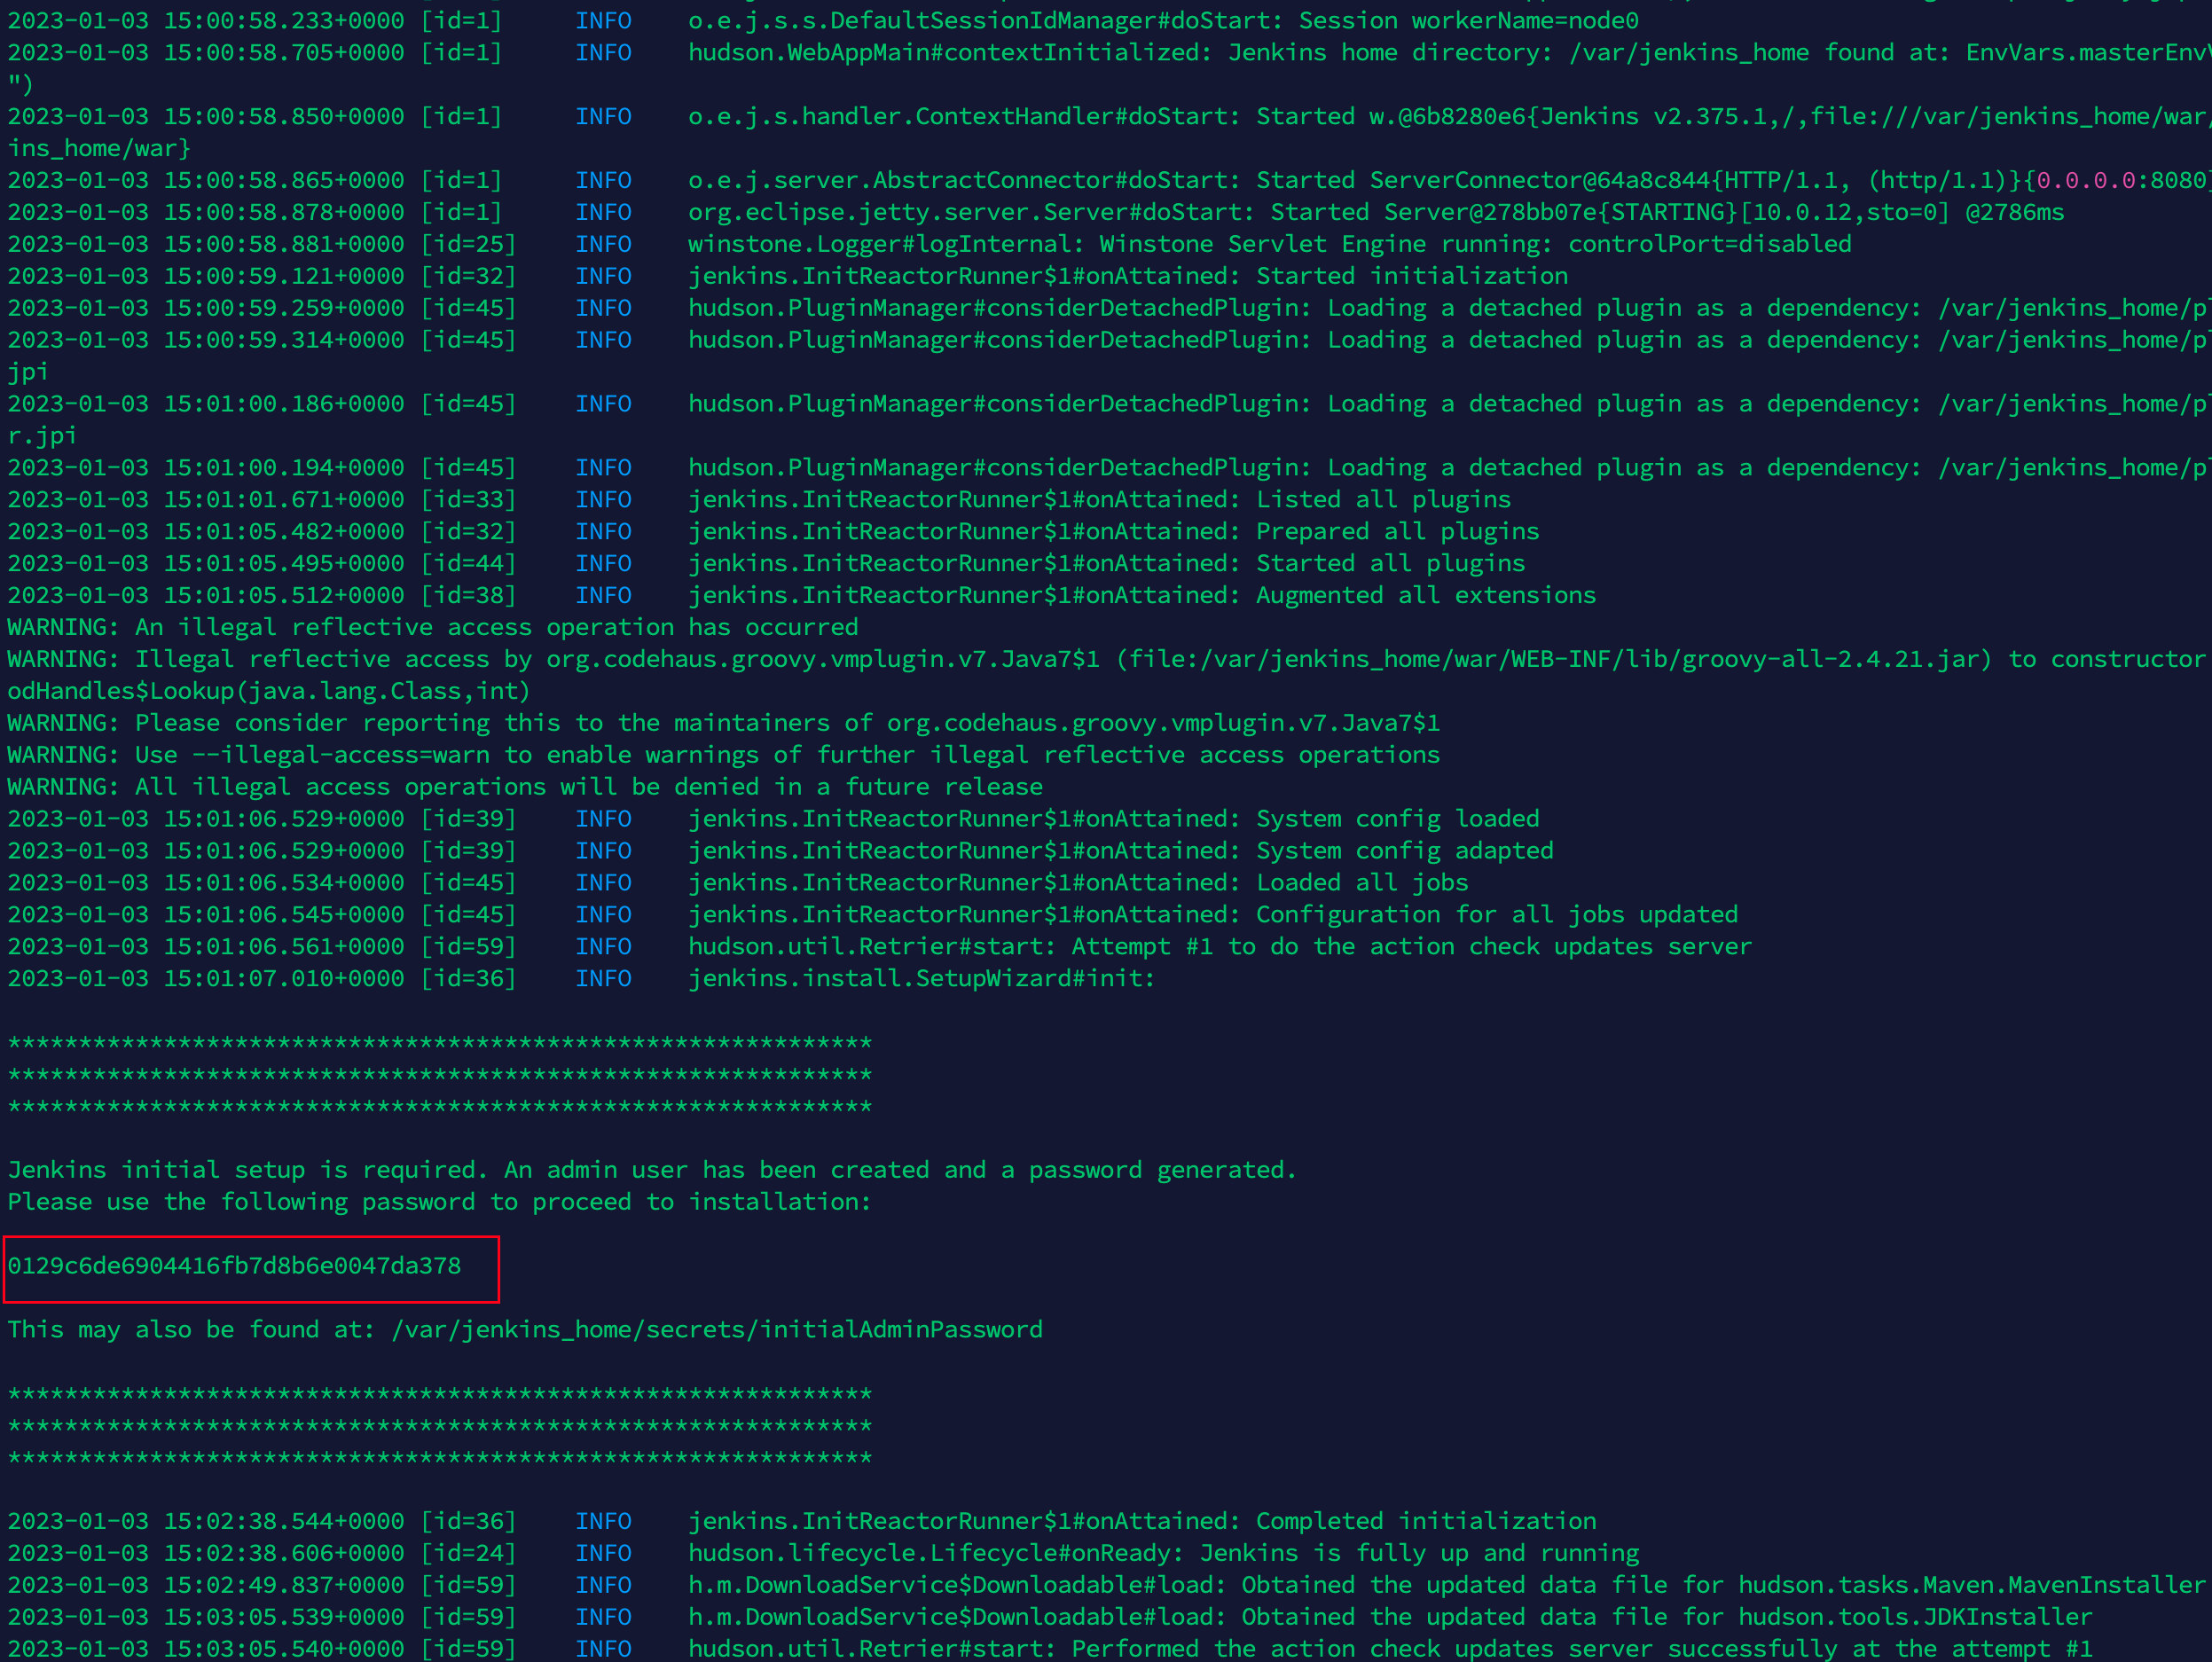
Now we can access Jenkins via ip:port. Open browser at http://server_public_ip:8080 and you'll be prompted to enter a password.
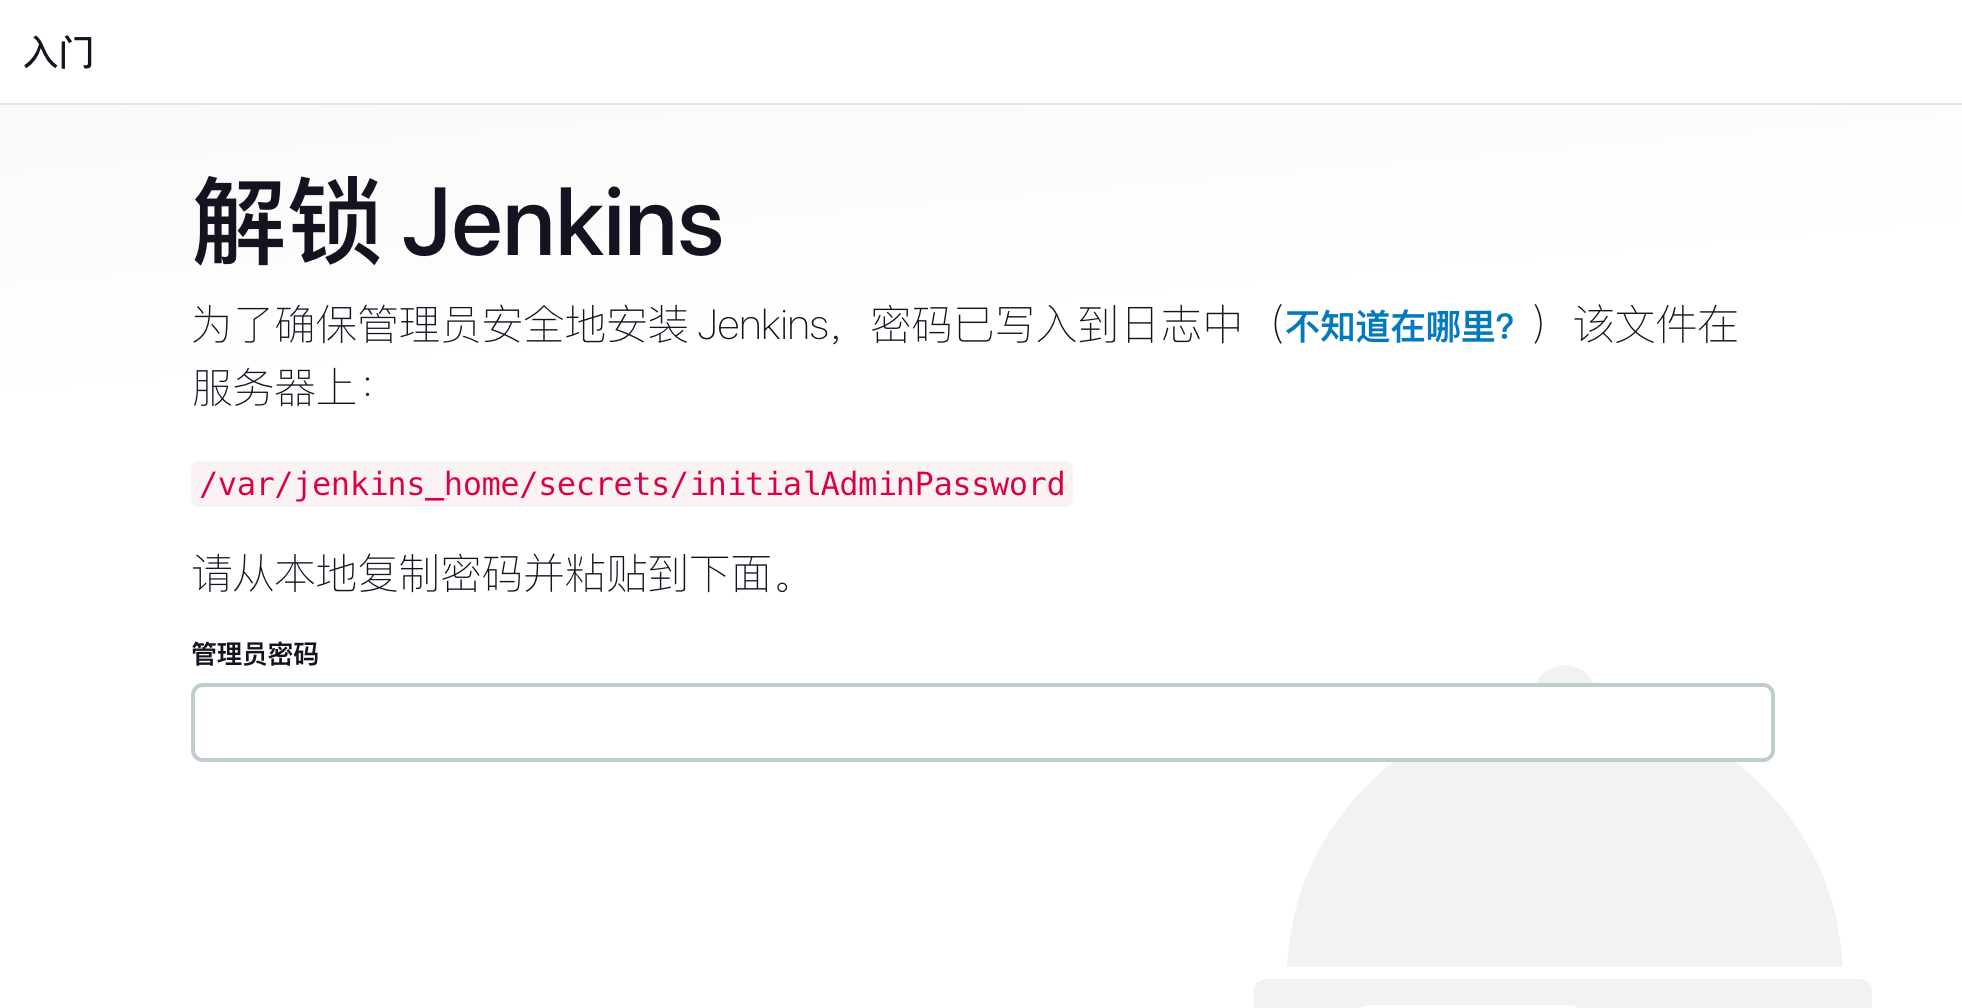
We can get the password directly using docker logs jenkins:
2.3 Jenkins Configuration: Timezone
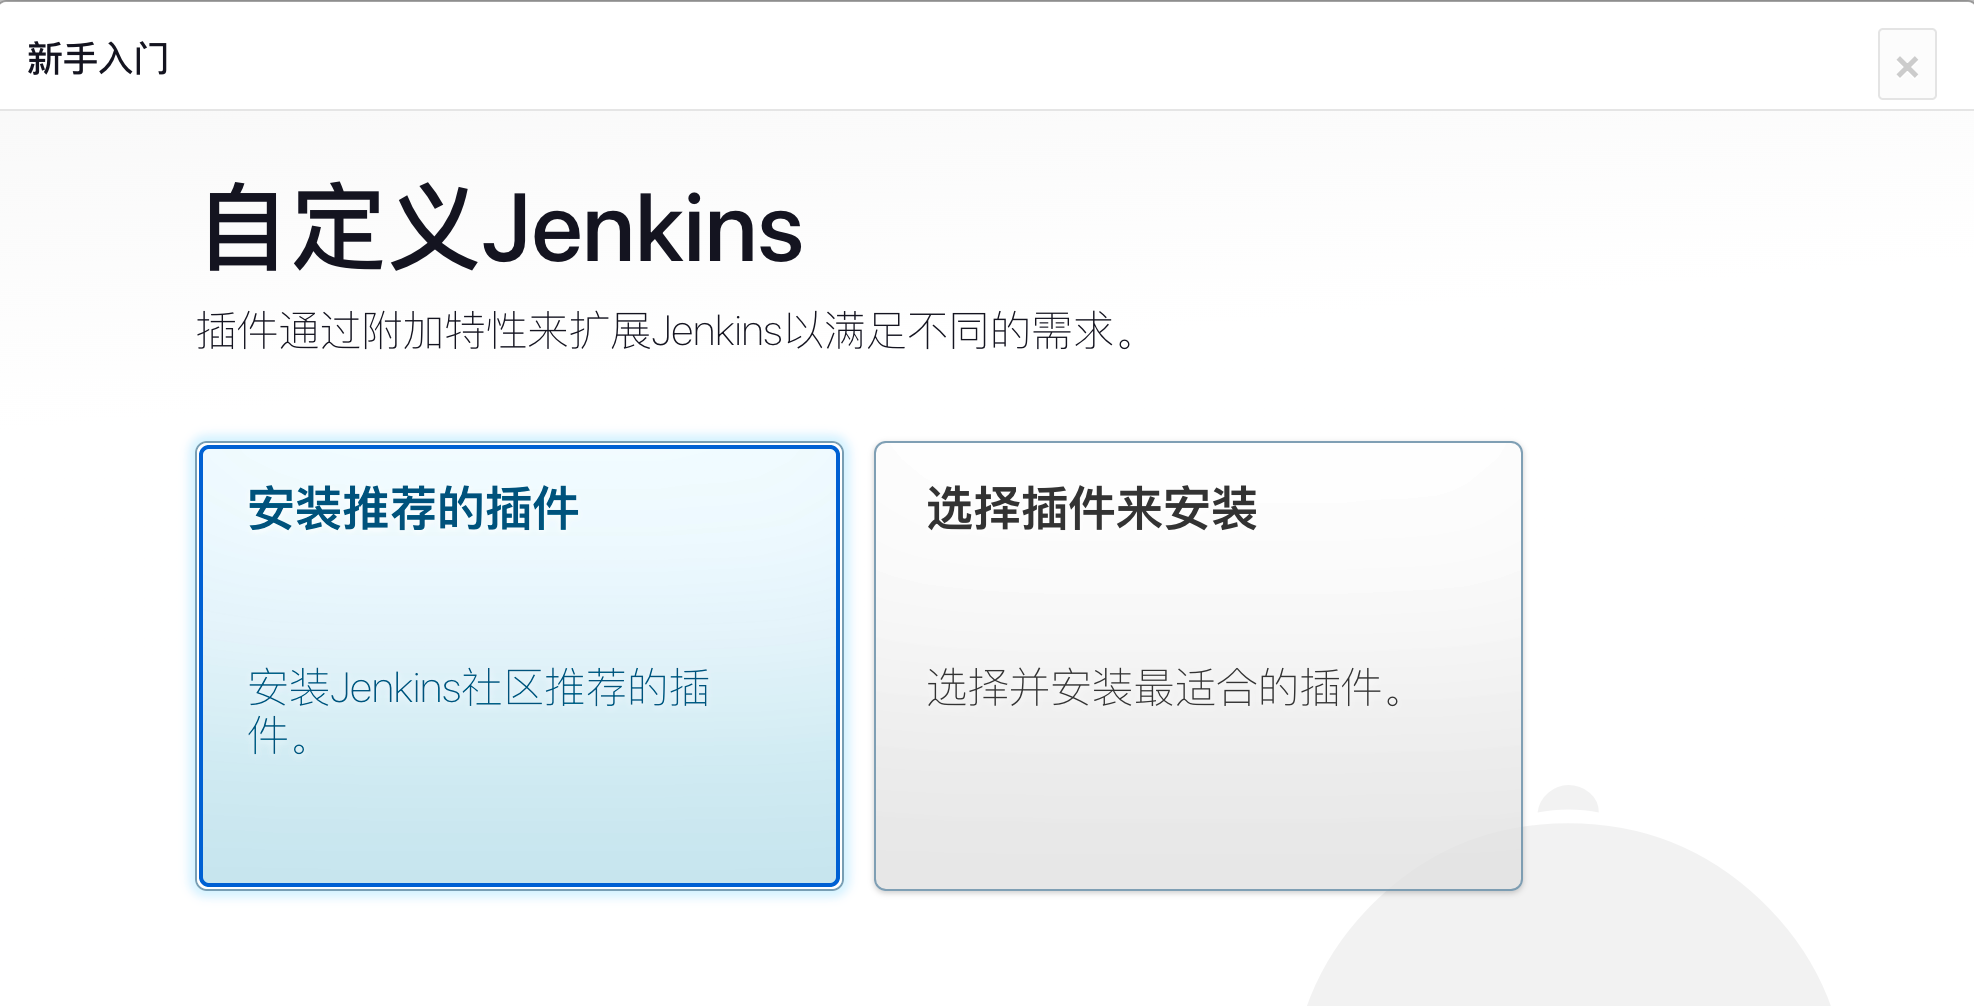
After installing recommended plugins, Jenkins will restart. Wait a moment, then refresh and log in.
Timezone Configuration
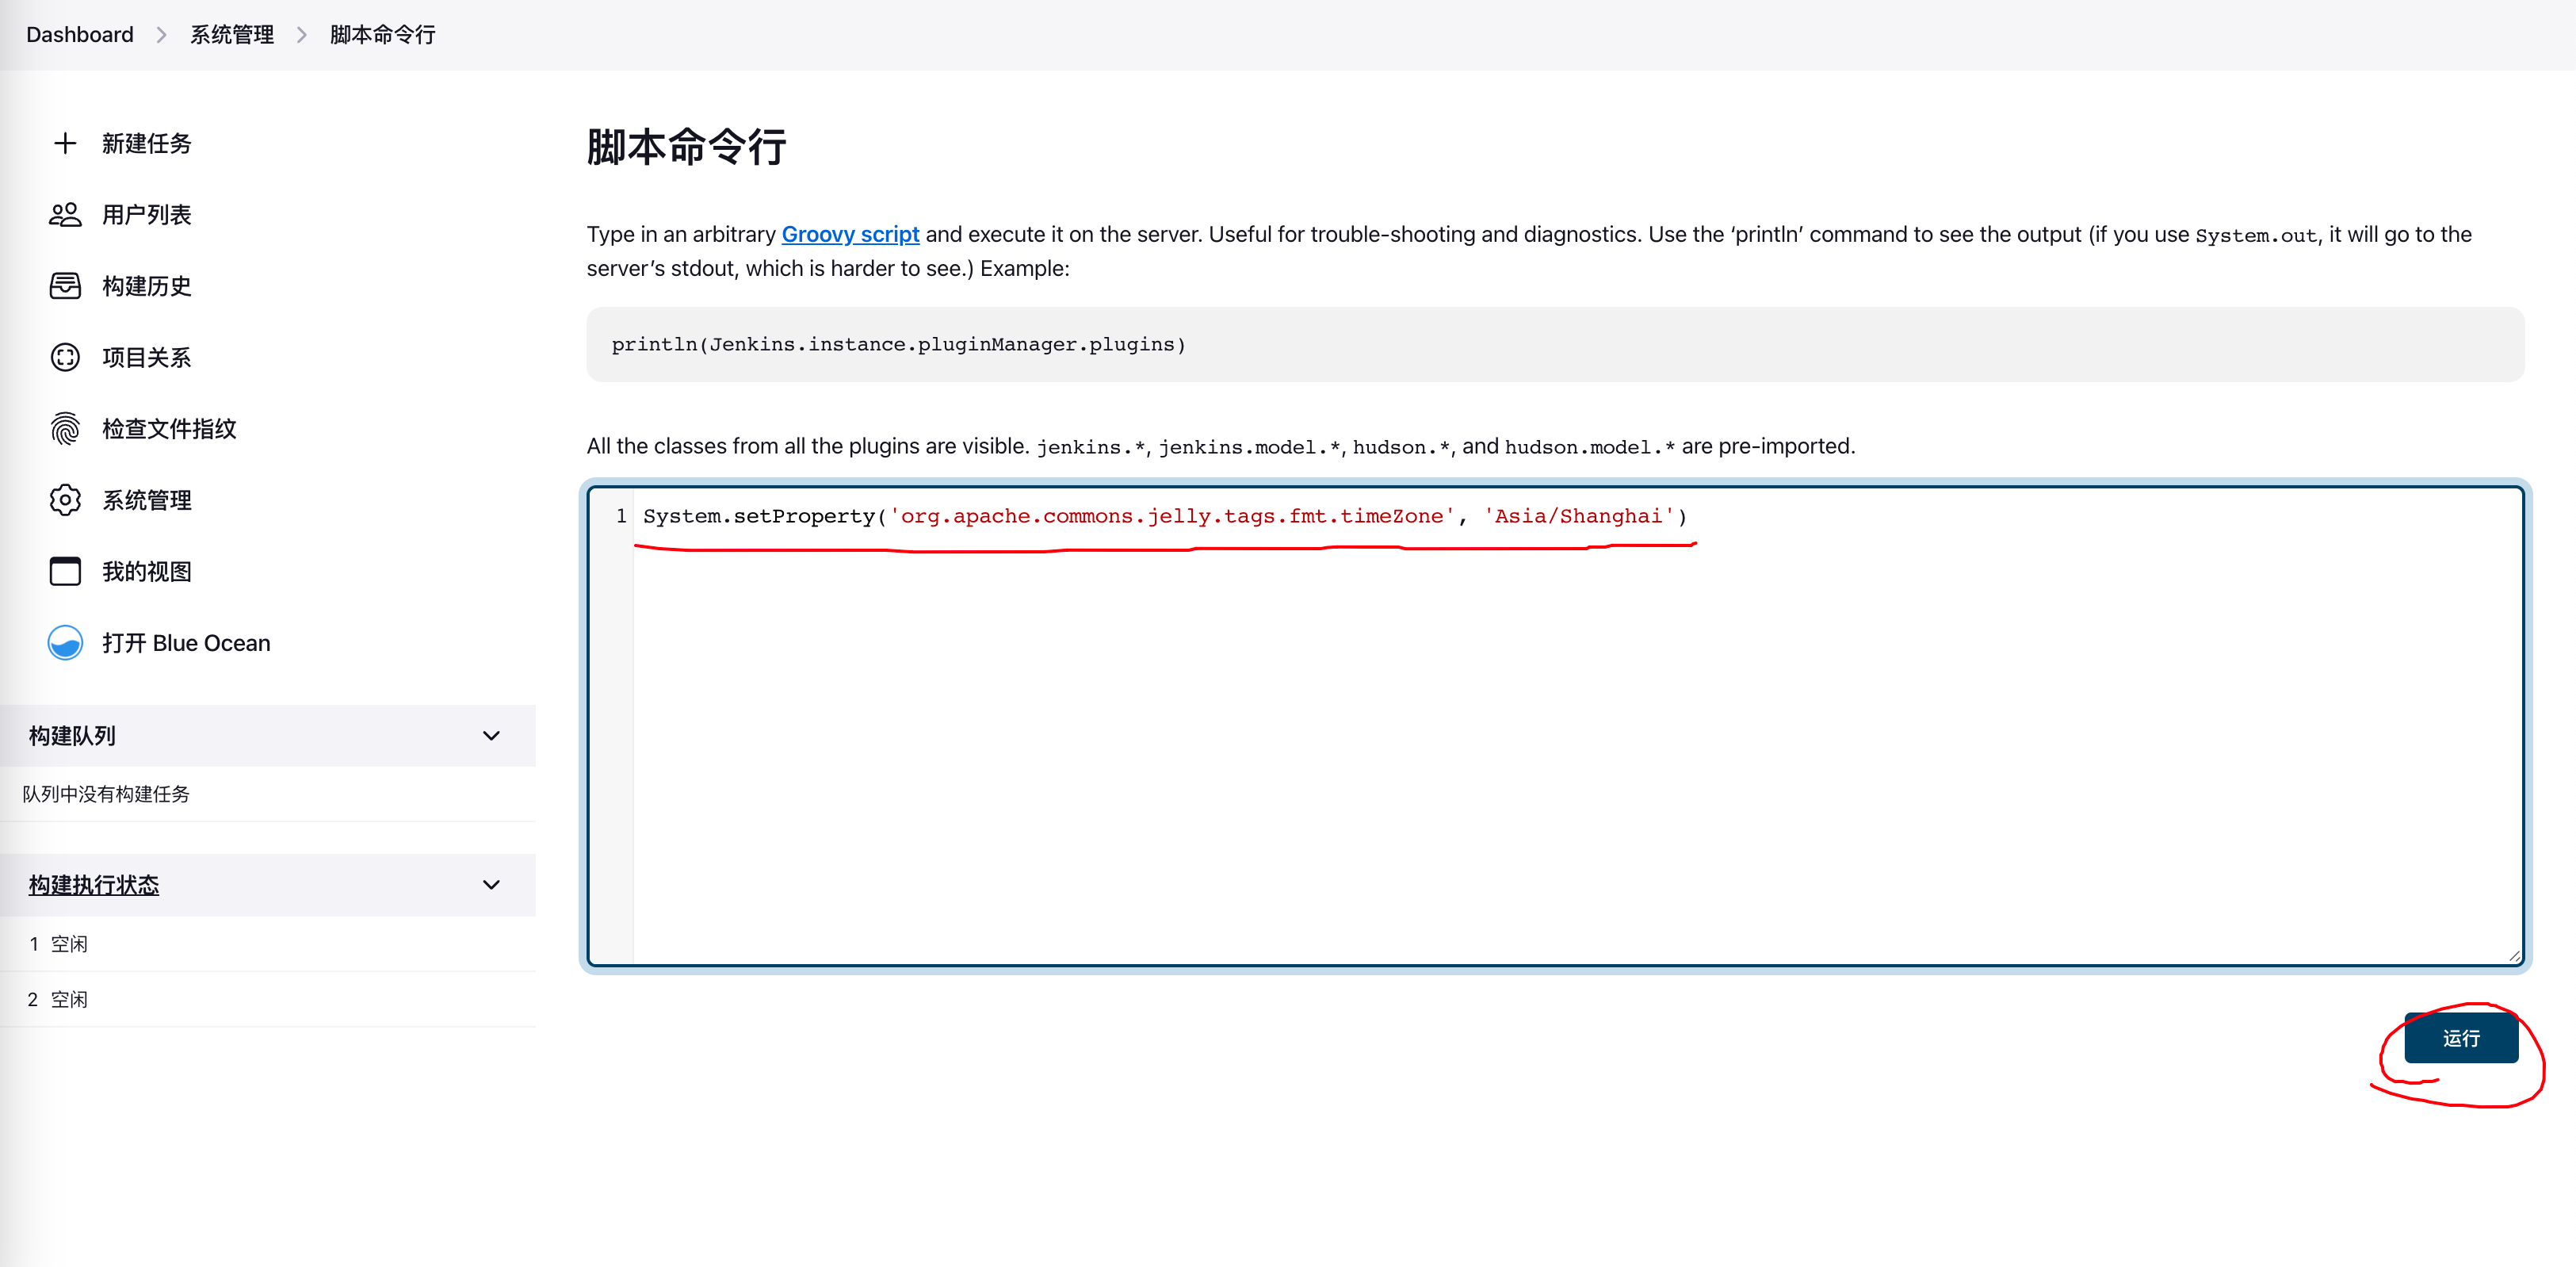
Go to Manage Jenkins → Script Console

Execute the following command to set timezone to Shanghai:
System.setProperty('org.apache.commons.jelly.tags.fmt.timeZone', 'Asia/Shanghai')
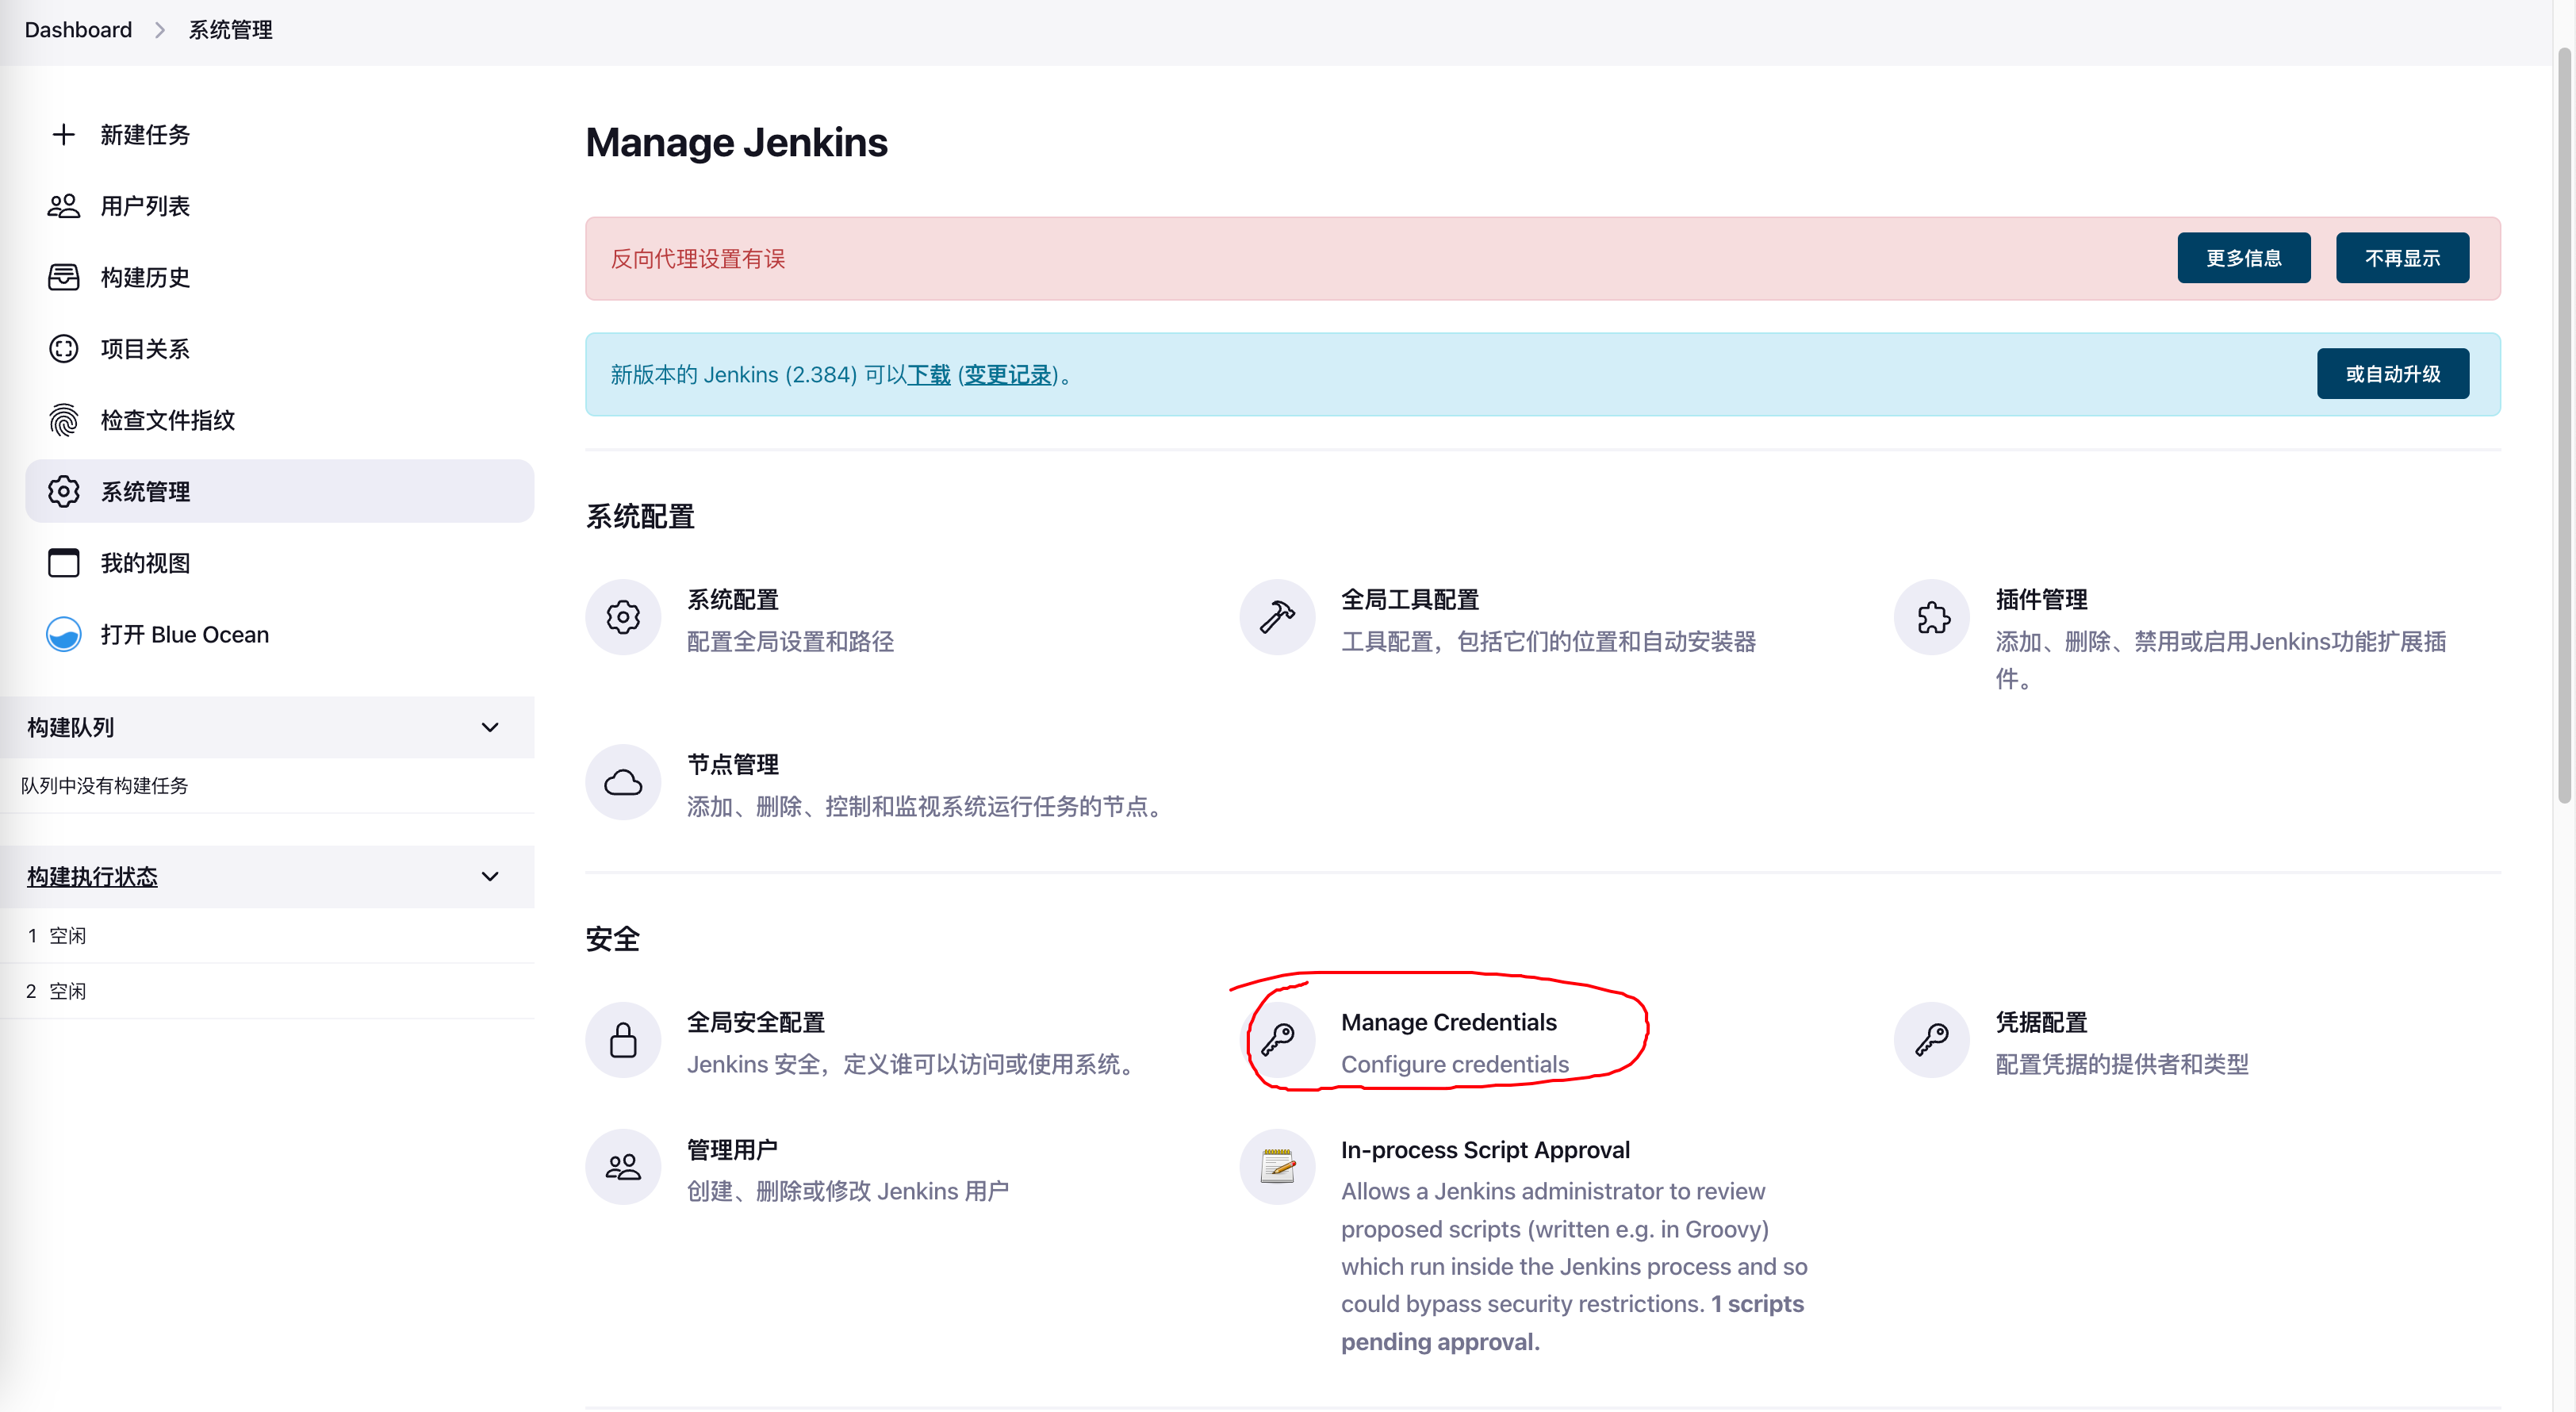
2.4 Jenkins Configuration: GitHub Credentials
Return to Manage Jenkins and click Manage Credentials
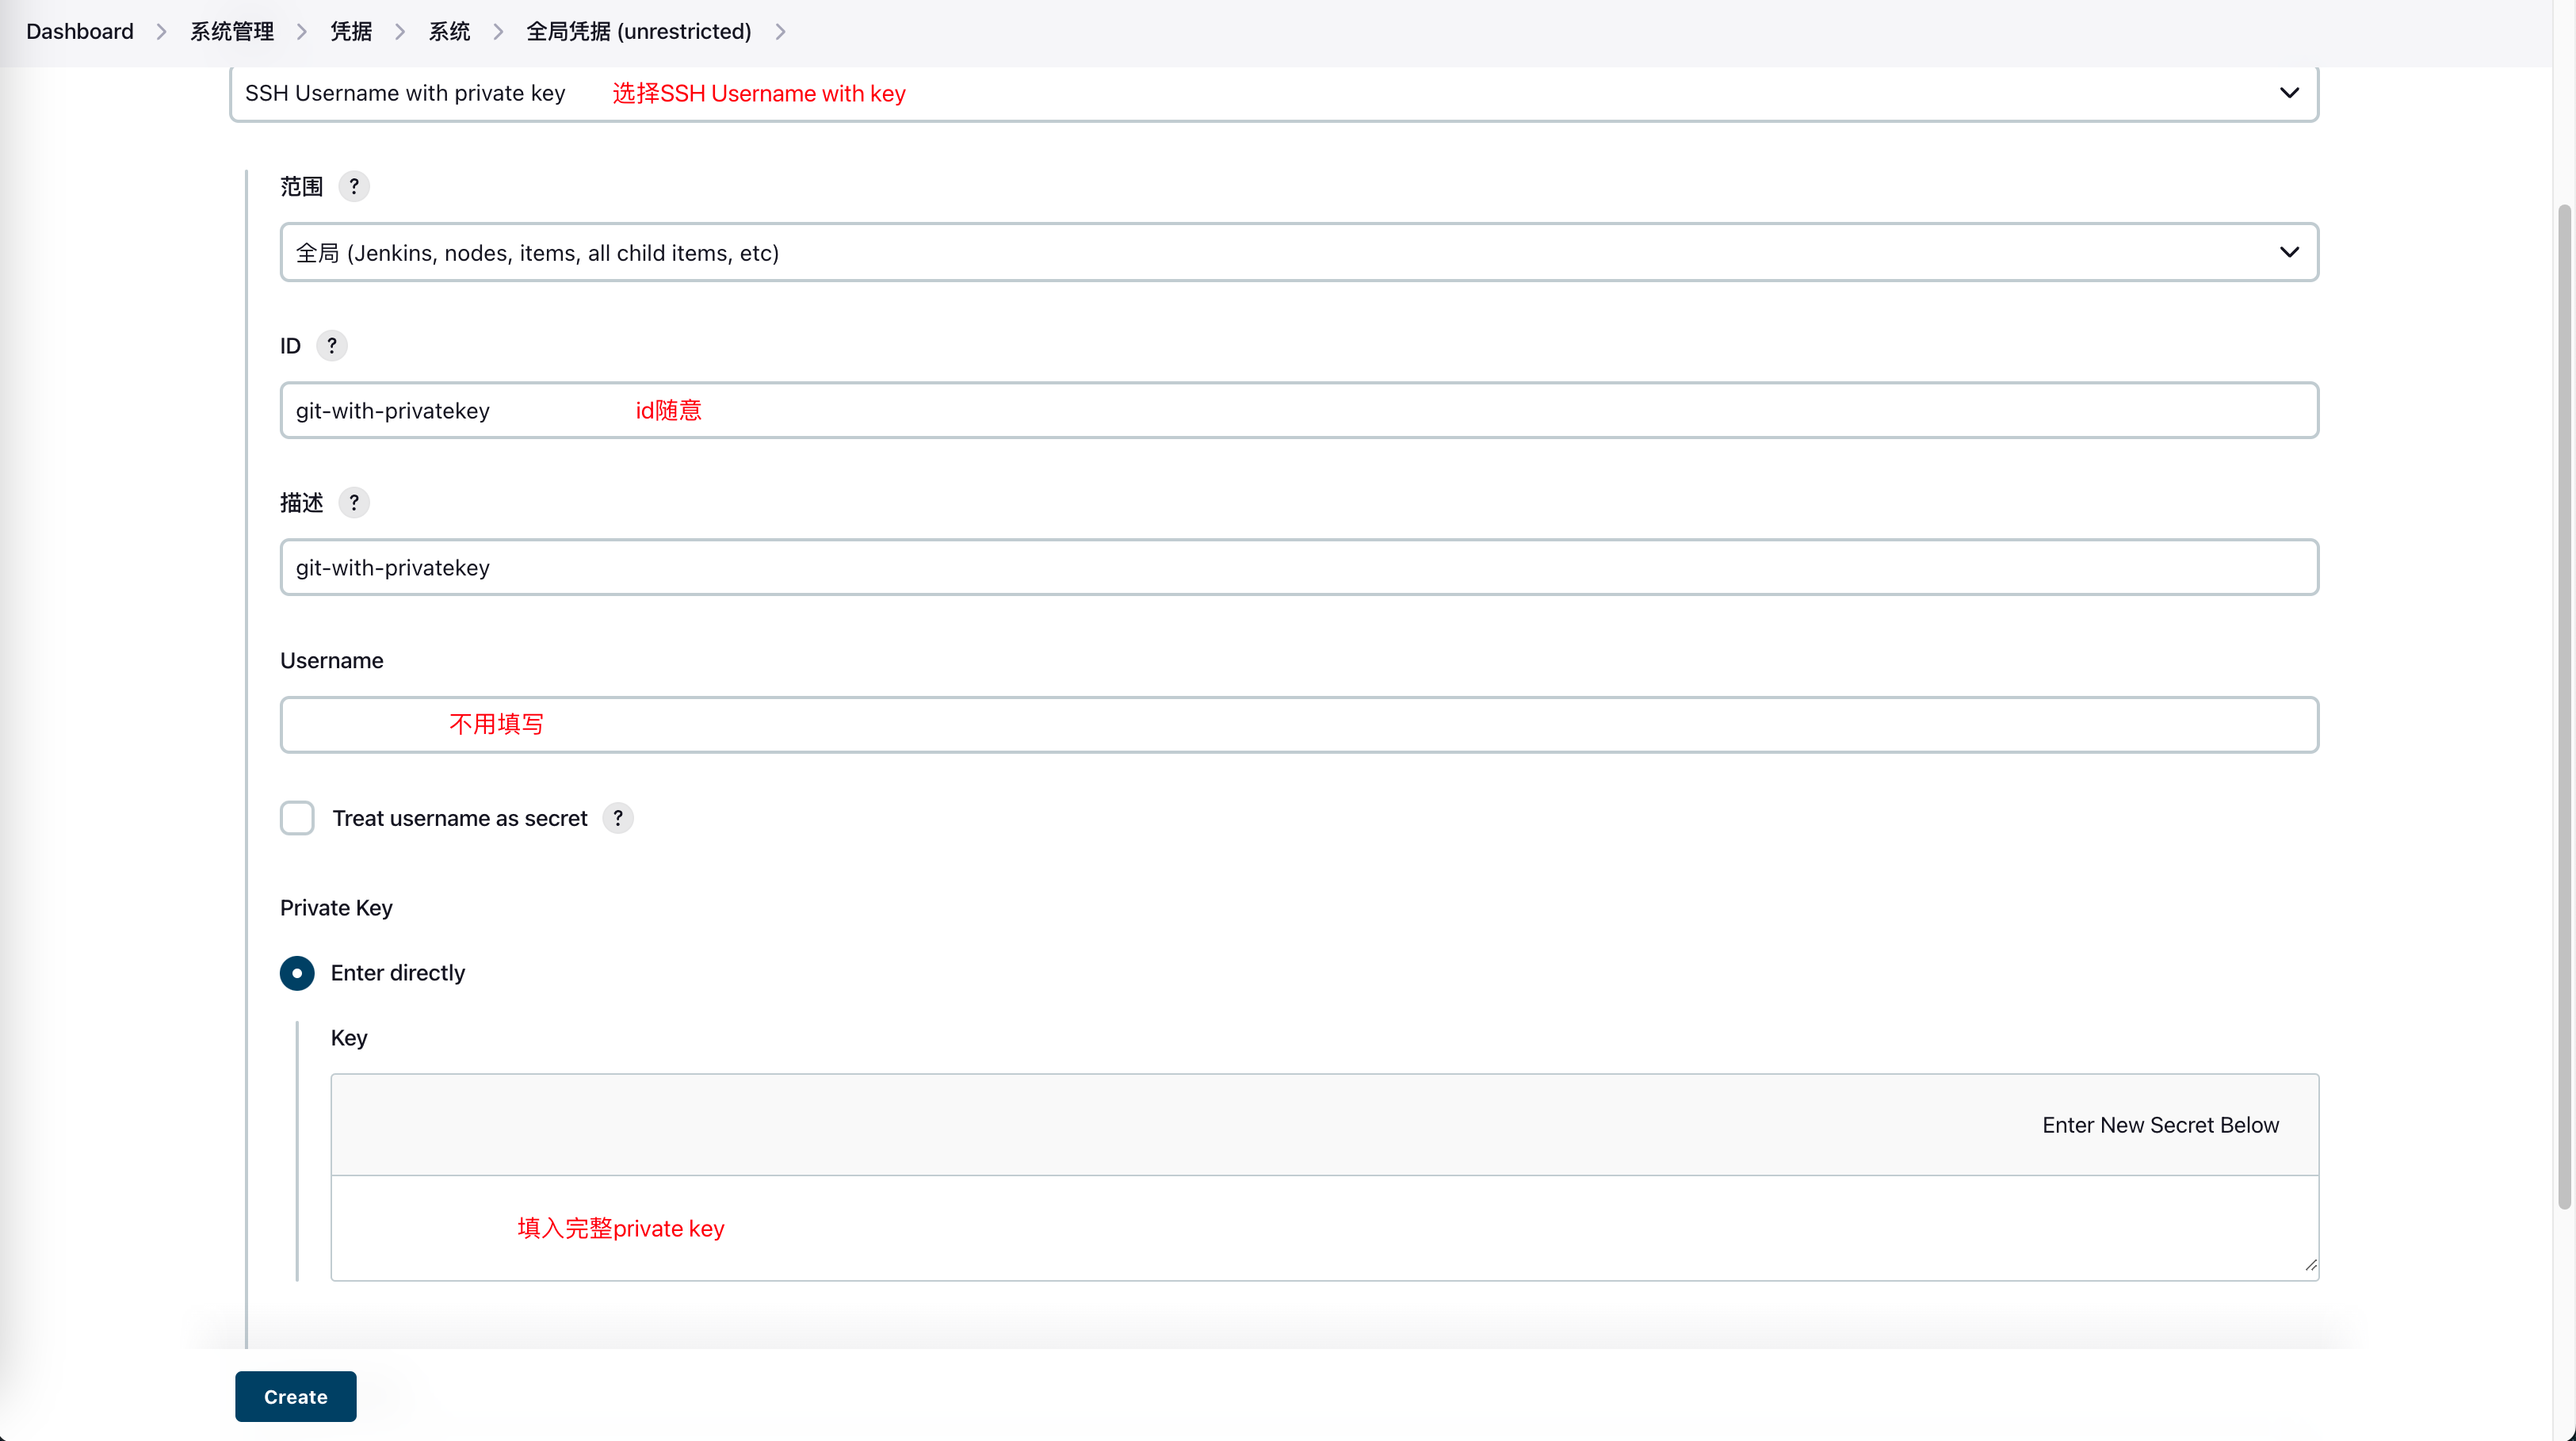
Create new credentials:
Source of private-key: Generate corresponding public key on the server deploying Jenkins
ssh-keygen -t rsa -b 4096 -C "your_email@example.com"
Three files will be generated:

Then copy the content of public key file id_rsa.pub to GitHub SSH configuration:
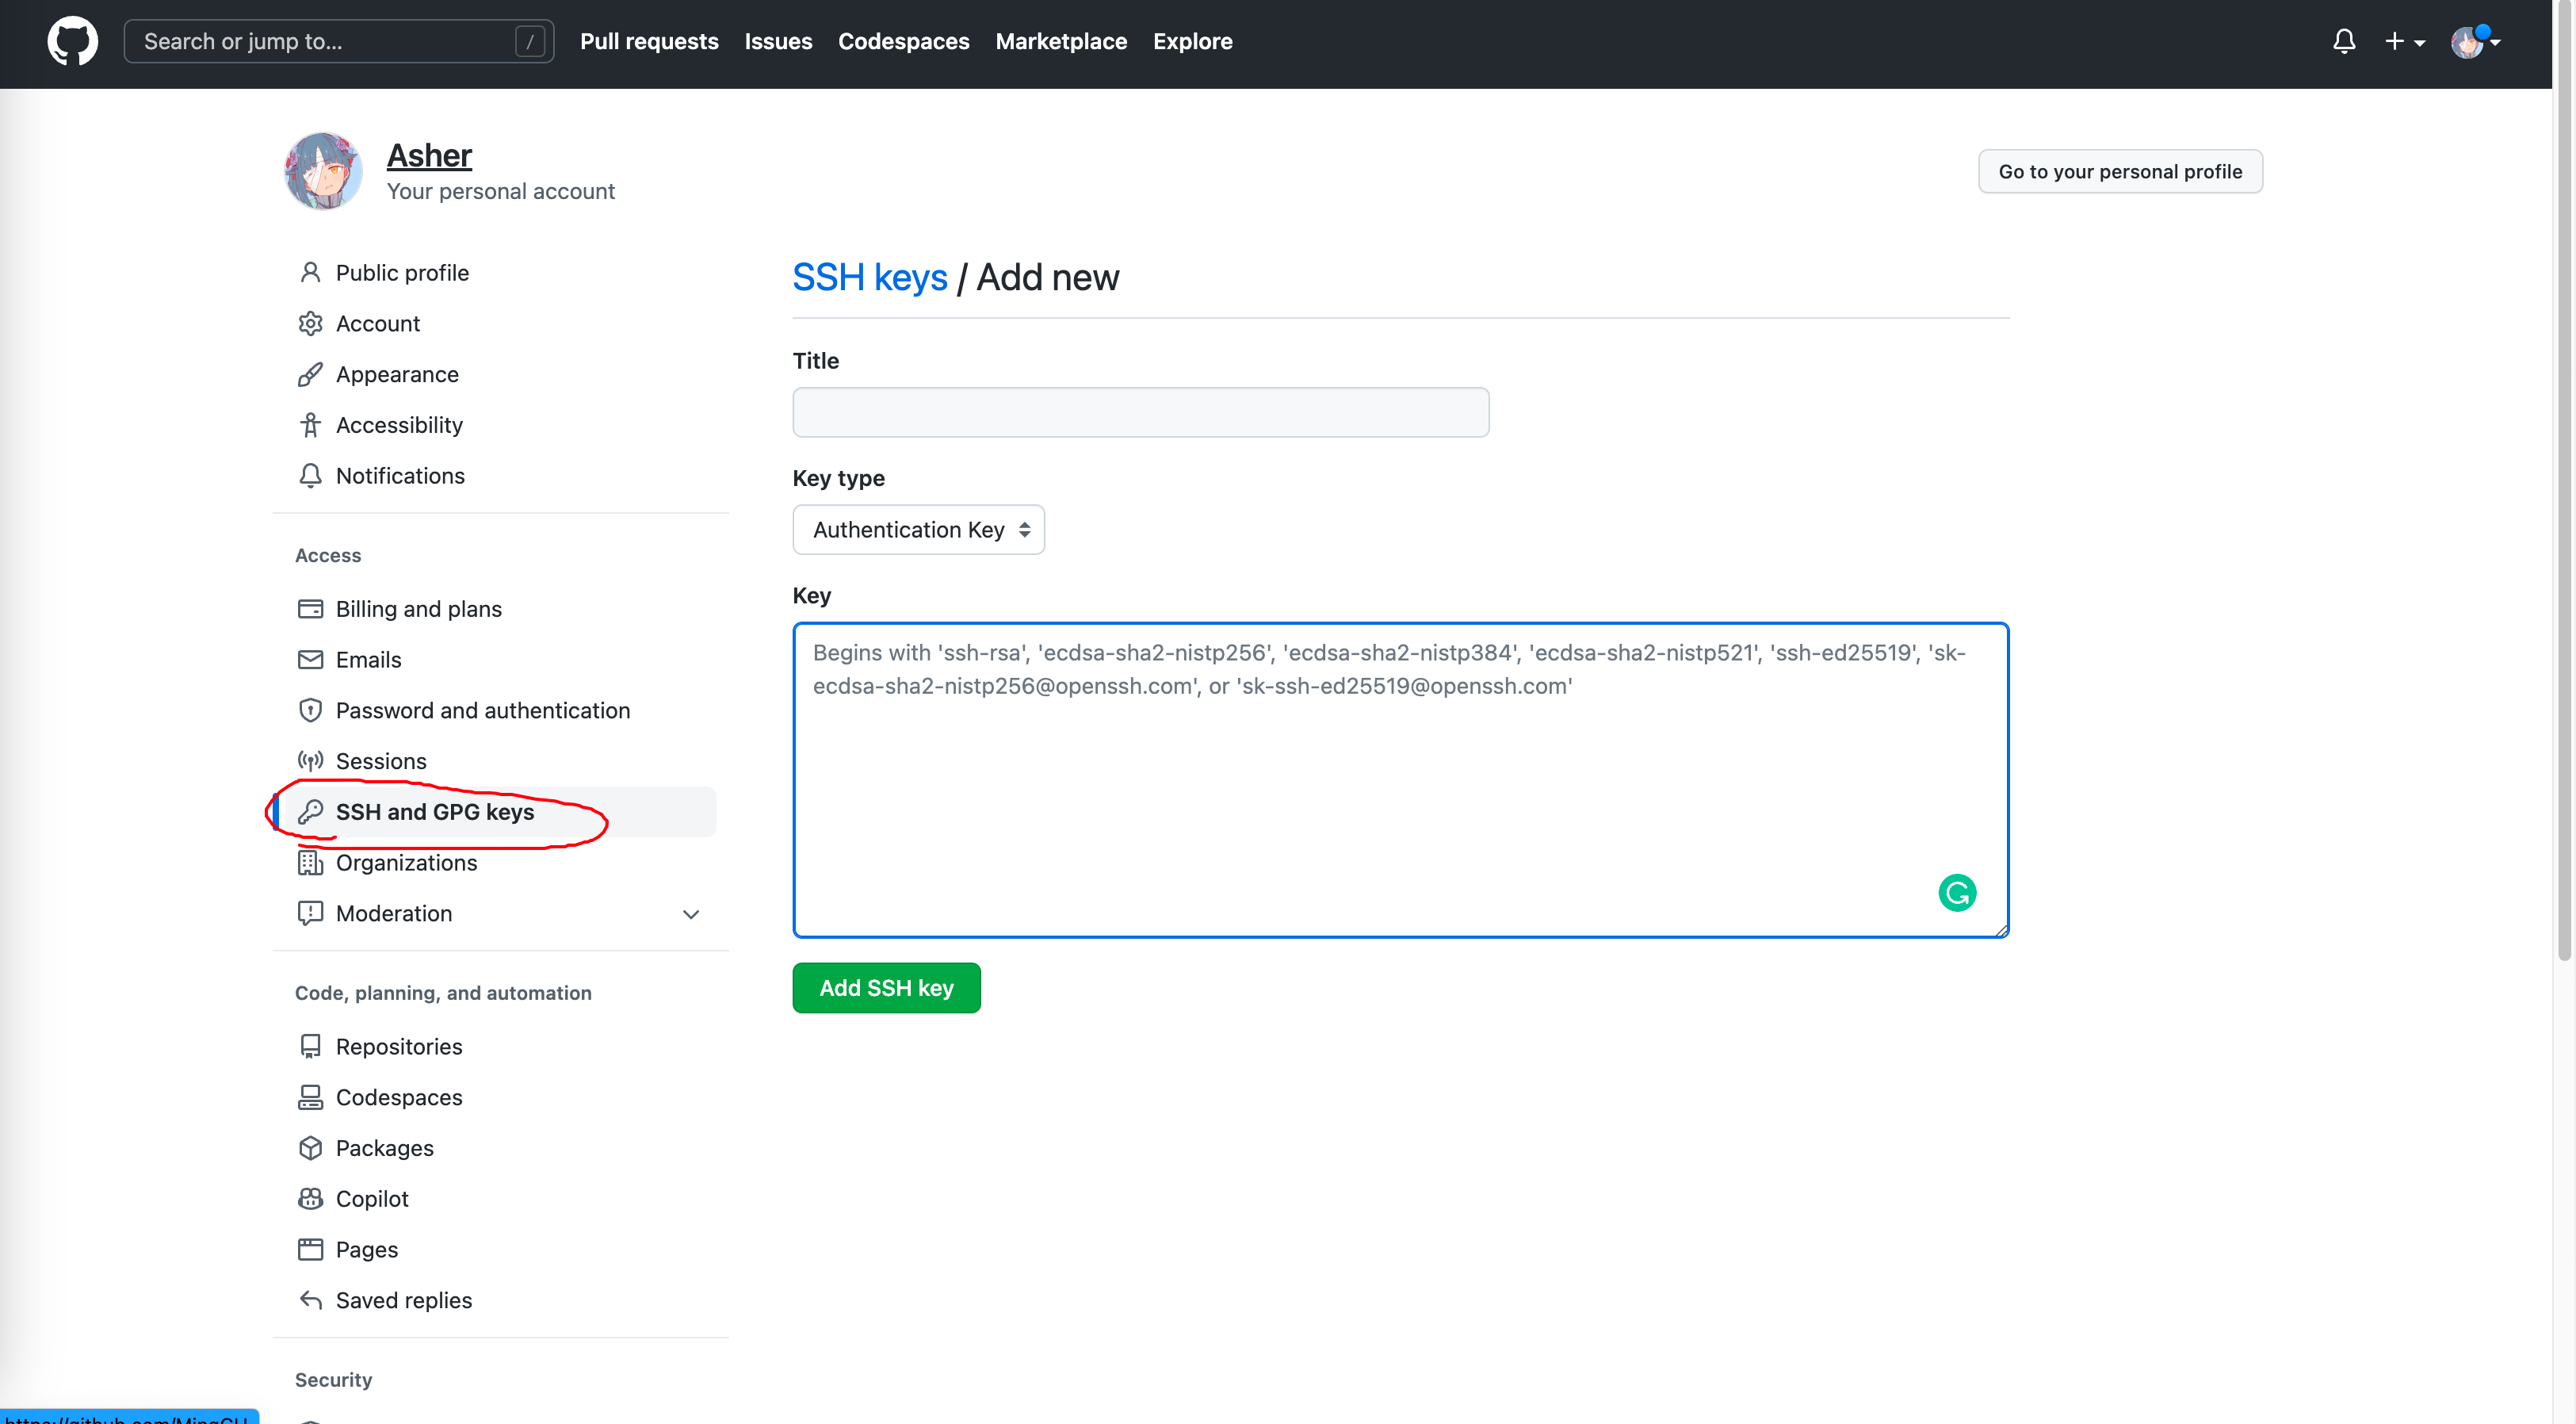
Then configure the content of private key file id_rsa in Jenkins:
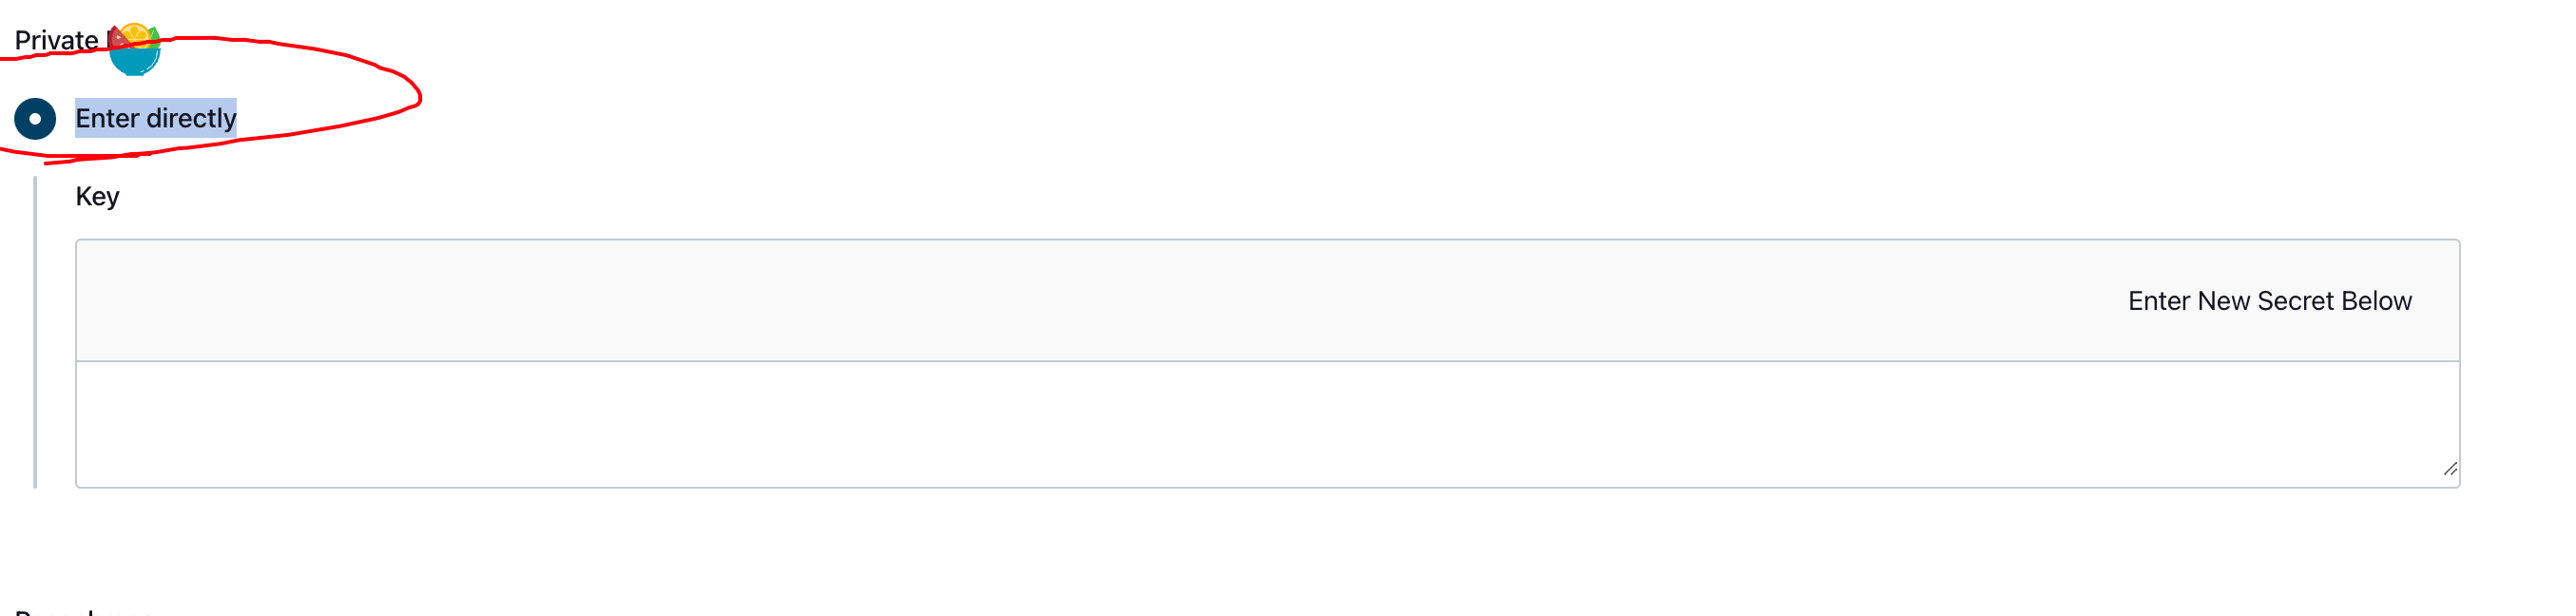
The id_rsa file content looks like:
-----BEGIN OPENSSH PRIVATE KEY-----

xxxxxxxxxxxxxxx==
-----END OPENSSH PRIVATE KEY-----
For public key generation issues, refer to this blog: Git SSH Public Key Configuration
2.5 Prepare Alibaba Cloud Maven Repository
Address: https://packages.aliyun.com/maven
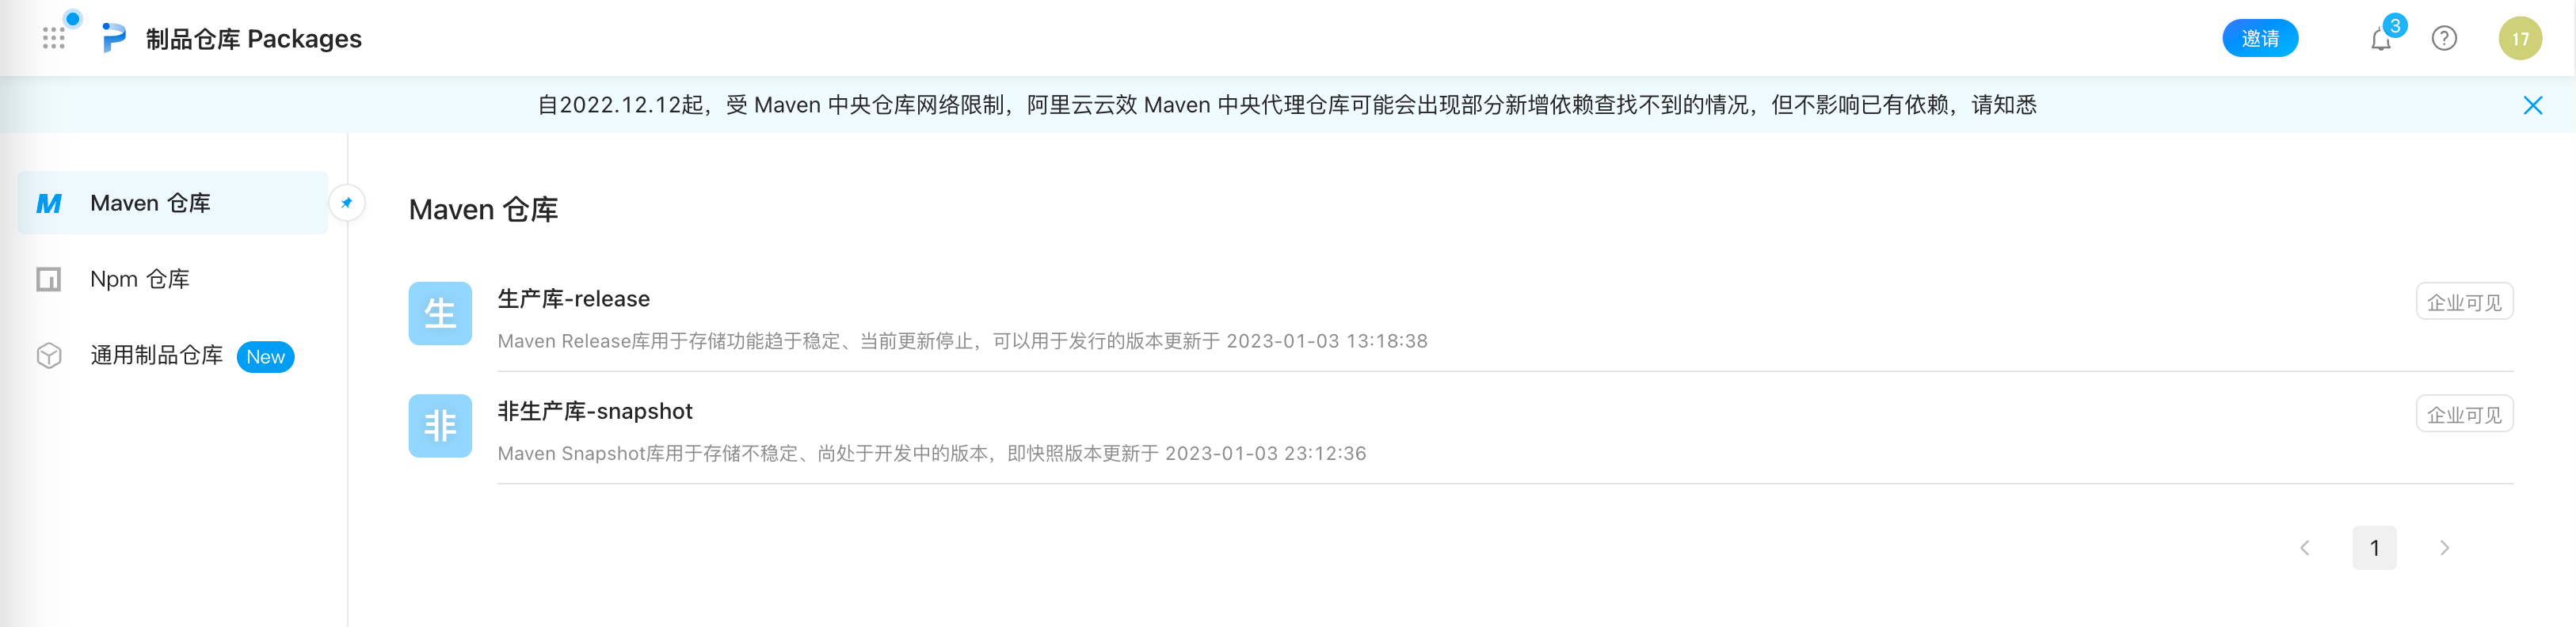
After registering and logging in, you'll see two corresponding repositories: Production-release and Non-production-snapshot, used to store jar packages for different environments. If your pom.xml version contains -snapshot, it pushes to the non-production repository; without -snapshot, it pushes to the production repository. Note that the production repository doesn't allow duplicate pushes.
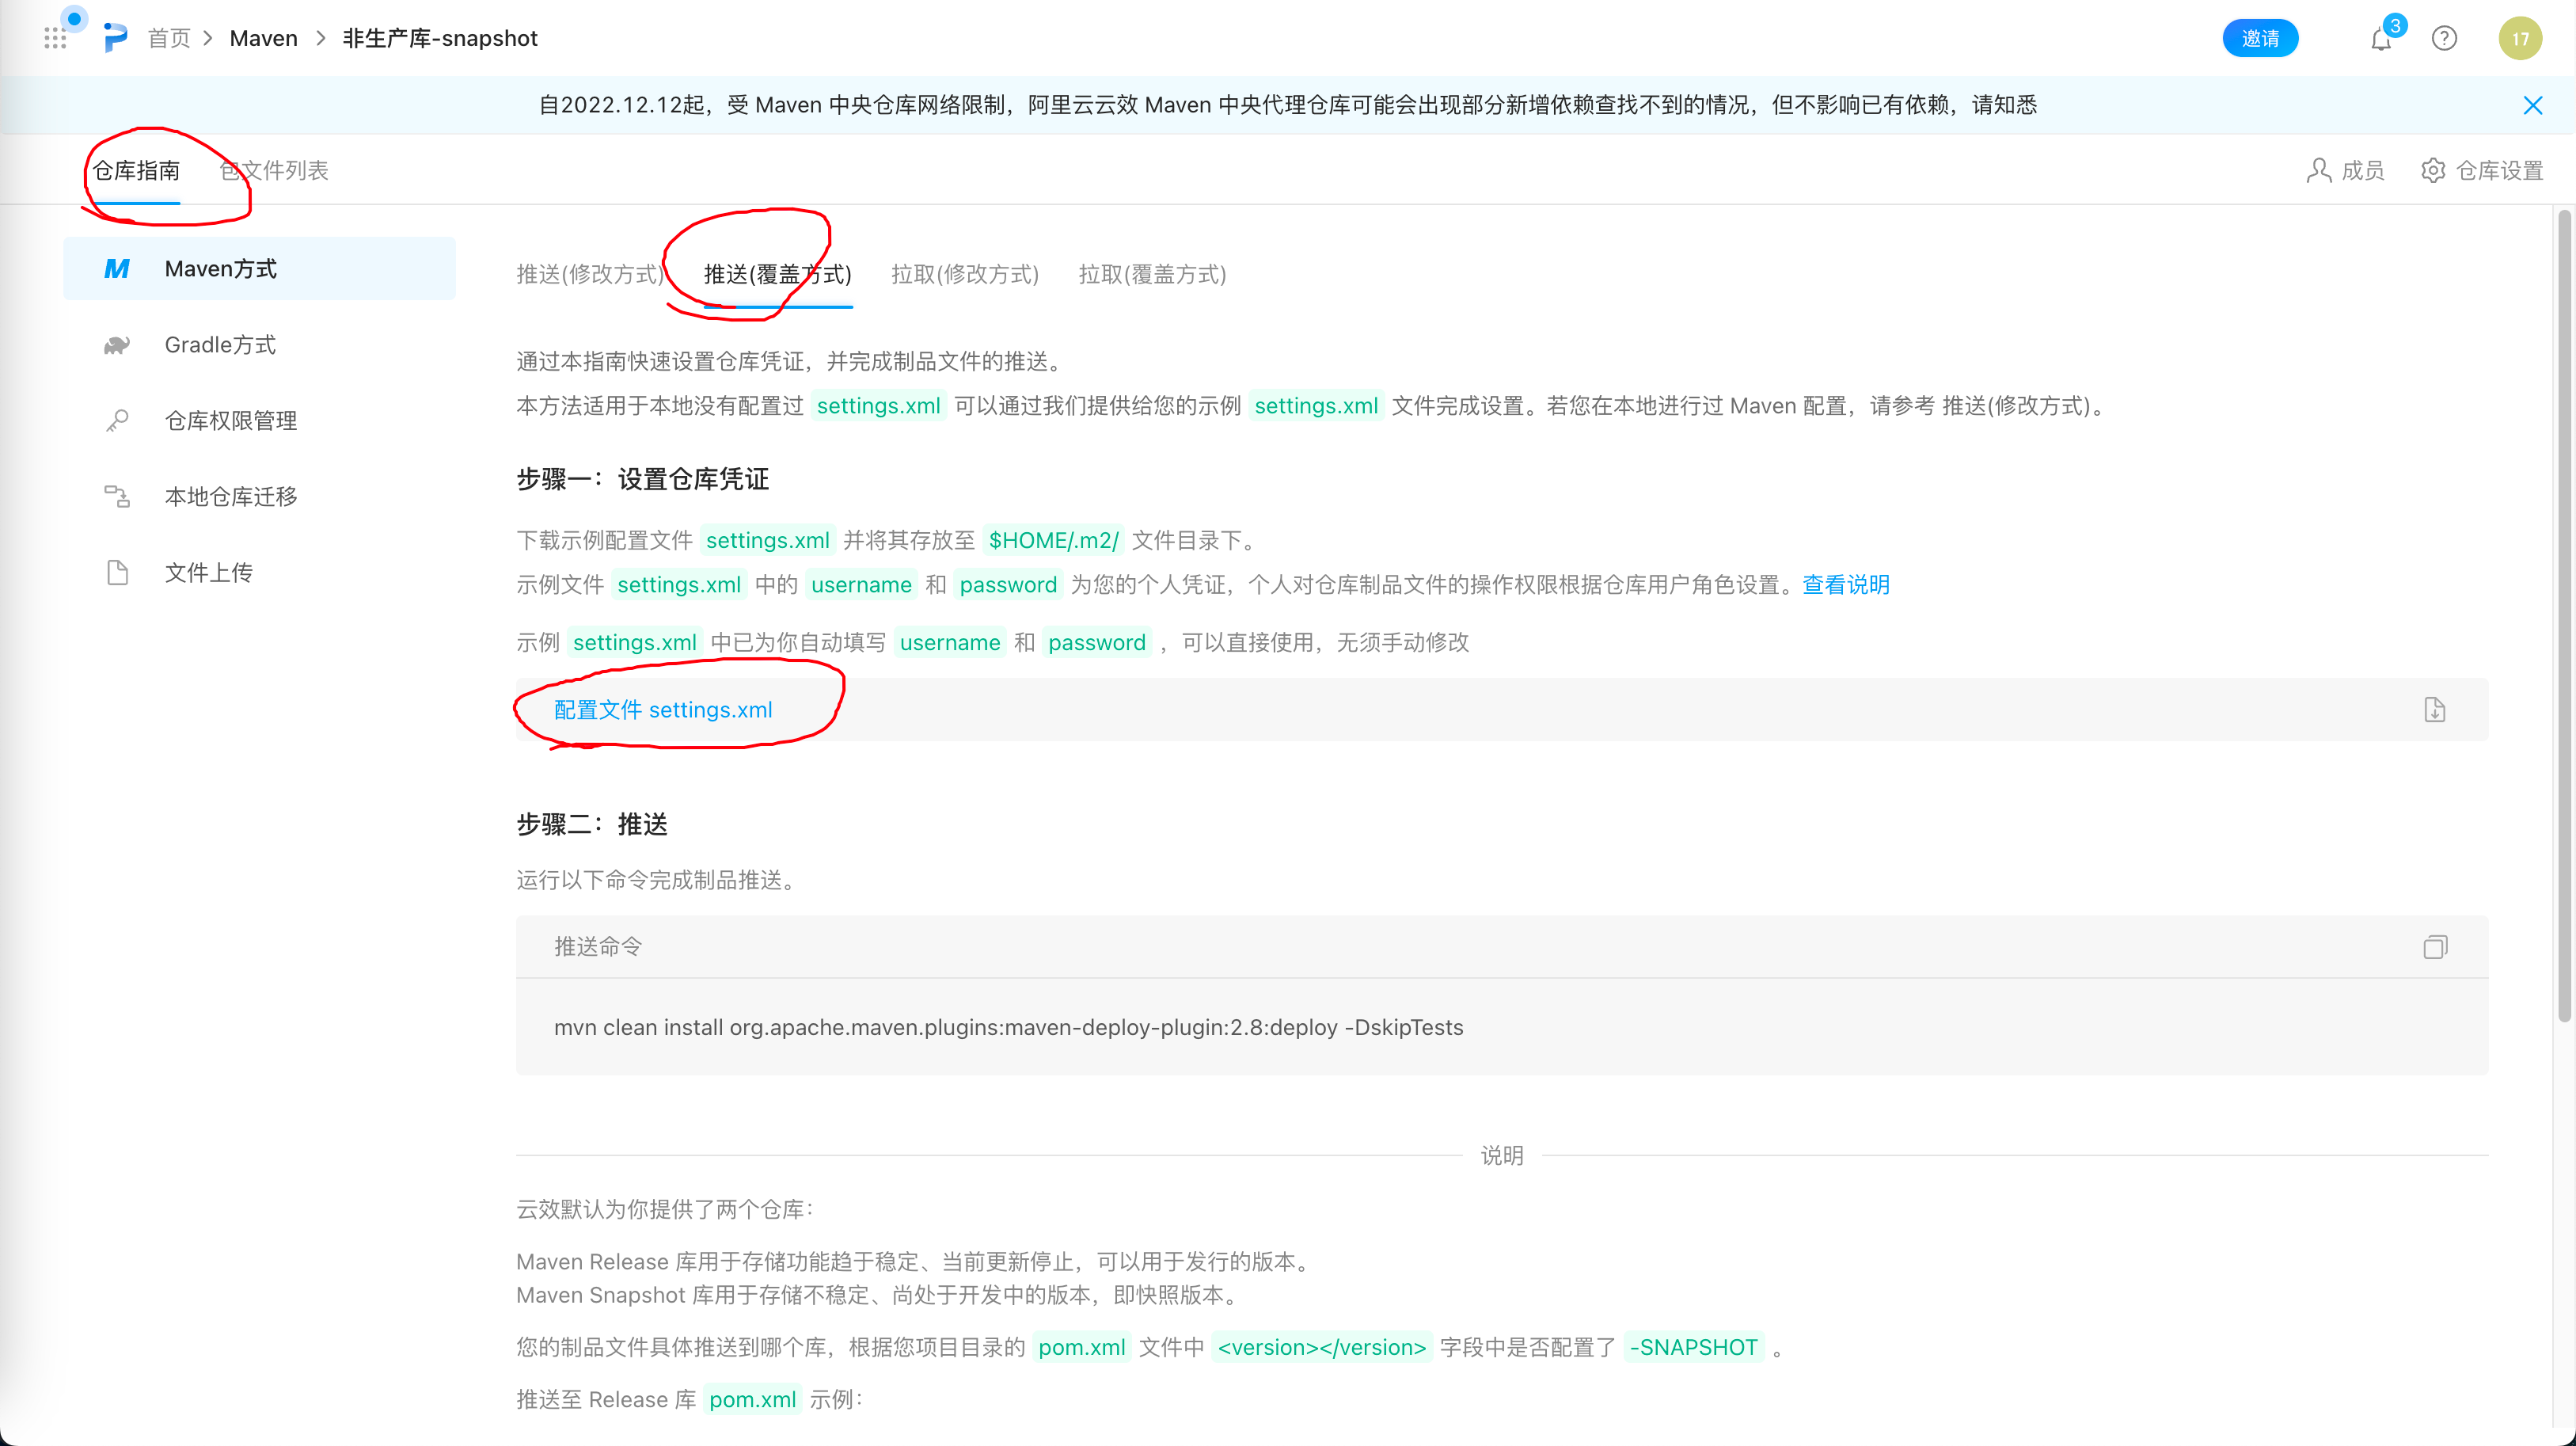
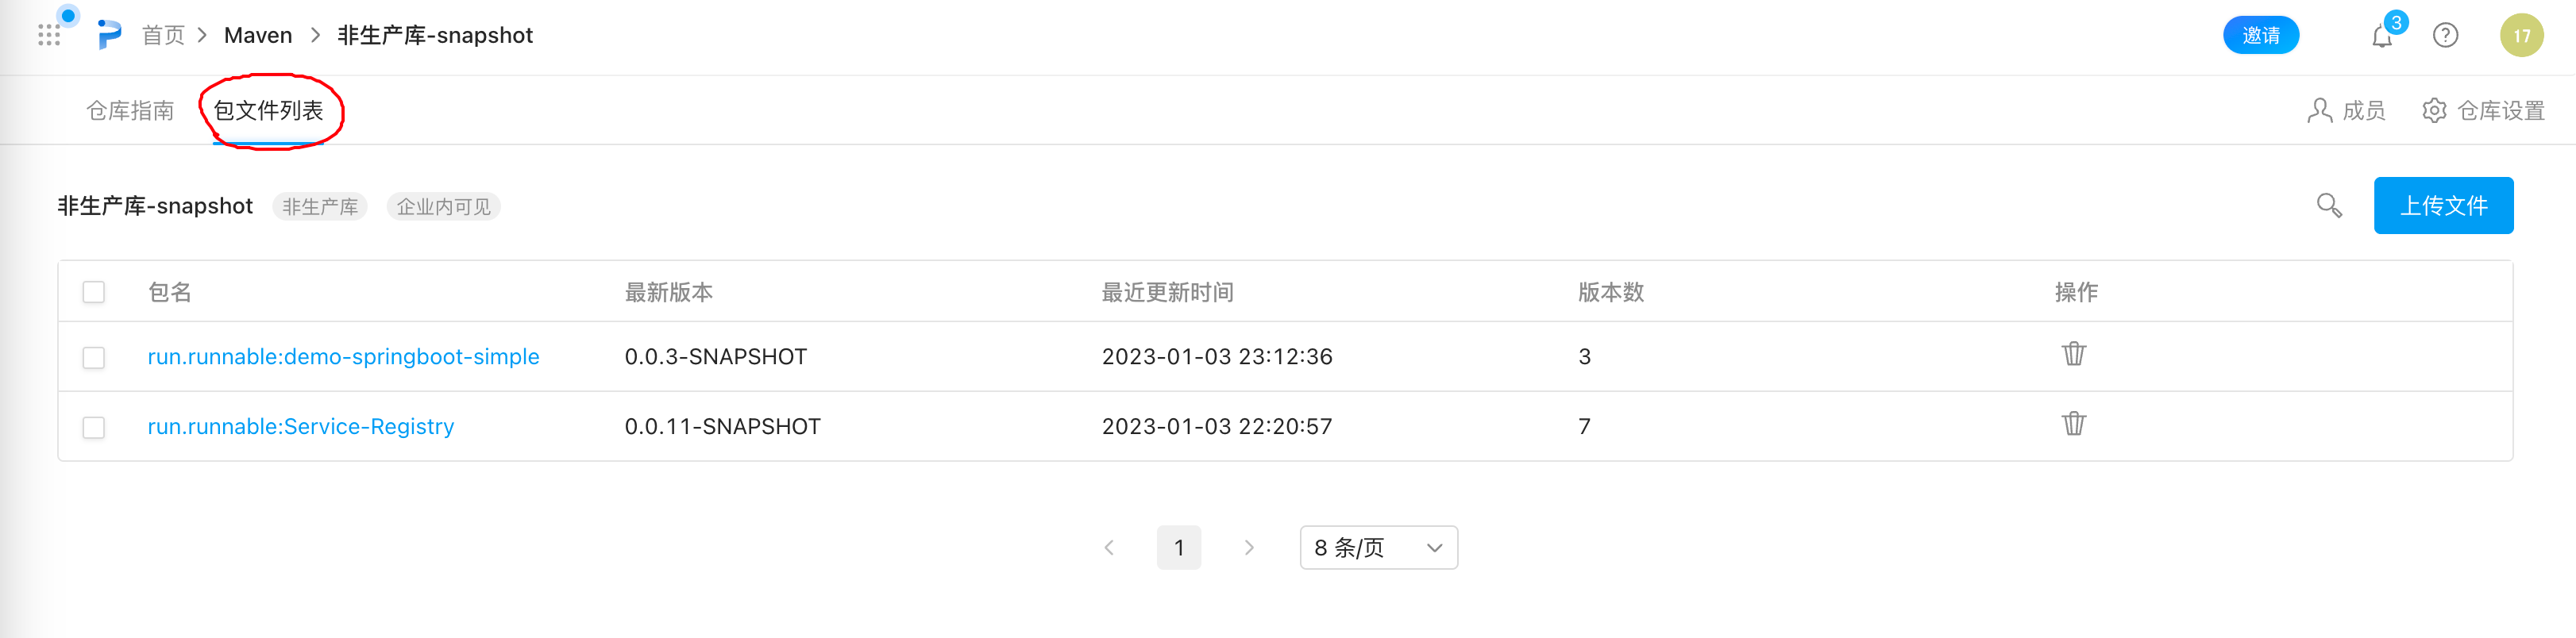
Click into Non-production-snapshot, and in the repository guide, download the corresponding settings.xml file. This file is needed when Jenkins pushes Jar to the Maven repository.
In the package file list next to it, you can see packages pushed by Jenkins later:
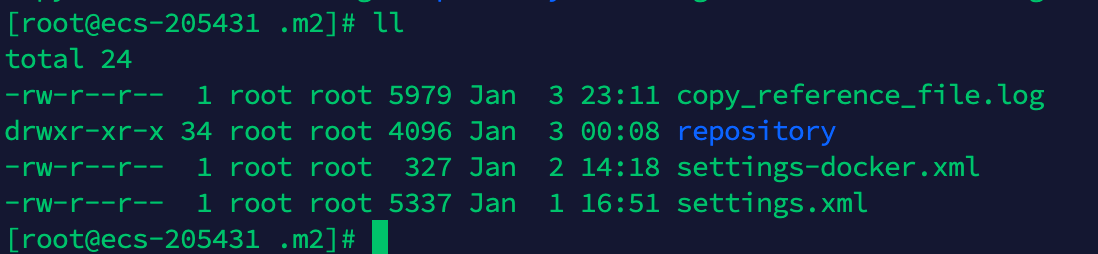
Upload this file to the server's /root/.m2/ directory:
2.6 Prepare Docker Container Image Repository
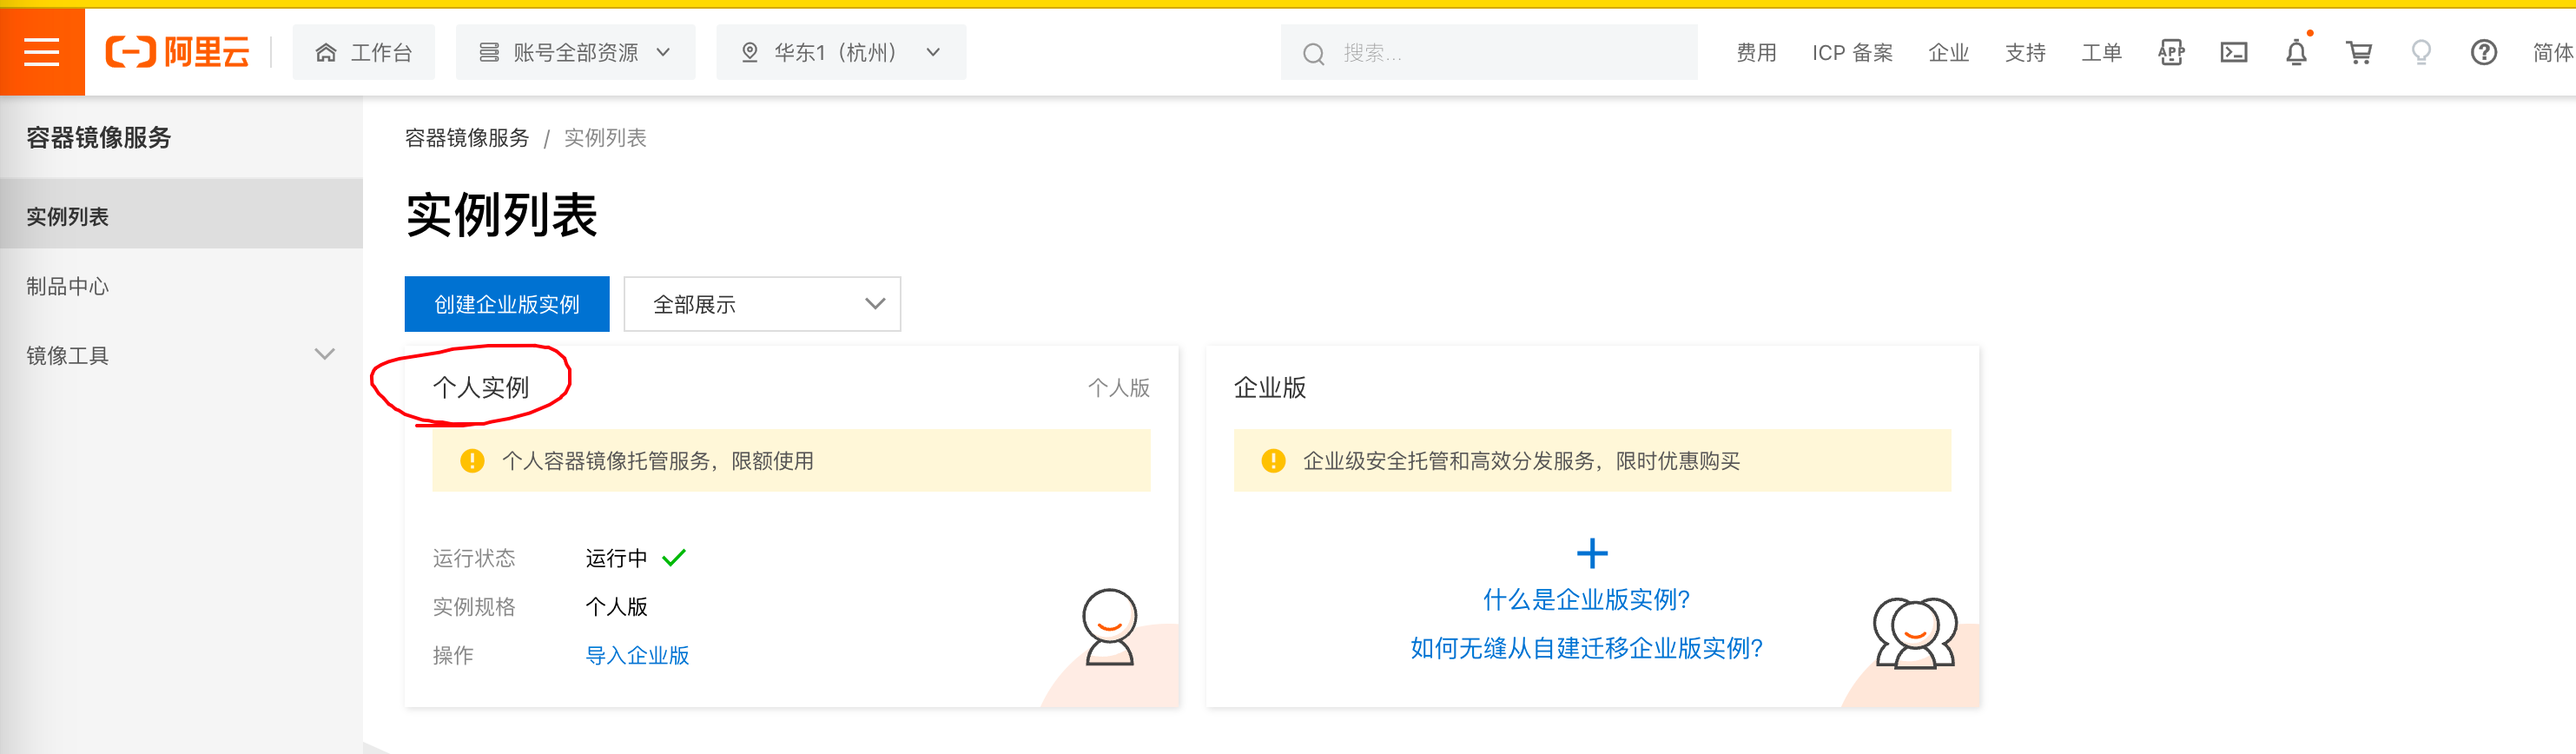
Alibaba Cloud Container Registry address: https://cr.console.aliyun.com/
After logging in, select Personal Edition
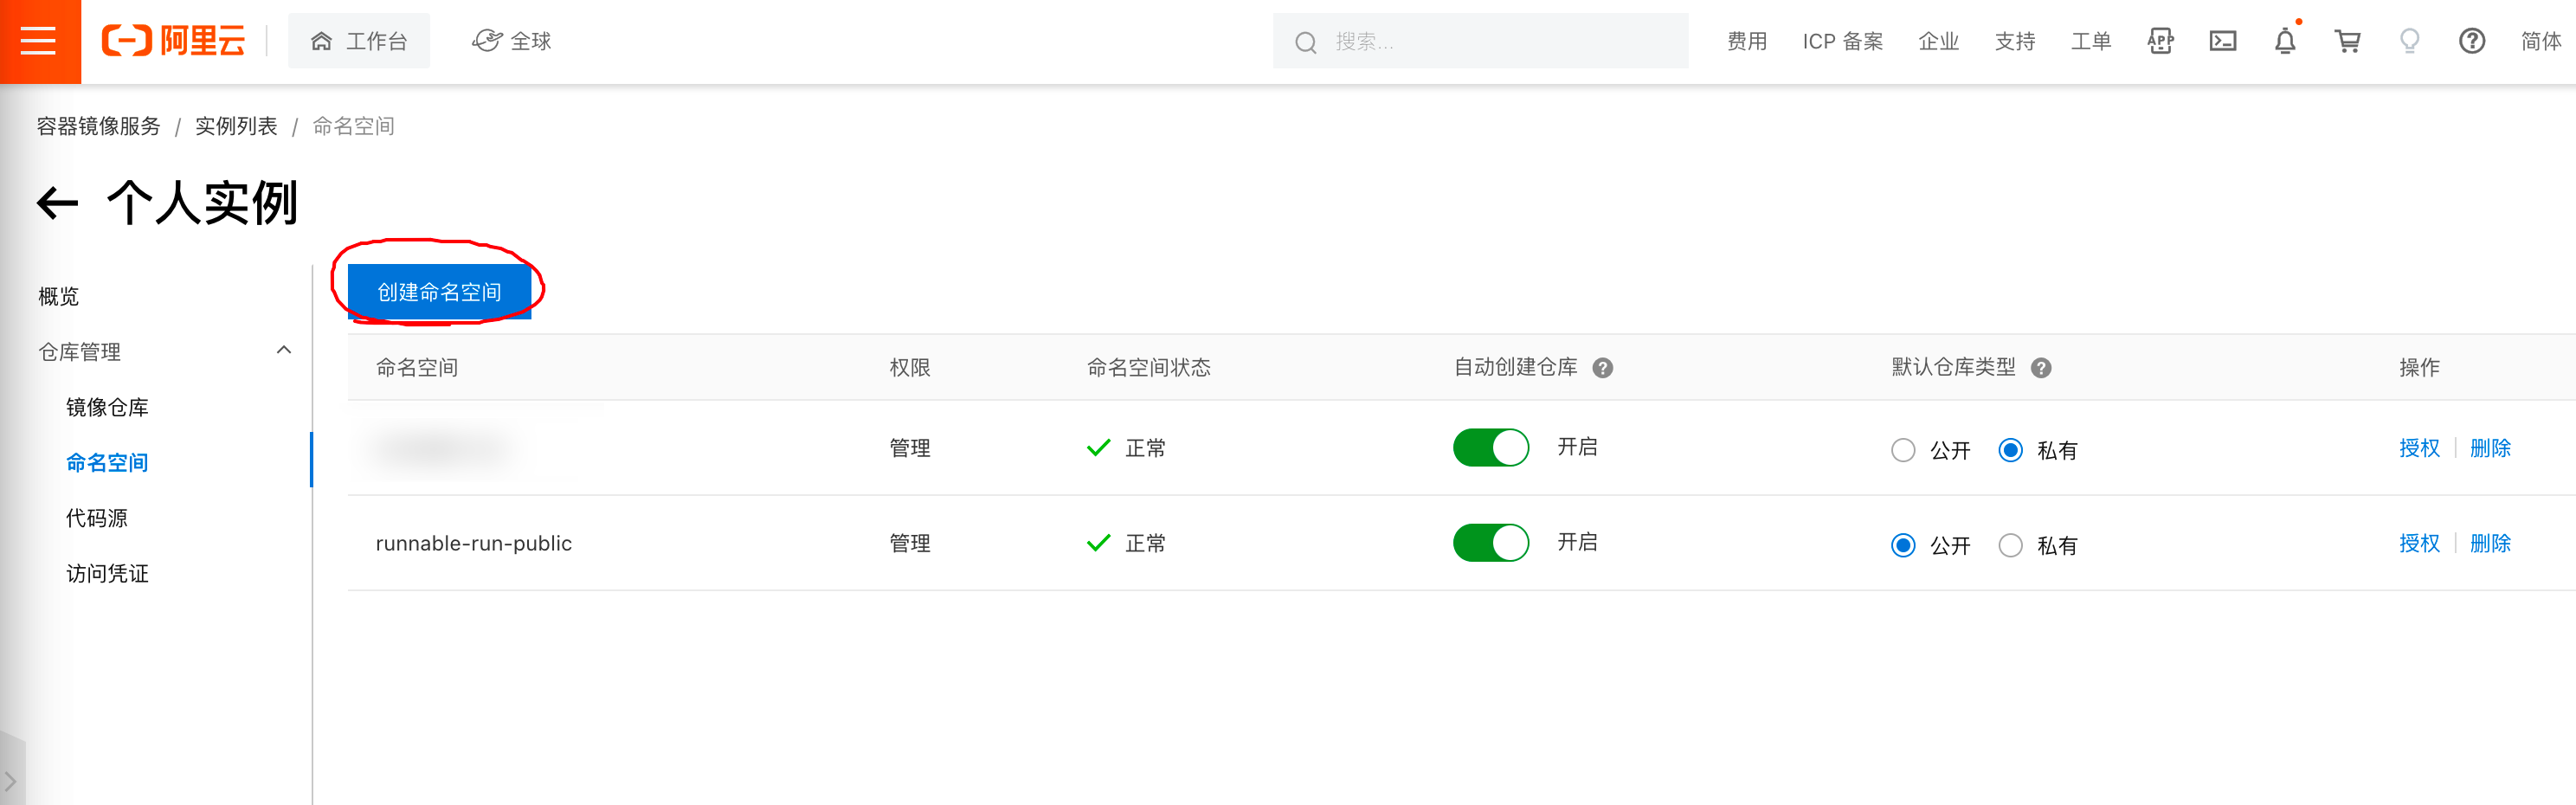
Create Namespace
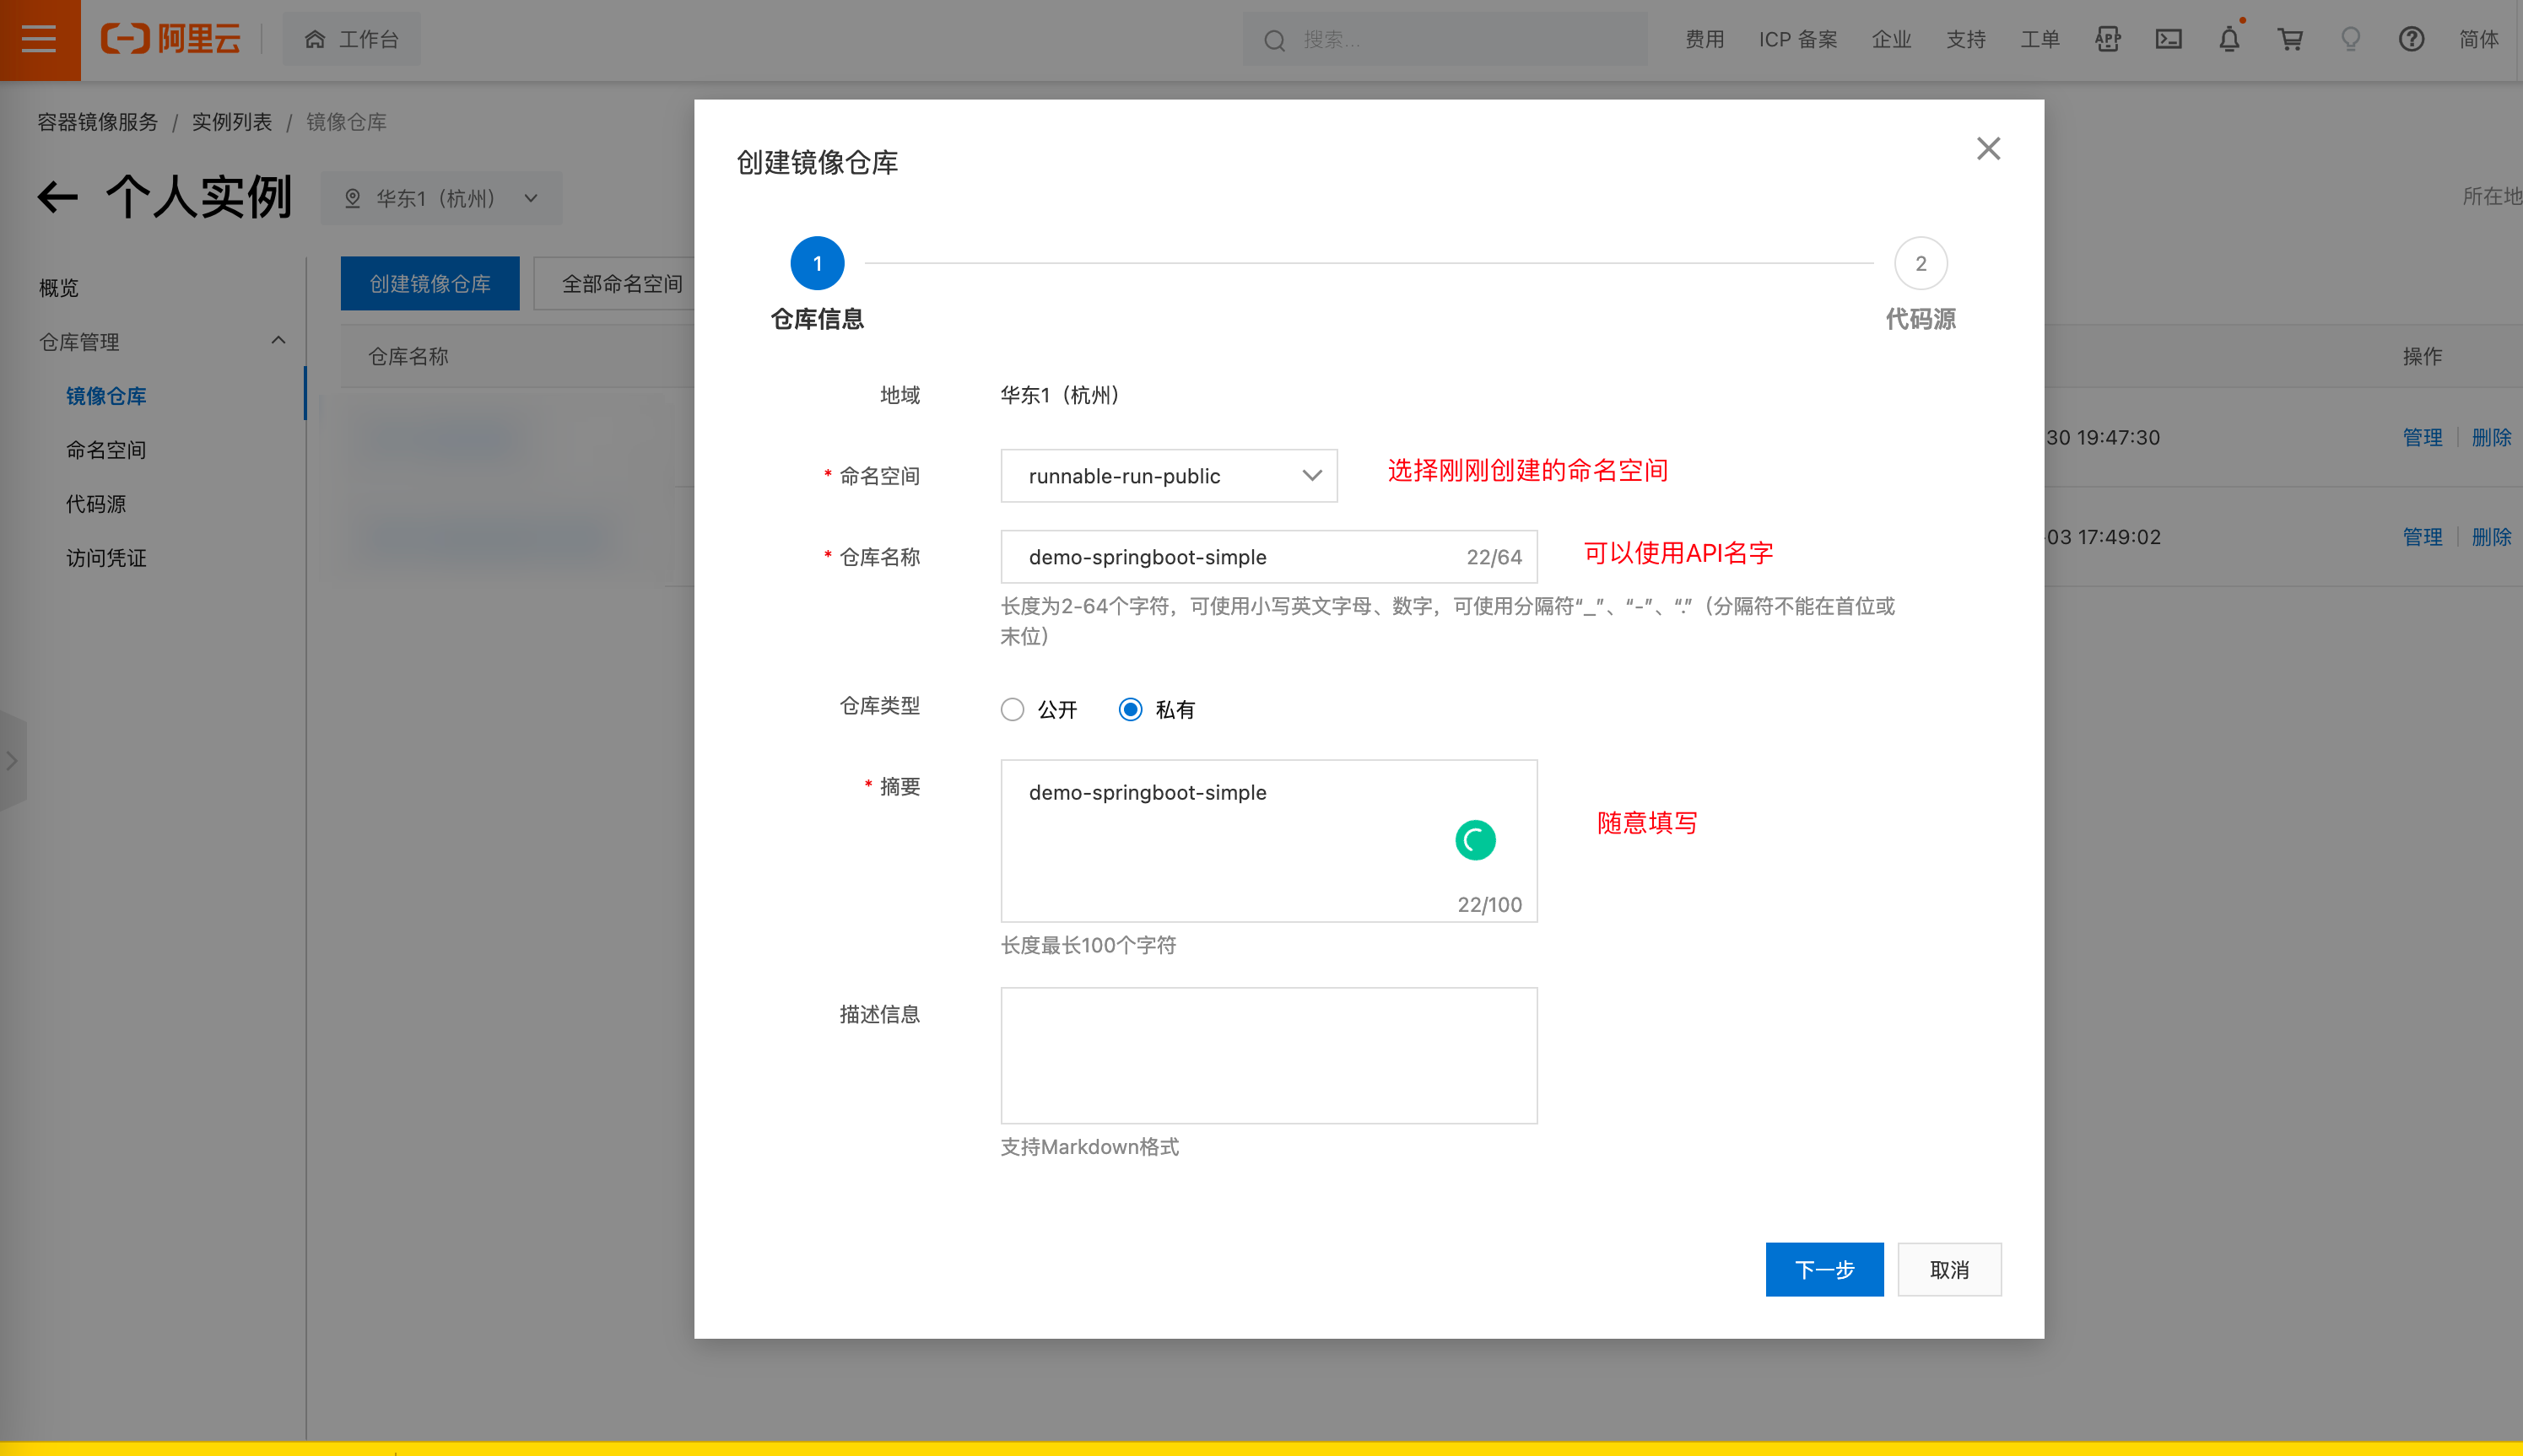
Create Image Repository for API
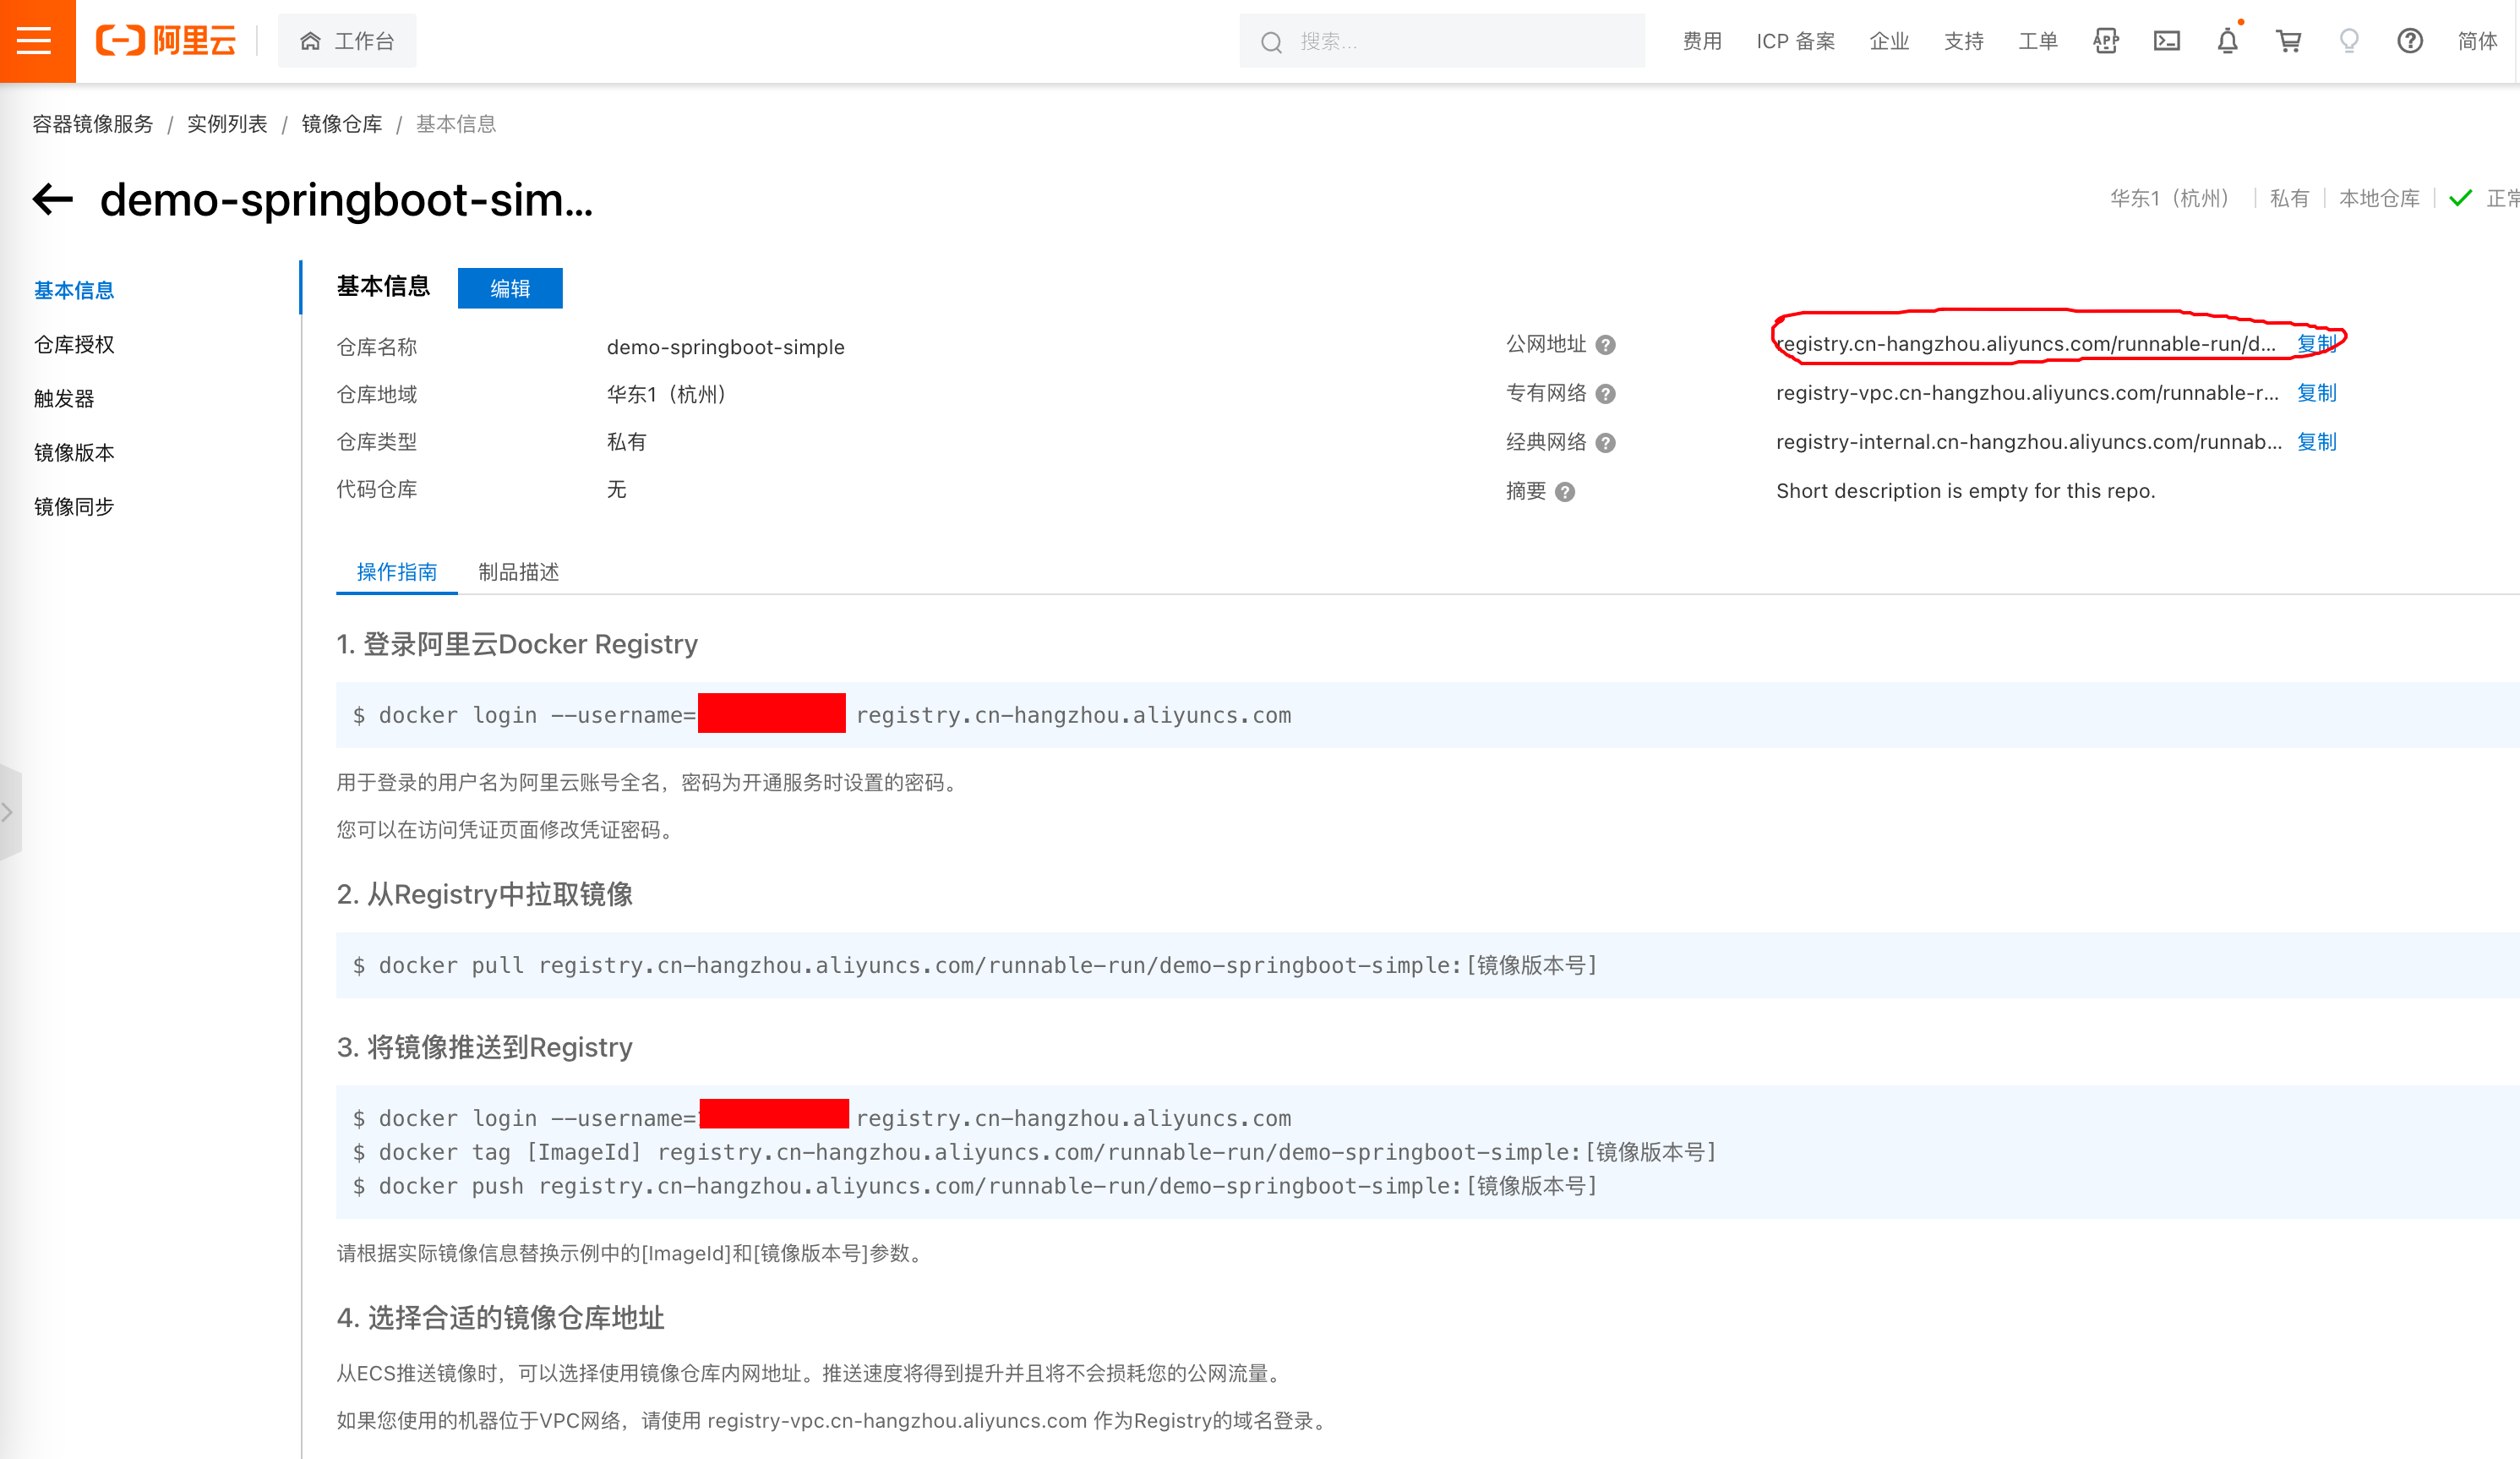
After creation, click in. The Basic Information section has the public address - this is where Docker Images need to be pushed. Copy it.
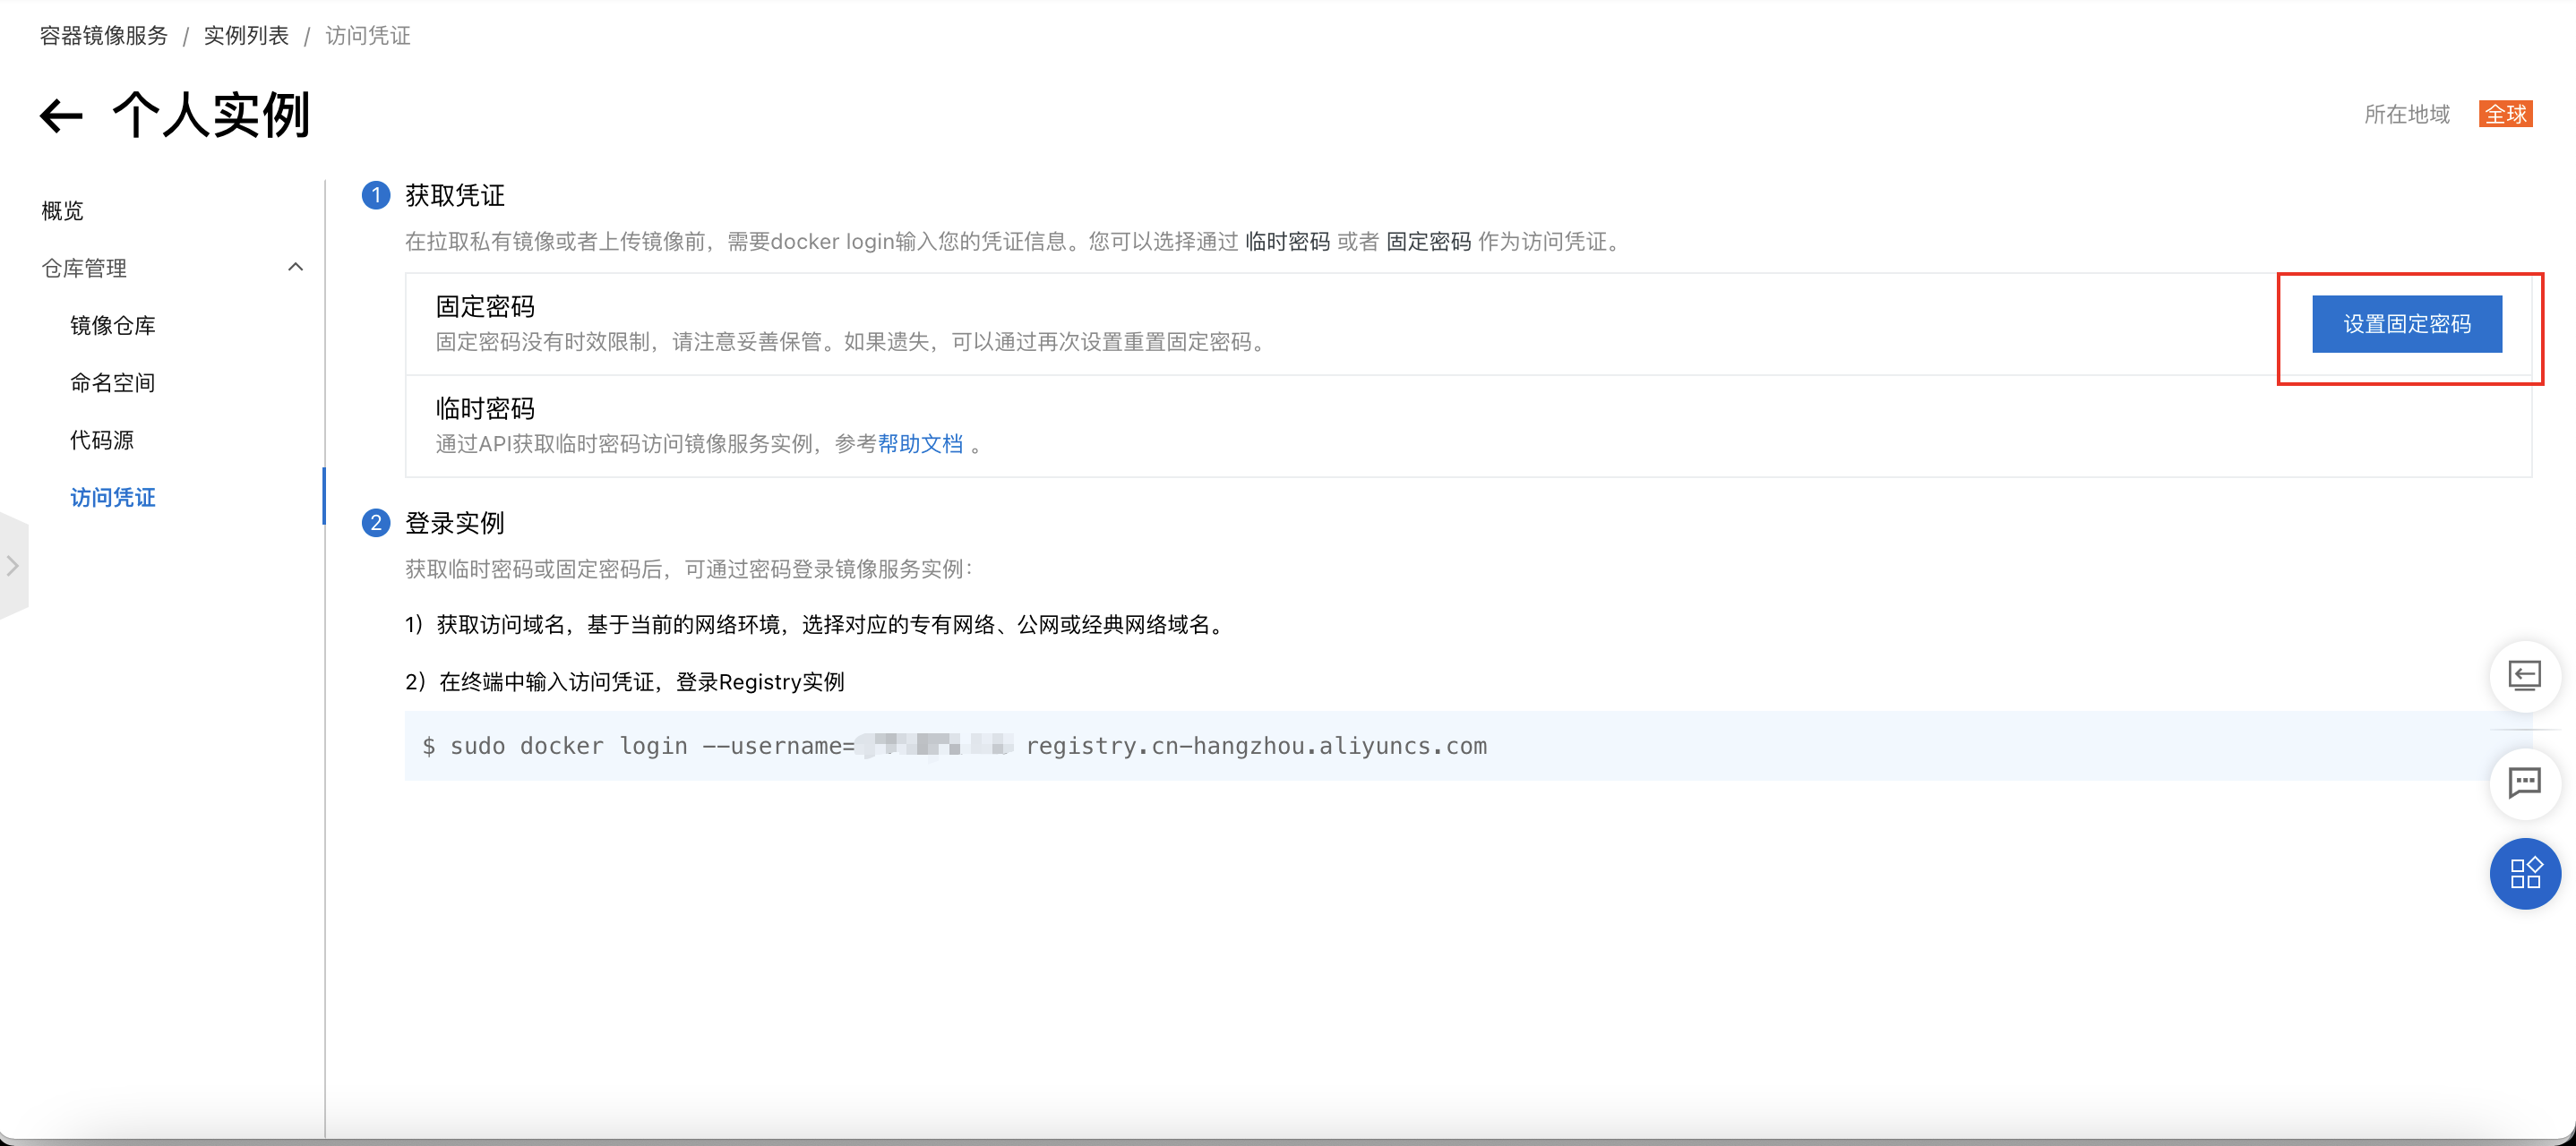
Set Password
In Personal Edition, under Access Credentials, set a Fixed Password. This password will be used in the project demo-springboot-simple's deploy_docker.sh.
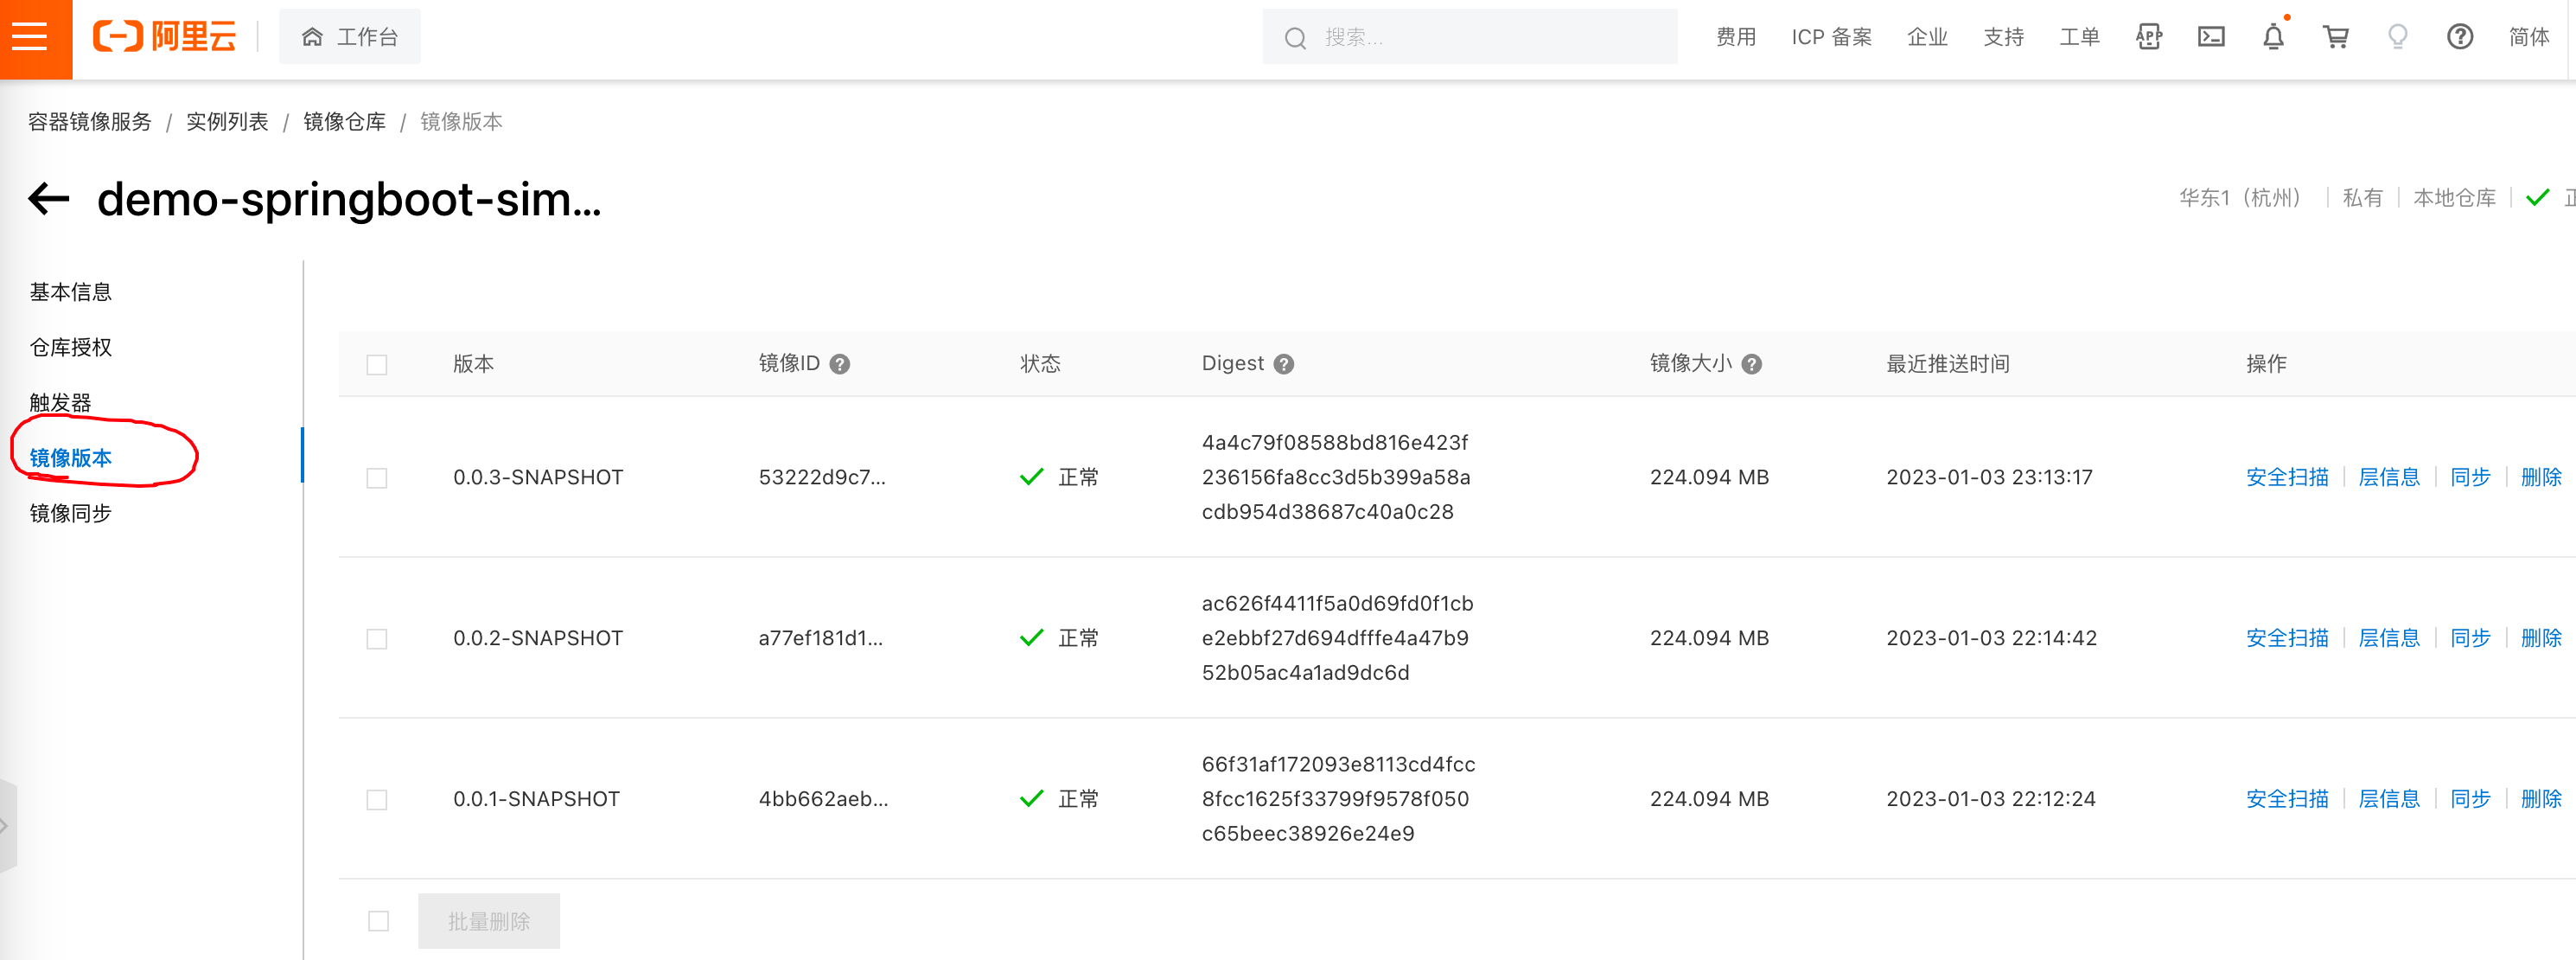
After Jenkins pushes images, you can find corresponding images in Image Versions:
3. Connecting Everything Through Pipeline
With the above preparations, we can now connect everything through Jenkins pipeline.
3.1 Create Jenkins Pipeline
Log into Jenkins again and create a new pipeline. Name it after the API. Follow my configuration - I'll point out important areas.
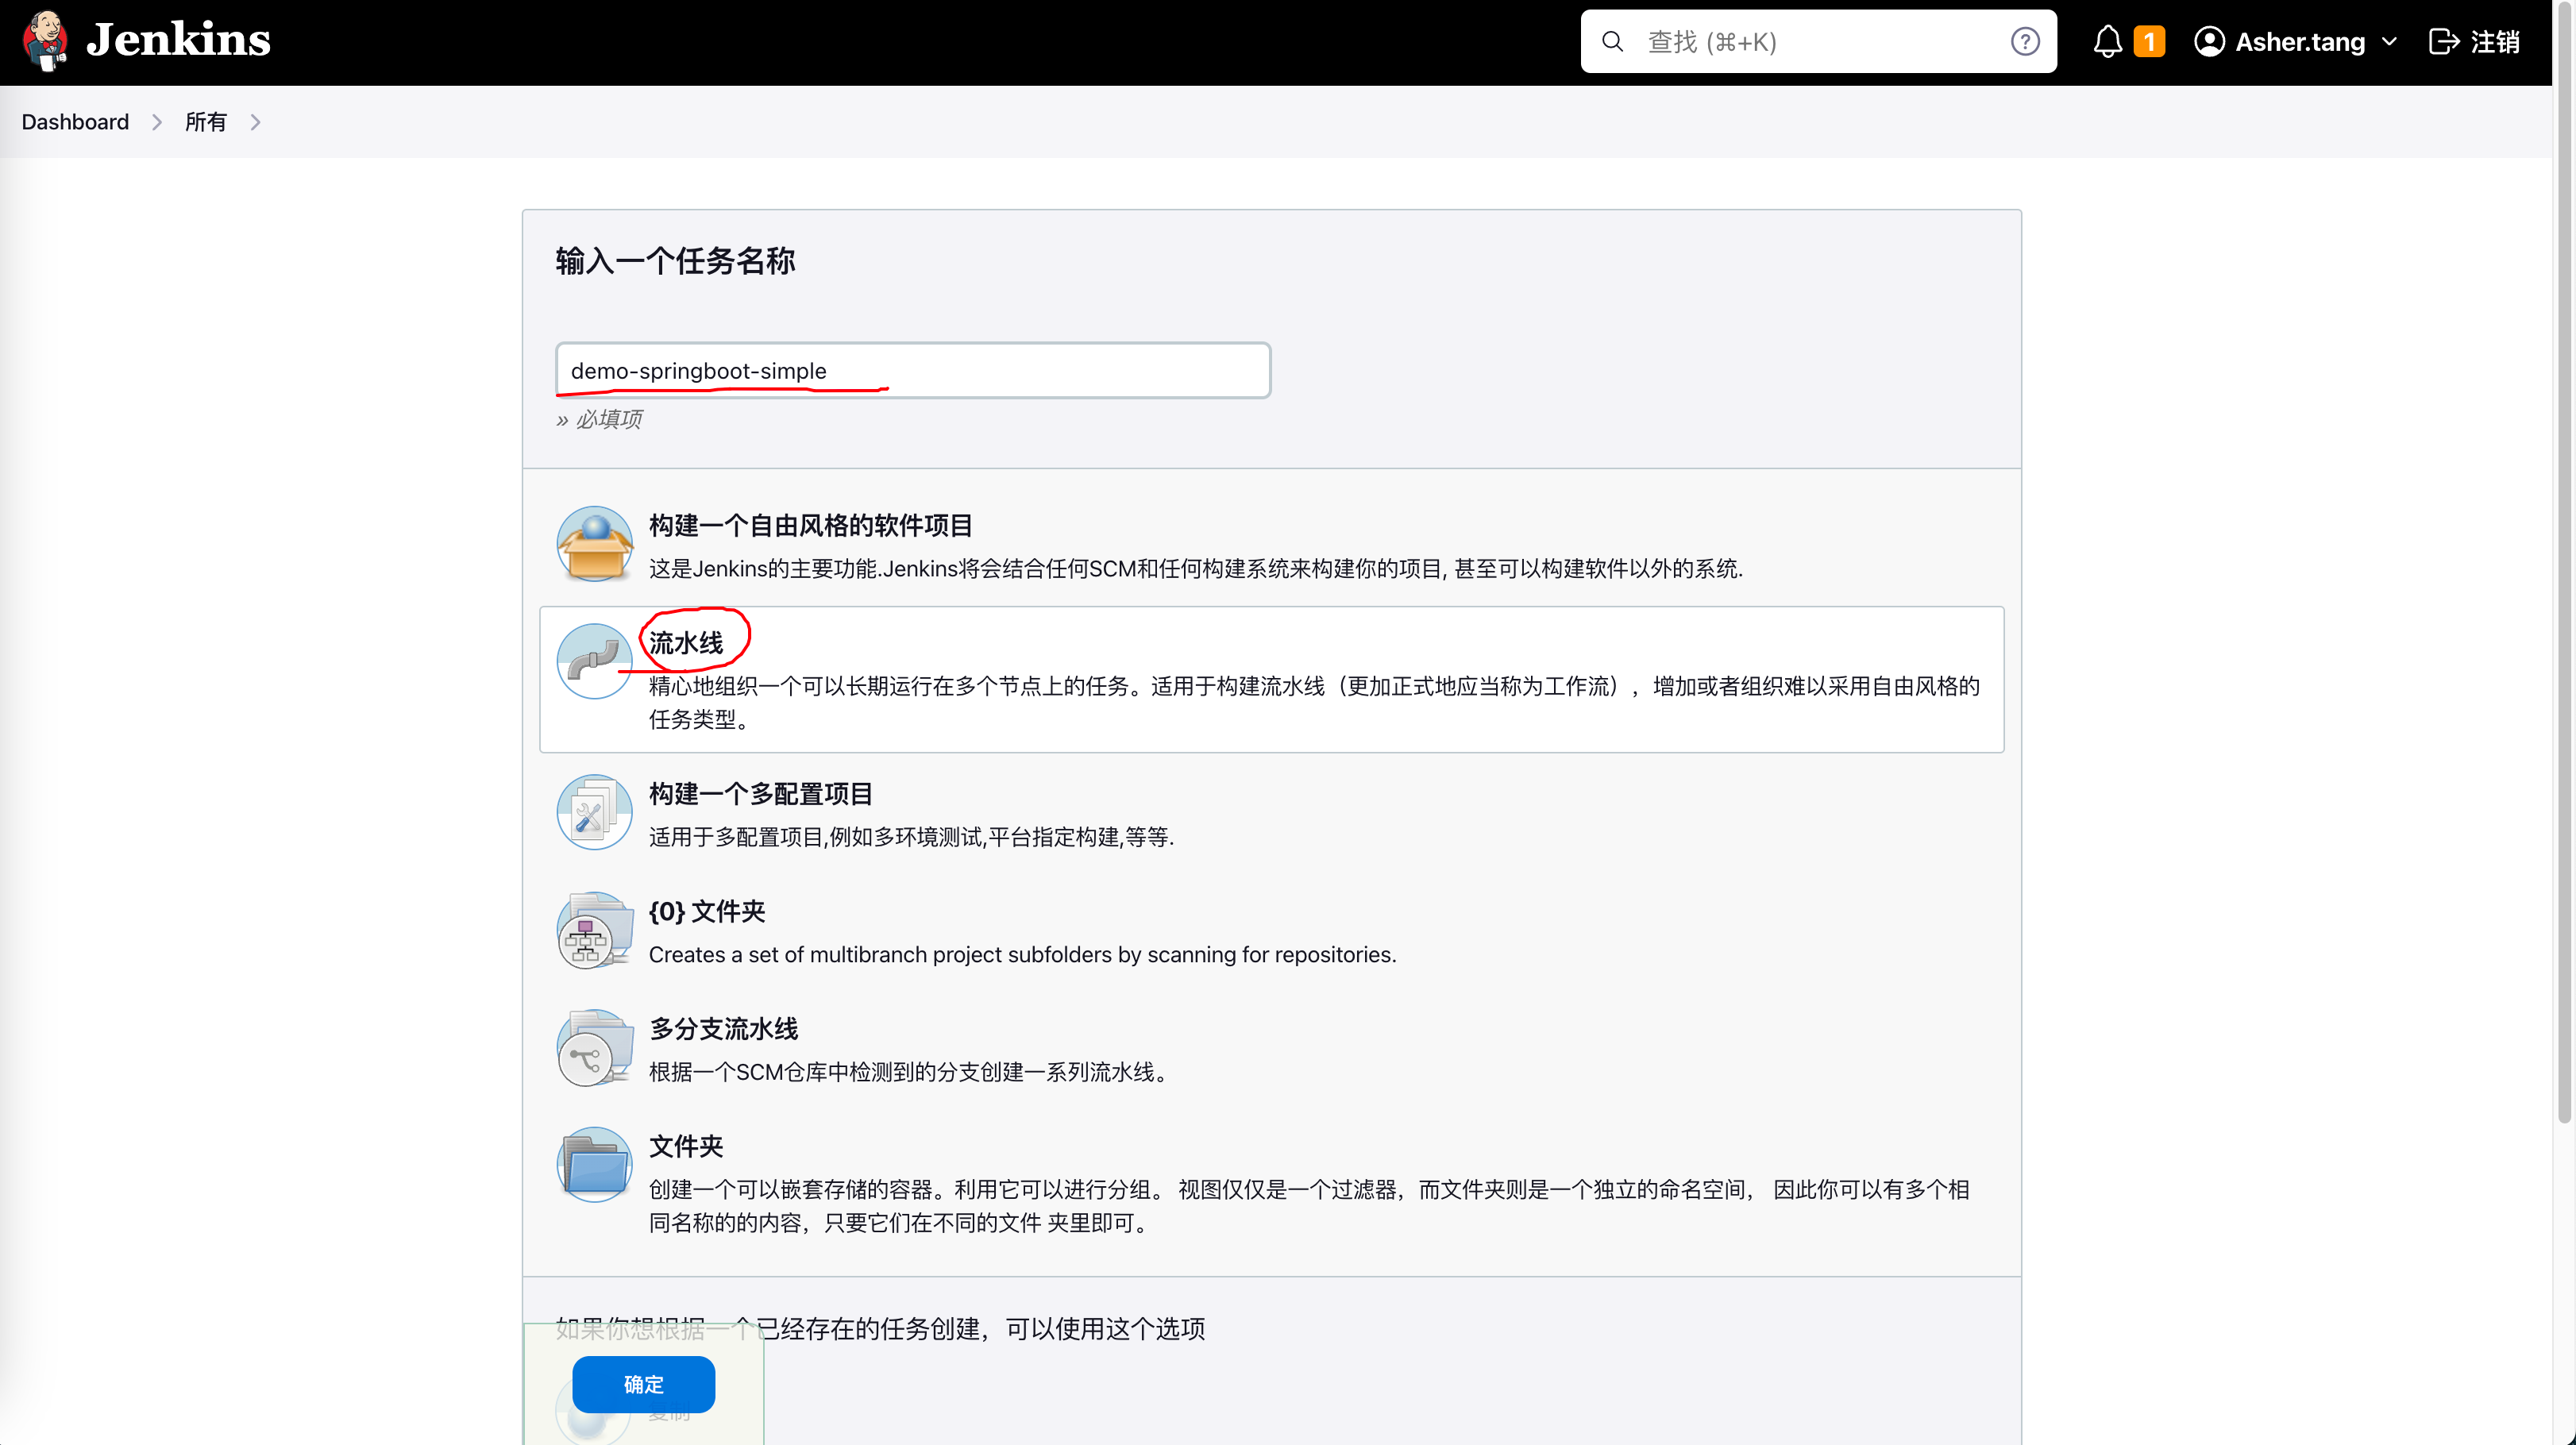
After clicking OK, configure some parameters:

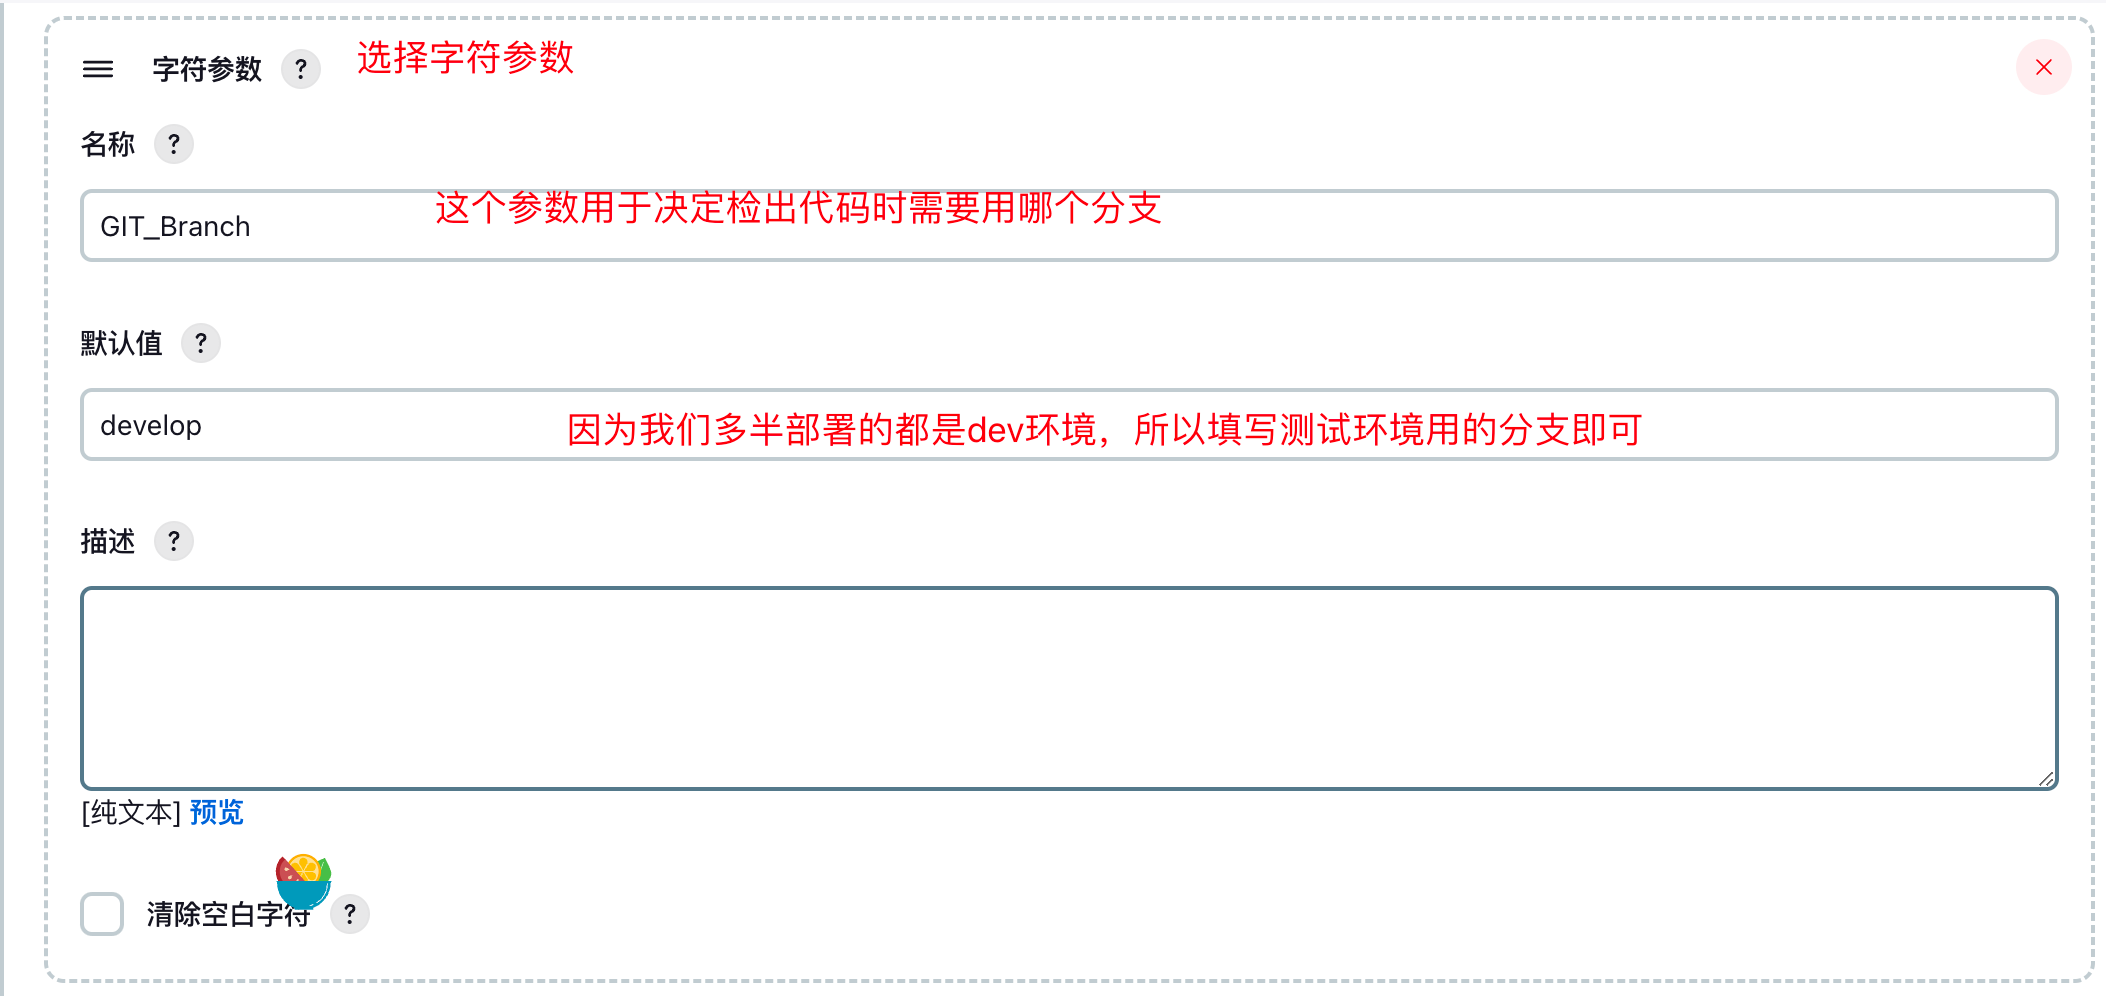
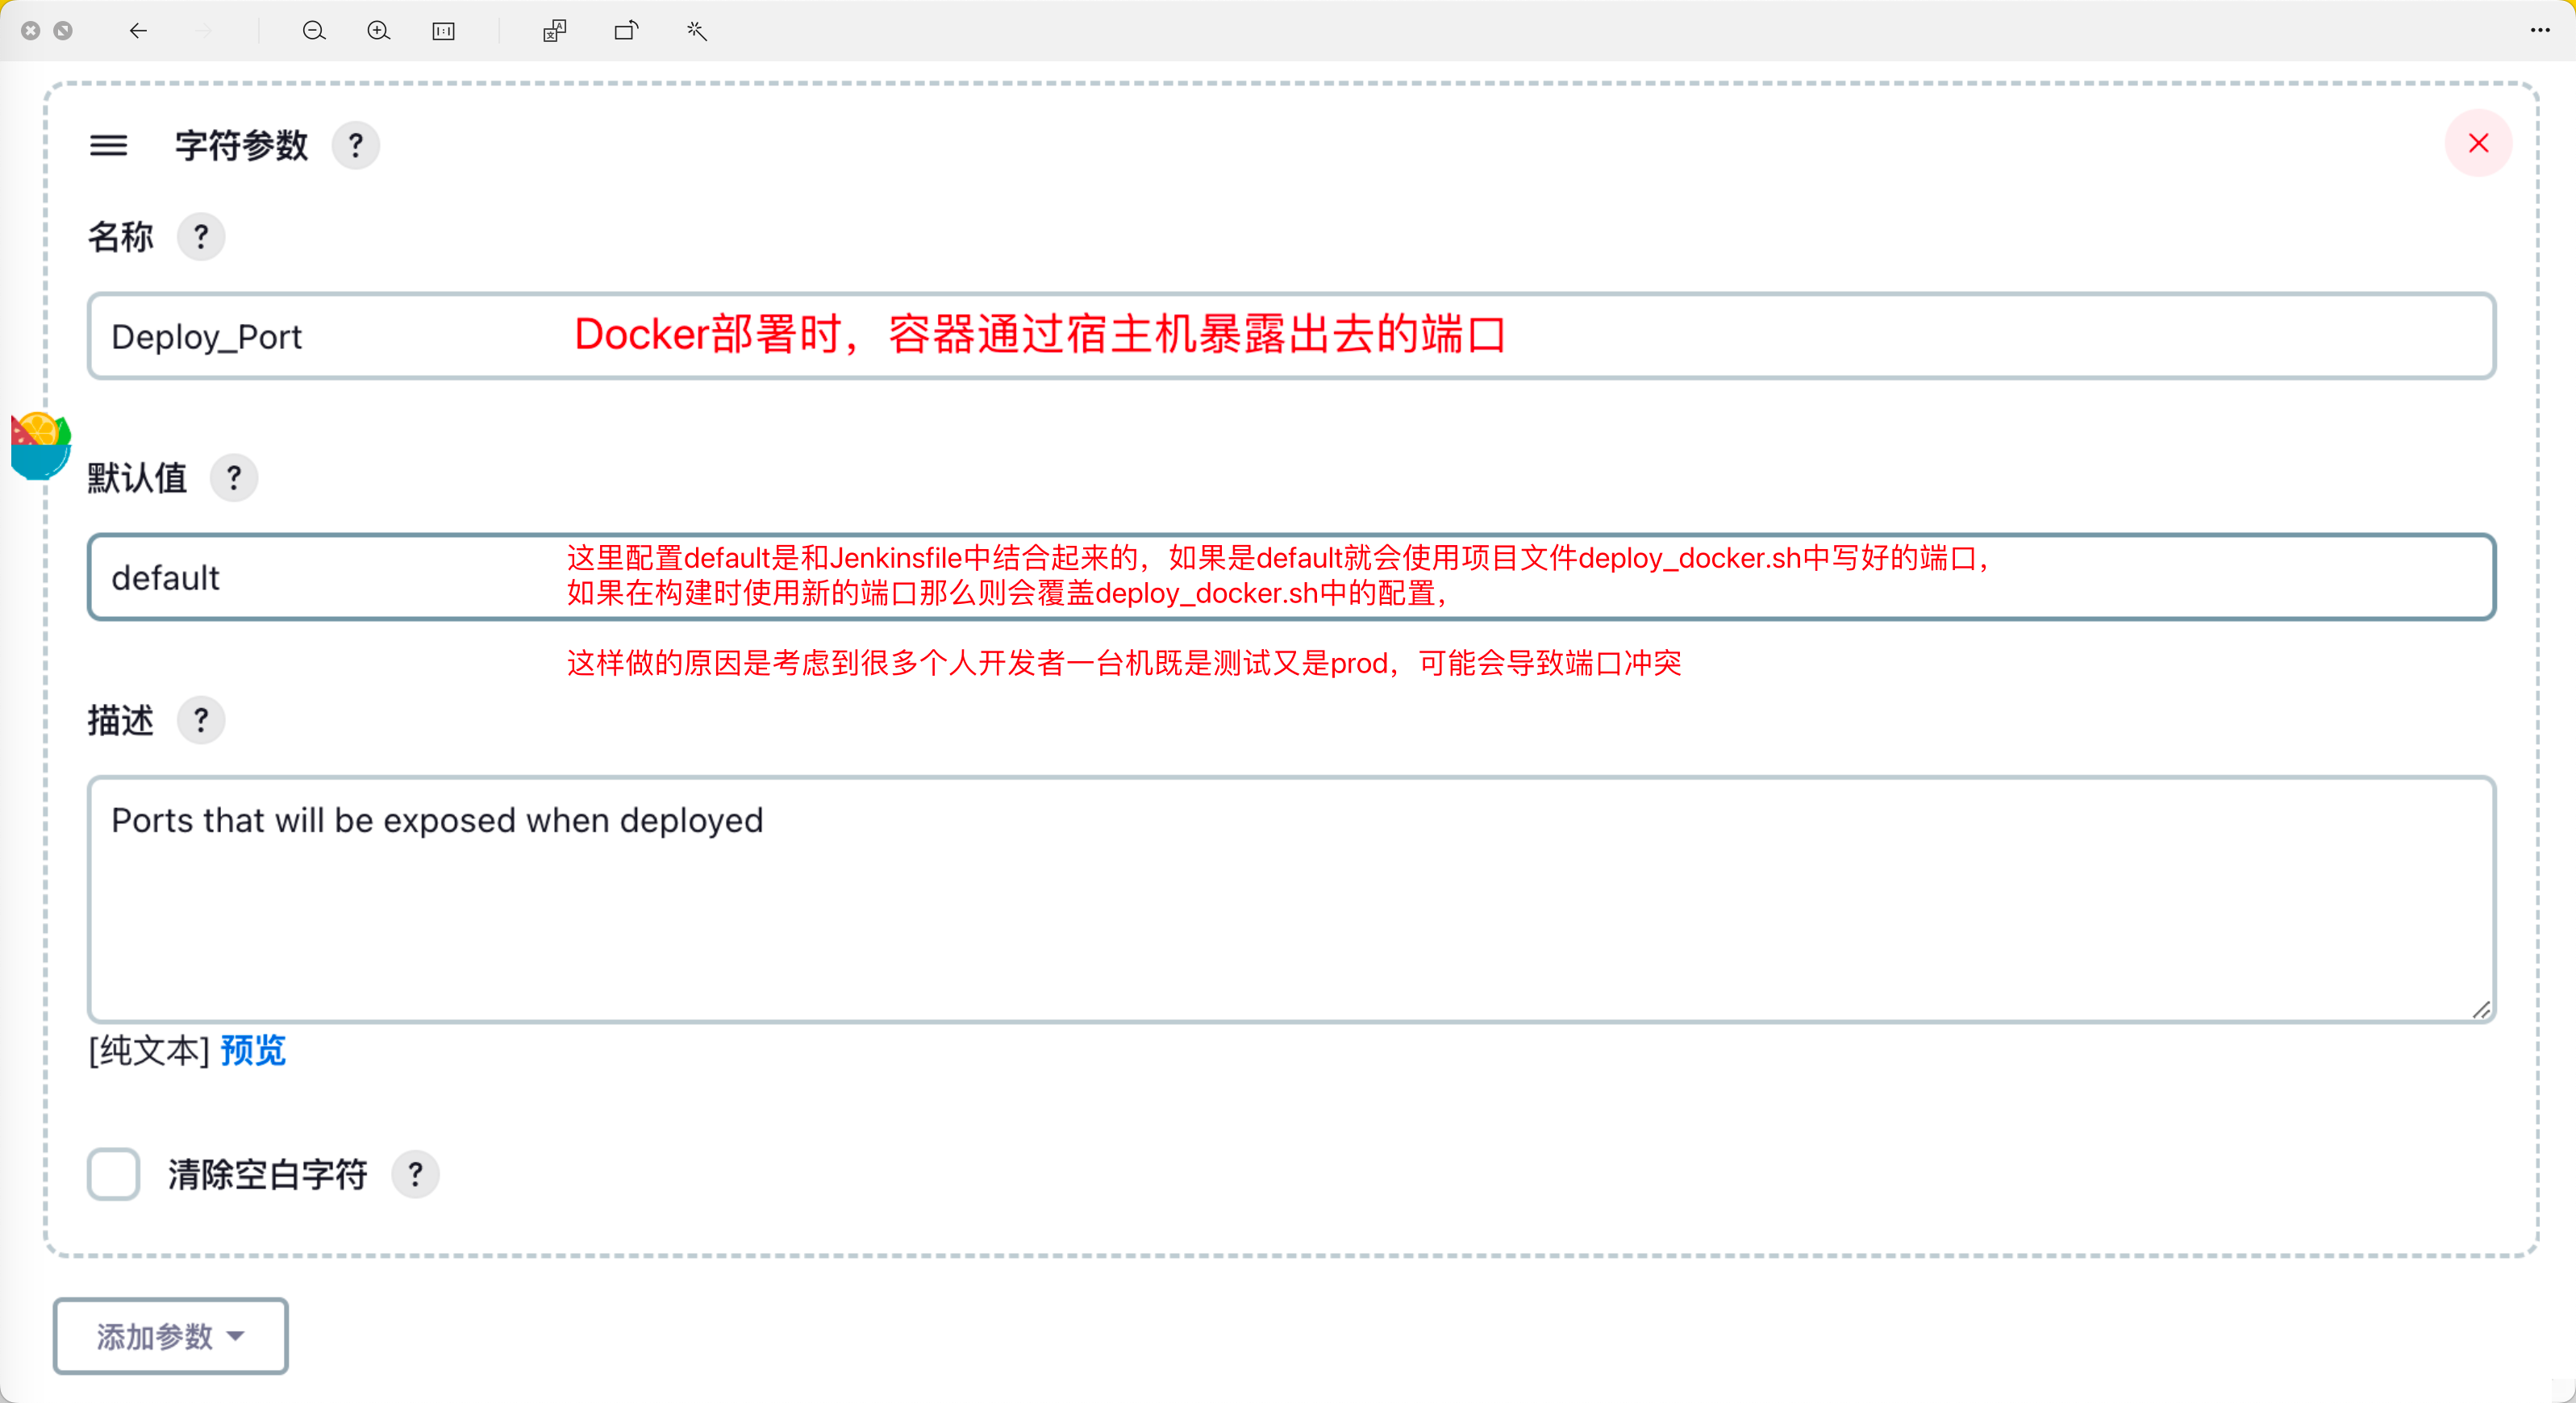
Add parameterized build process - three parameters total: ENV_INFO, GIT_Branch, Deploy_Port
ENV_INFO

GIT_Branch
Deploy_Port
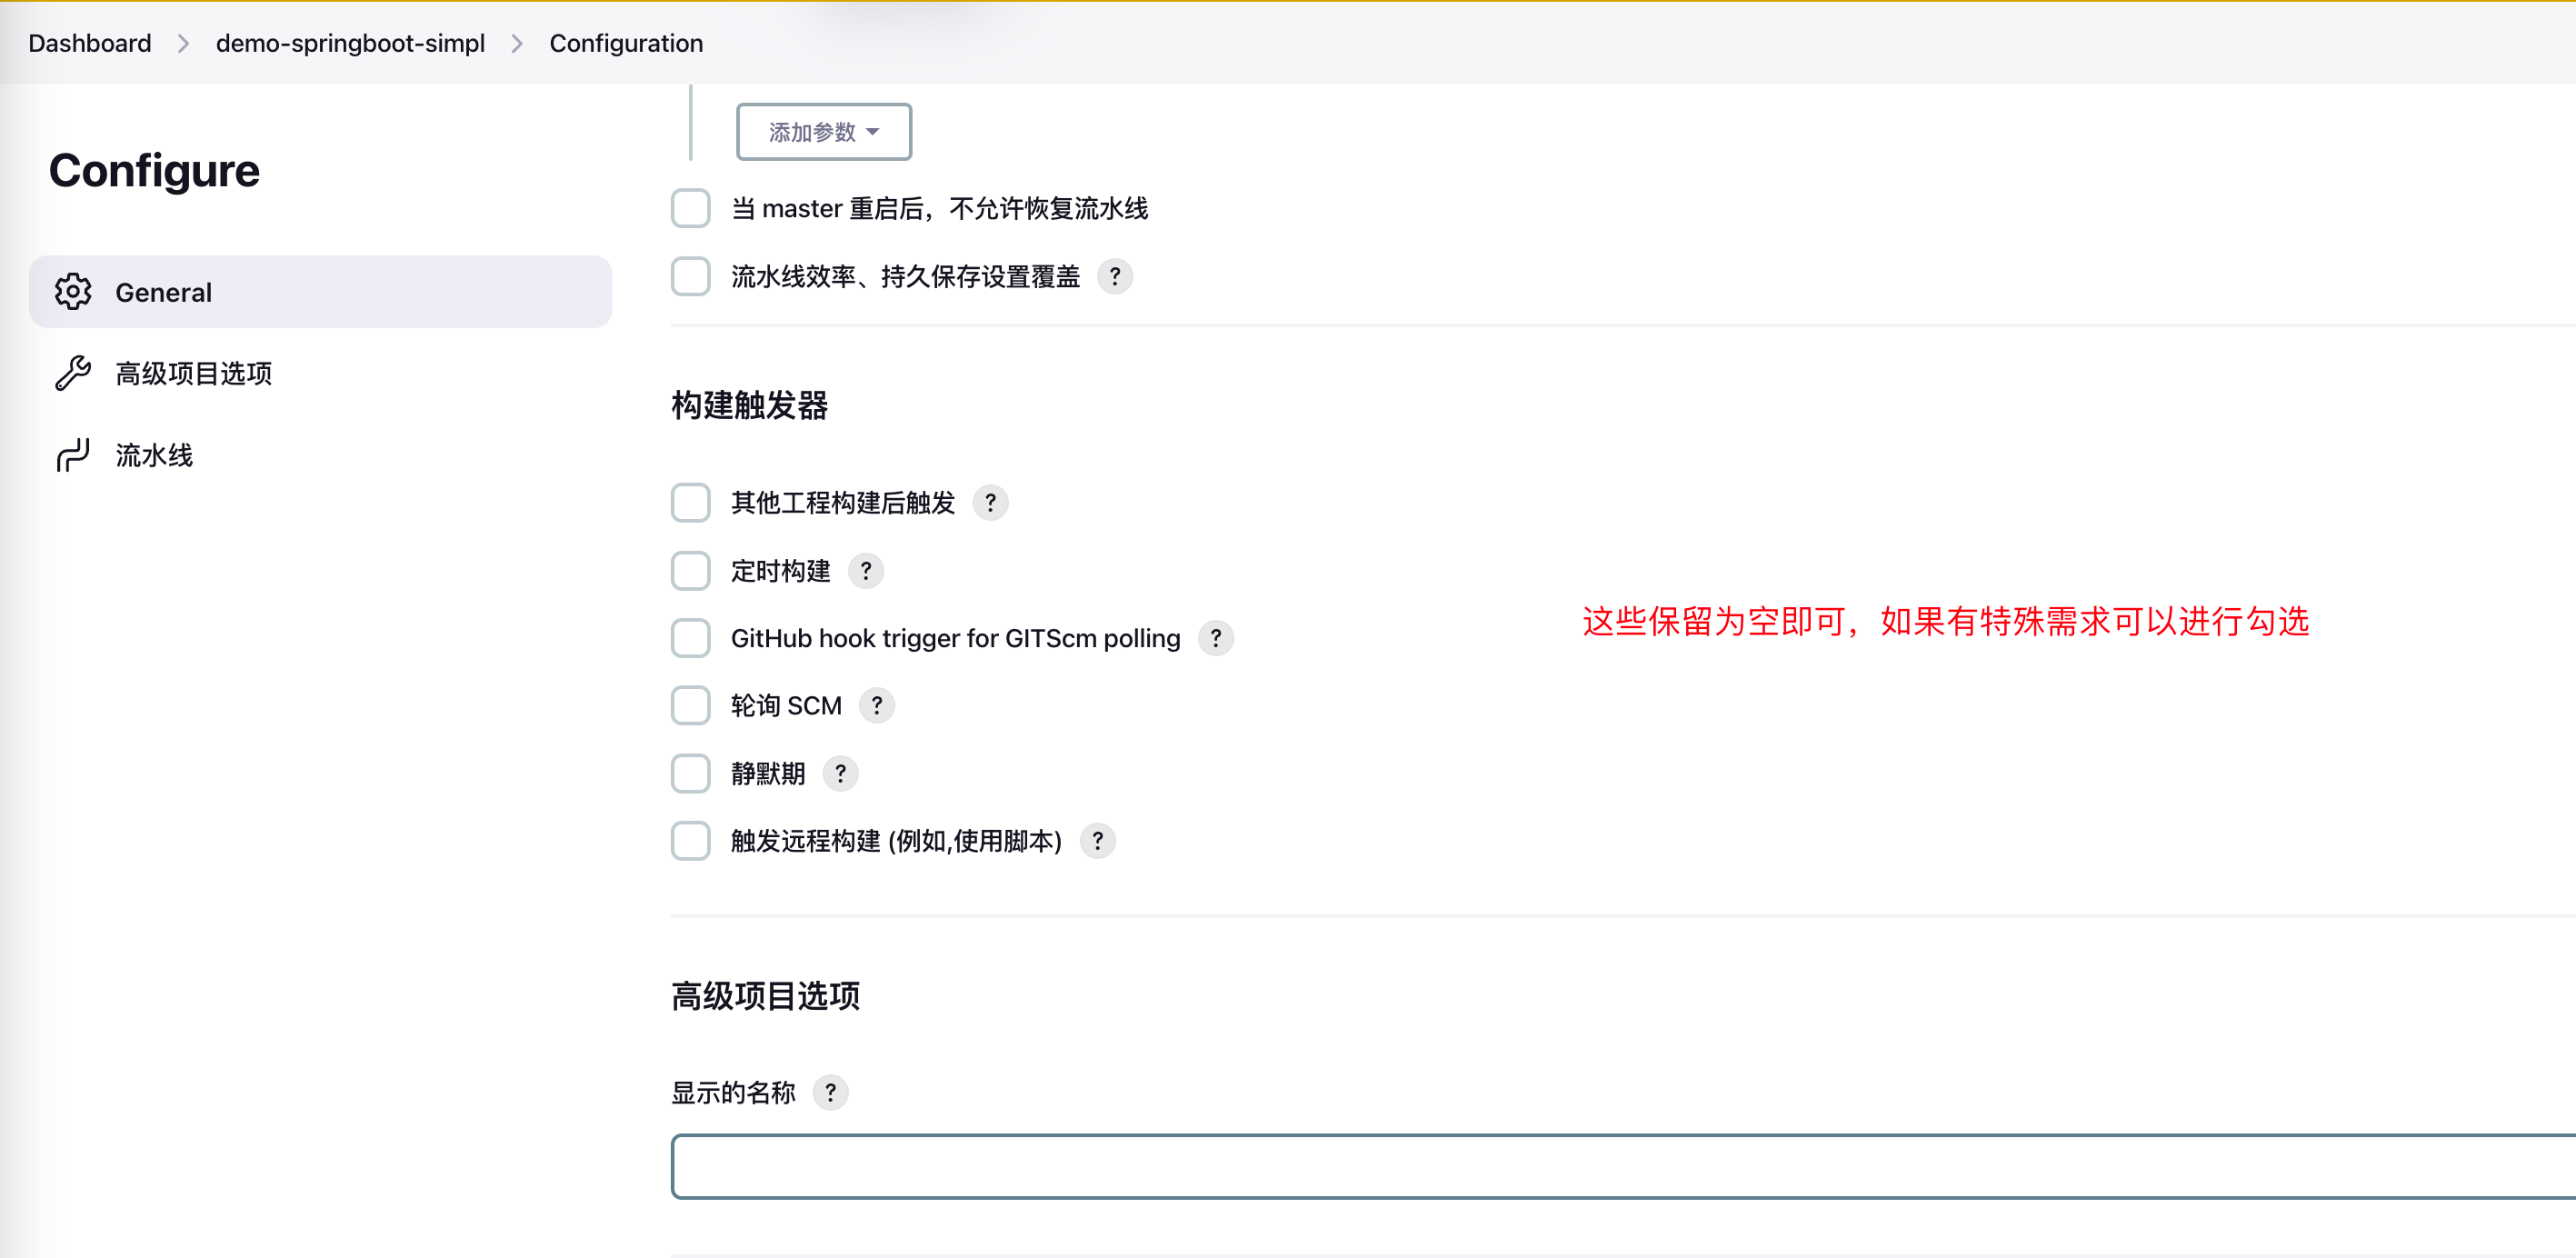
Pipeline script from SCM
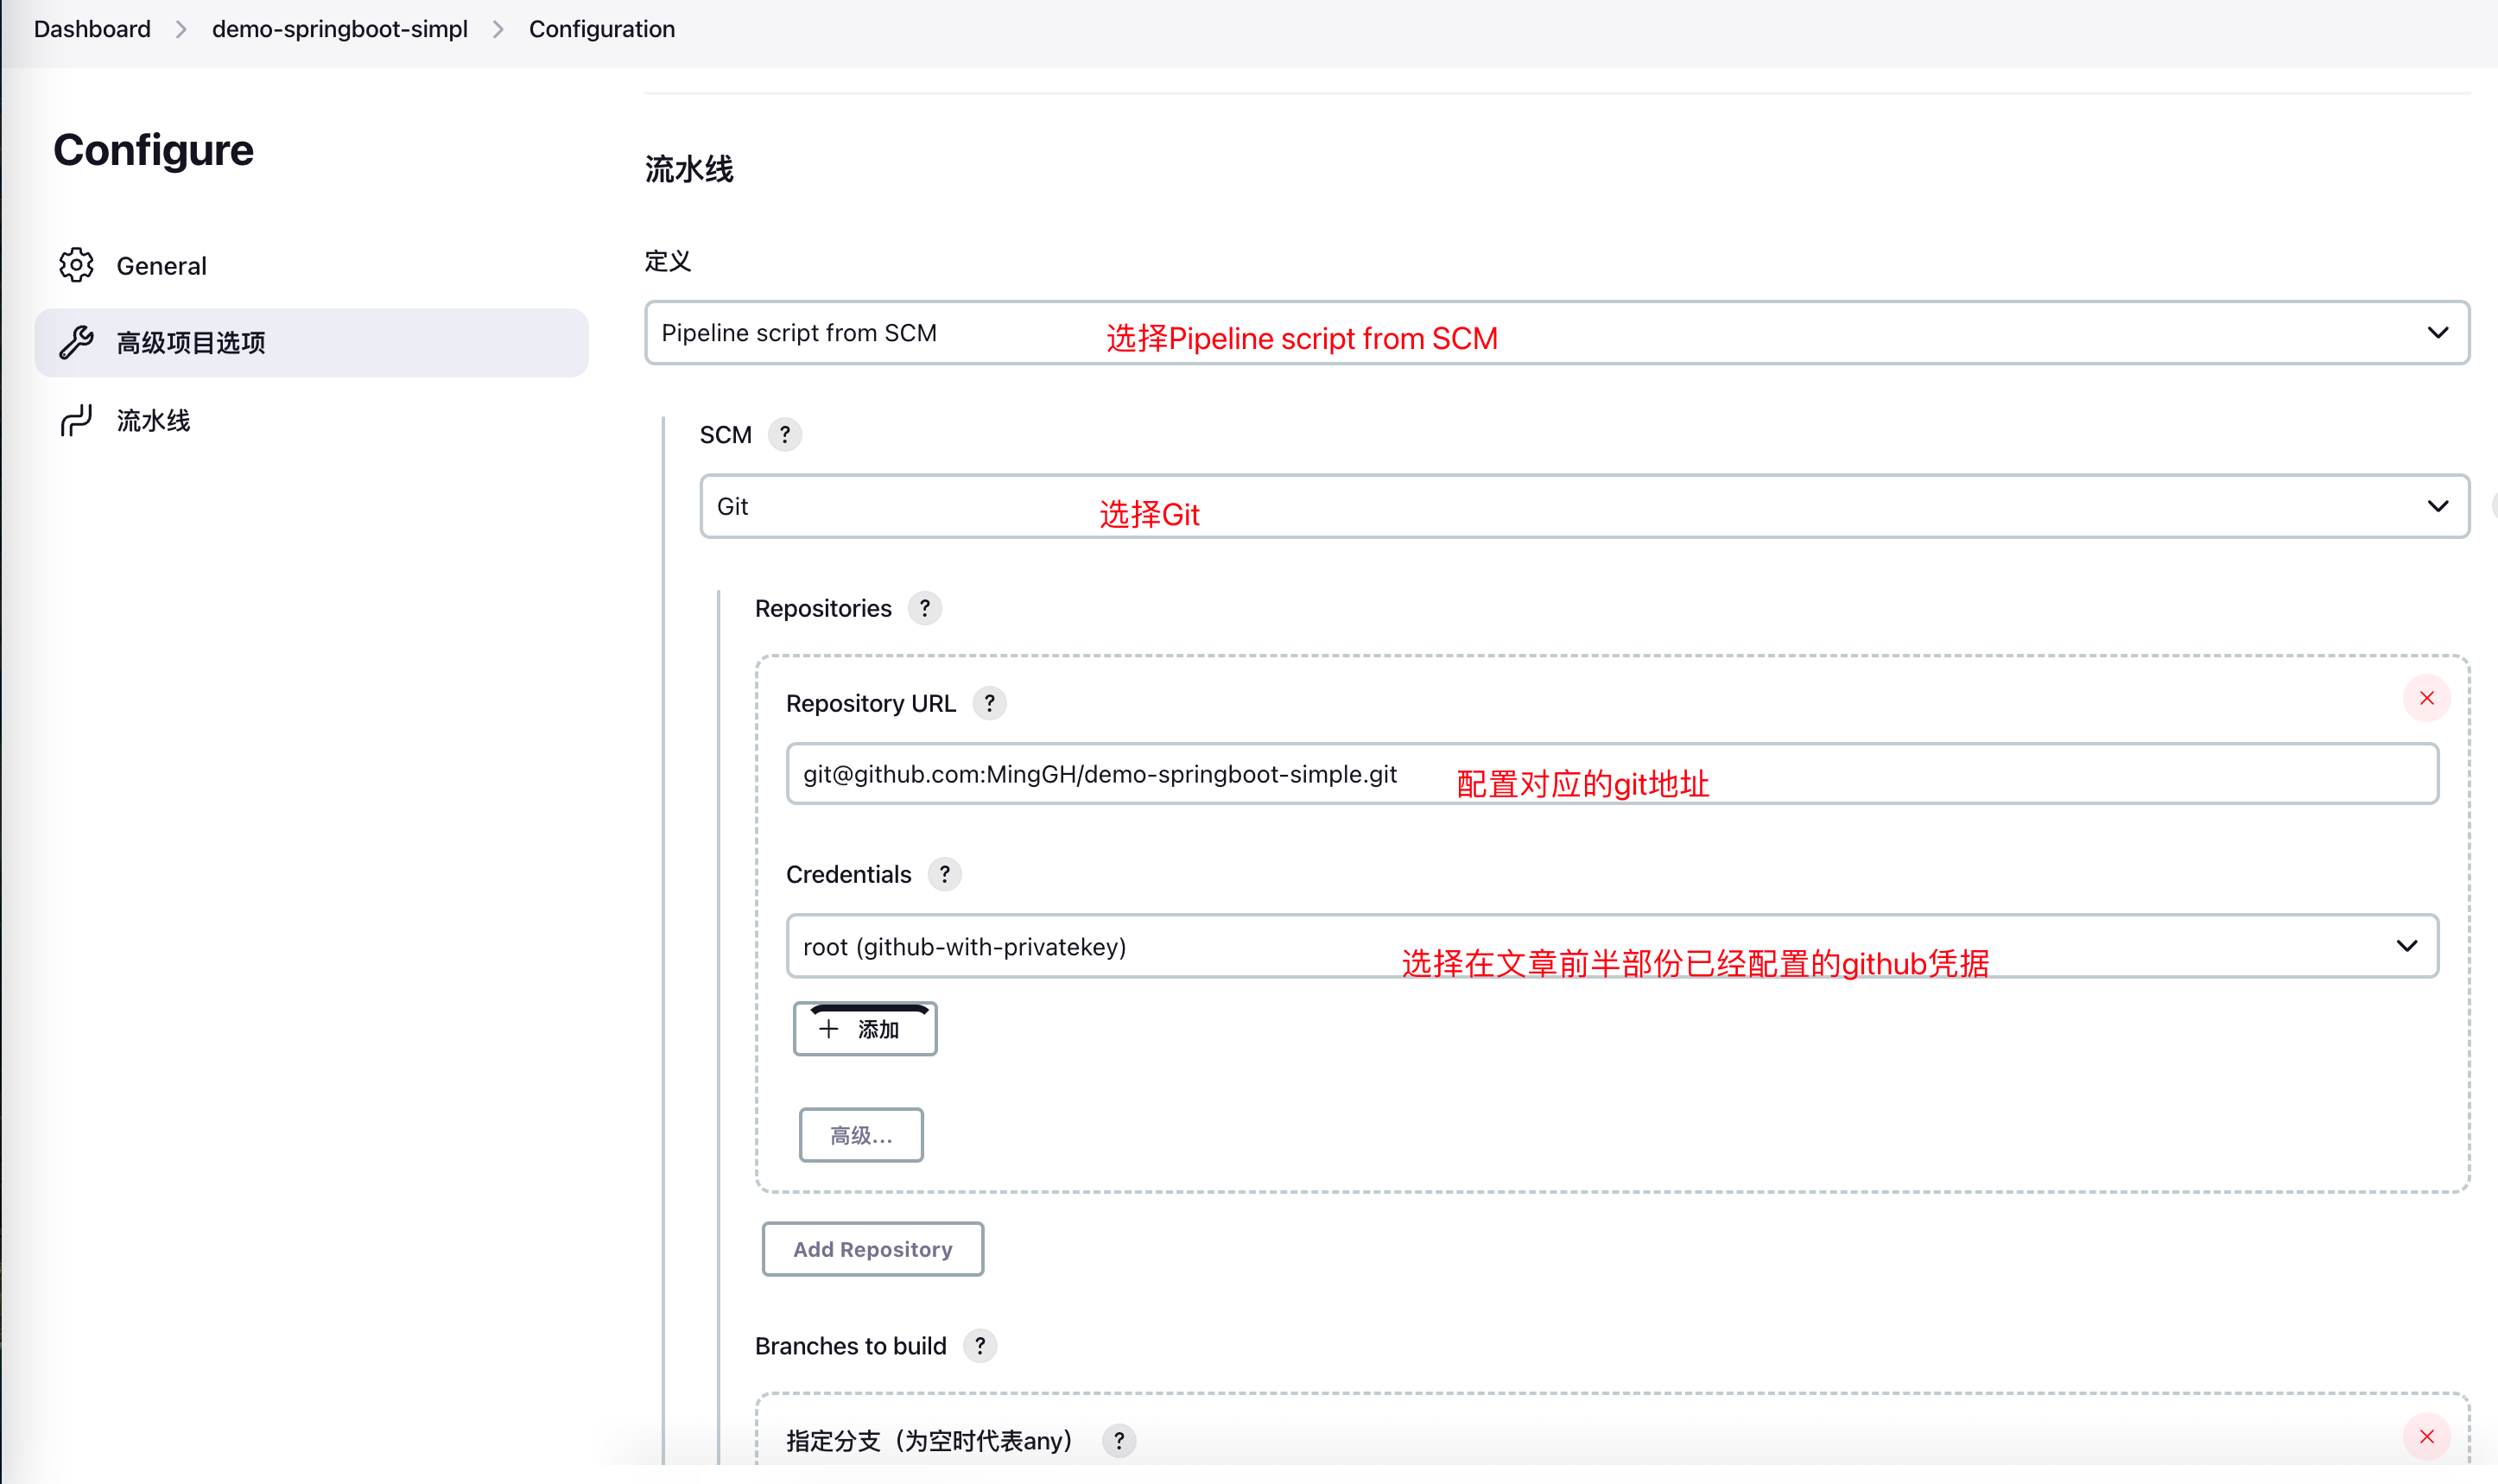
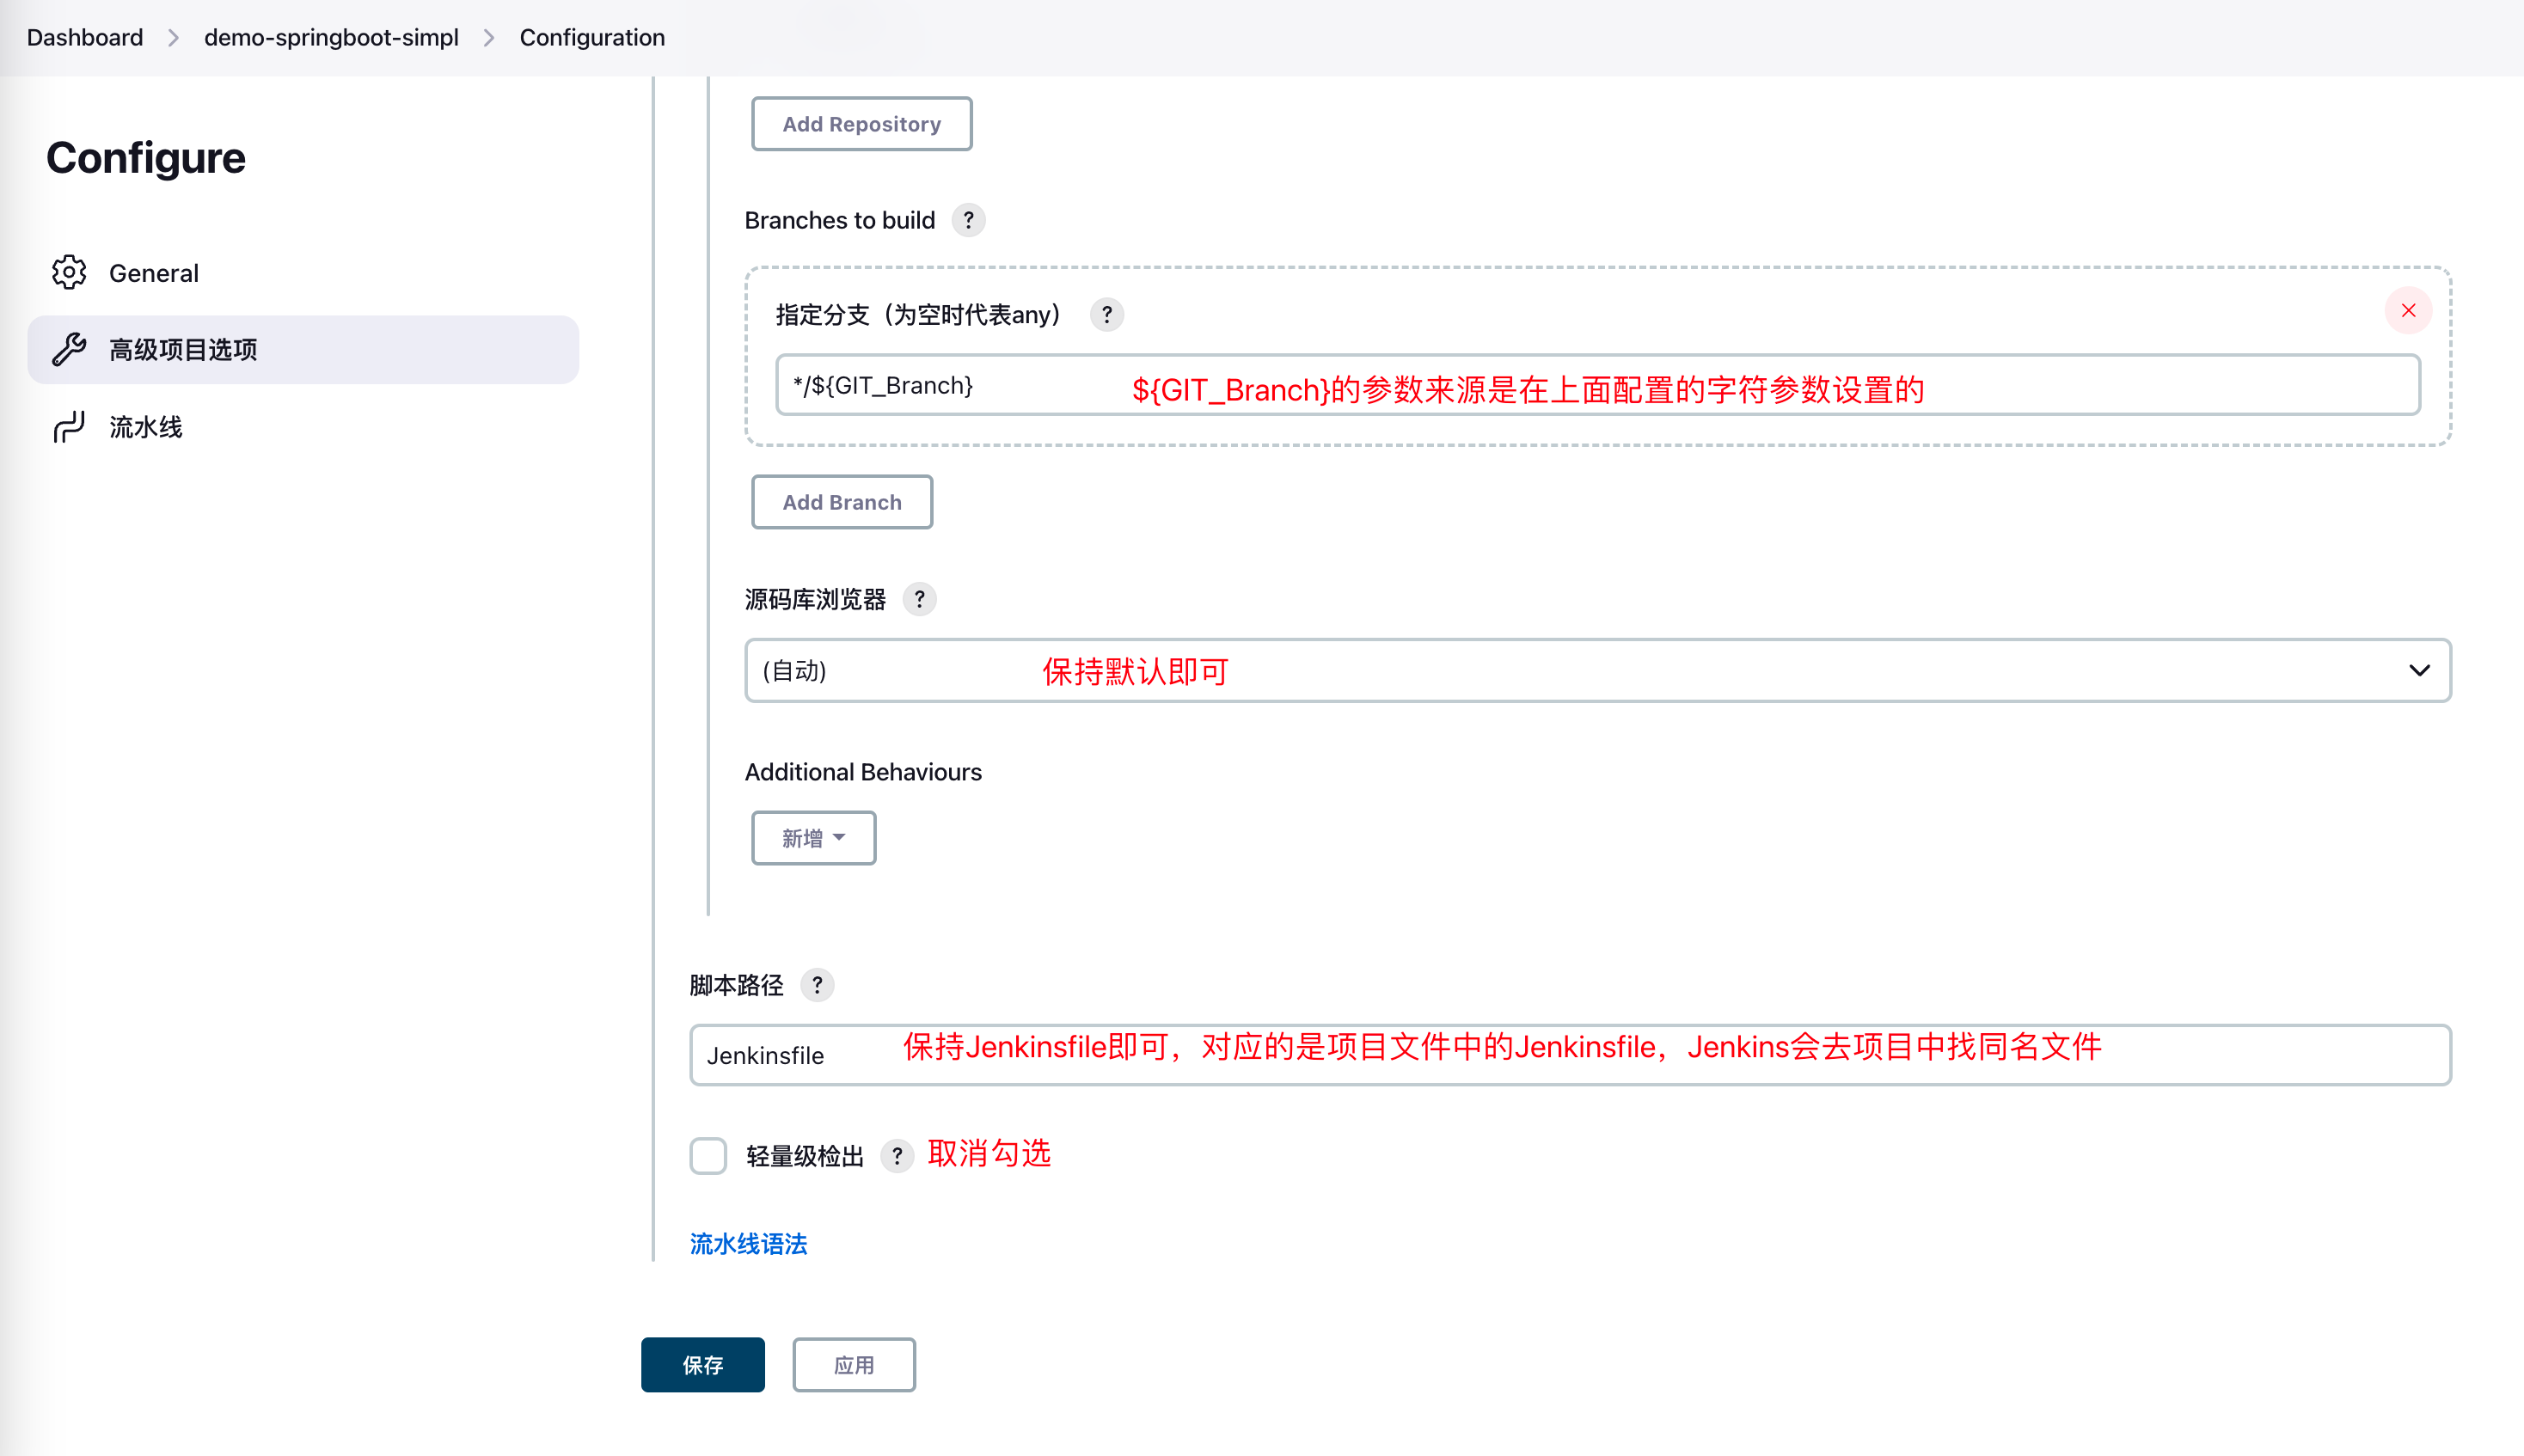
Click create - the pipeline is now created. Can't wait to click build? Wait, let me finish explaining the rest so you know where to look when issues arise.
3.2 Project demo-springboot-simple Explanation
Back to the project I asked you to download at the beginning: demo-springboot-simple
application-dev.yaml and application-prod.yaml
The project is a simple Spring Boot project with default port 5002. Two different configuration files are defined: application-dev.yaml and application-prod.yaml to simulate switching parameters for different environments.
HelloController
A HelloController is created to demonstrate the simplest GET request, returning different content based on deployment environment.
HelloController content:
import org.springframework.beans.factory.annotation.Autowired;
import org.springframework.stereotype.Controller;
import org.springframework.web.bind.annotation.GetMapping;
import org.springframework.web.bind.annotation.ResponseBody;
import run.runnable.demospringbootsimple.config.AppConfig;

/**
 * @author Asher
 * on 2023/1/3
 */
@Controller
public class HelloController {

    @GetMapping("/hello")
    @ResponseBody
    public String hello(){
        return "hello " + appConfig.getEnv();
    }

    private AppConfig appConfig;
    @Autowired
    public void setAppConfig(AppConfig appConfig) {
        this.appConfig = appConfig;
    }
}
3.3 Project Configuration: Jenkinsfile (Requires Modification)
When Jenkins clicks build on the panel, it finds the Jenkinsfile in the corresponding directory, so the first thing we need to explain is the Jenkinsfile.
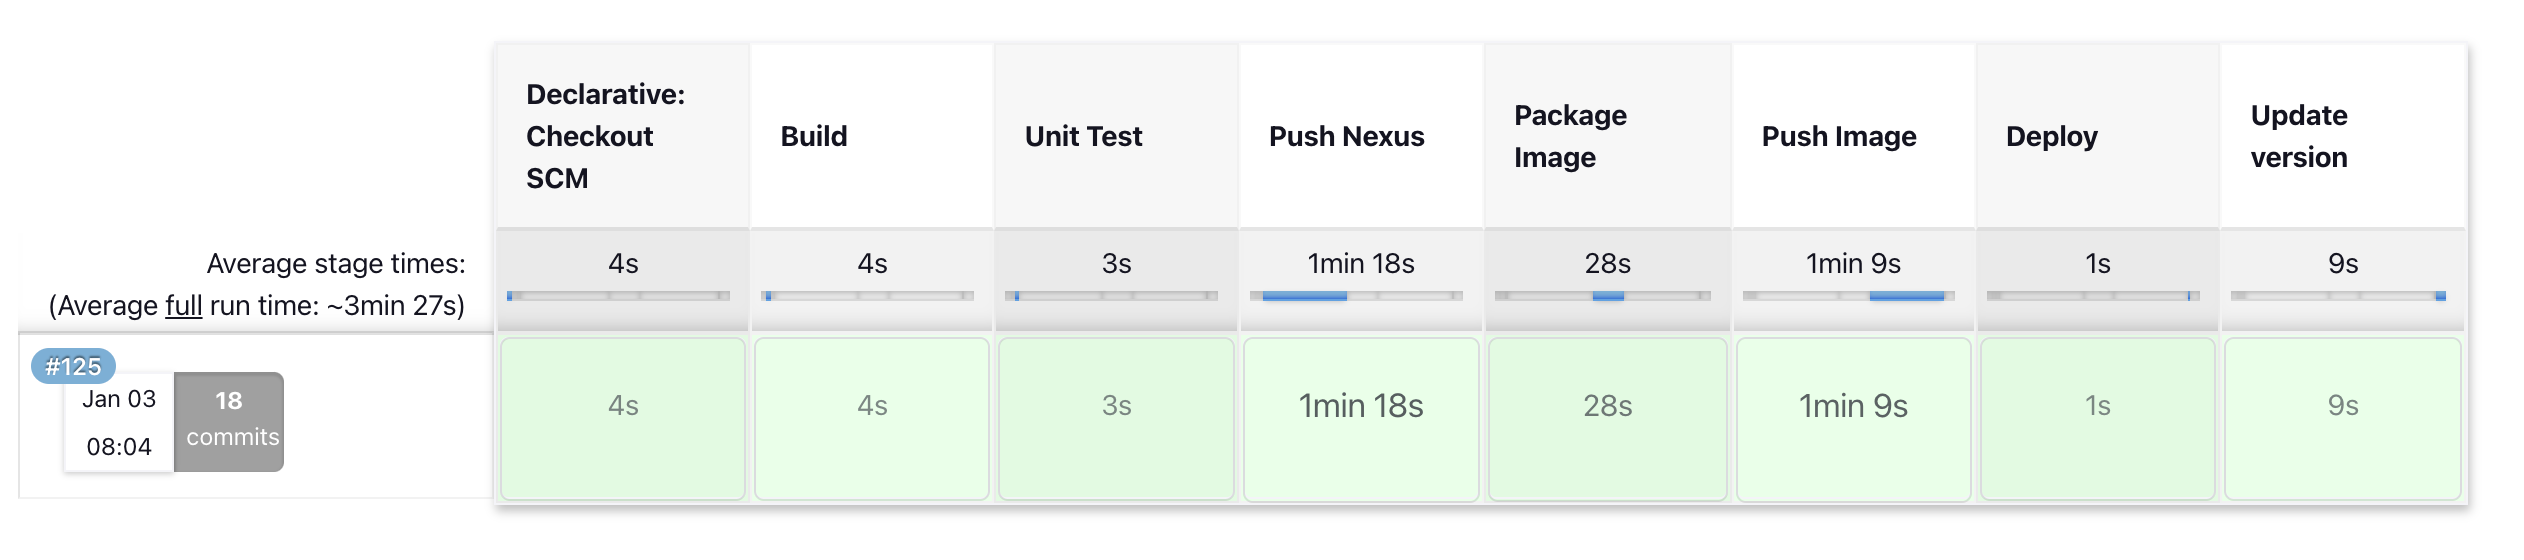
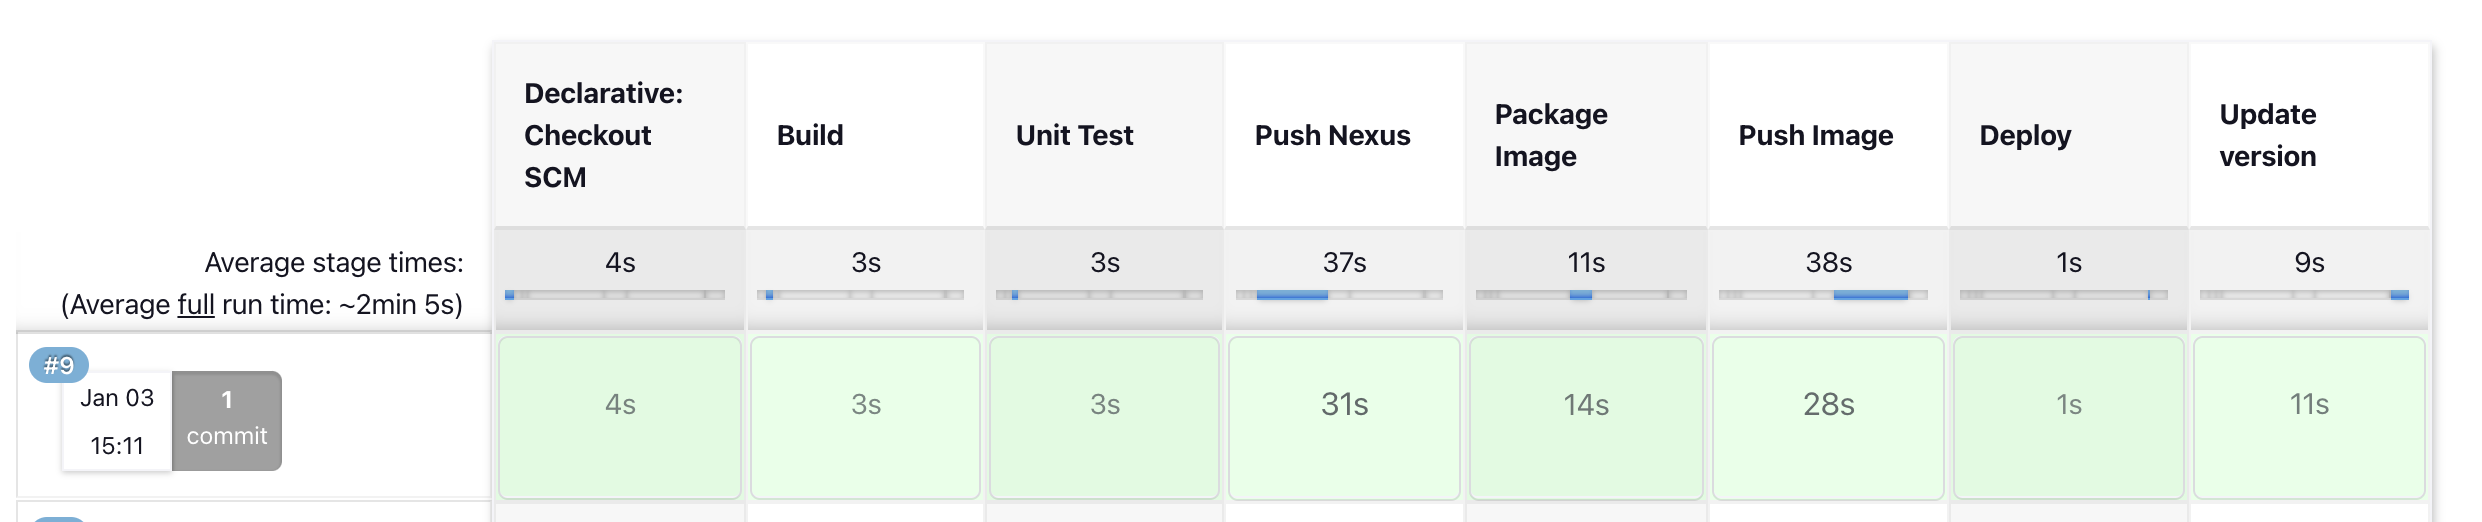
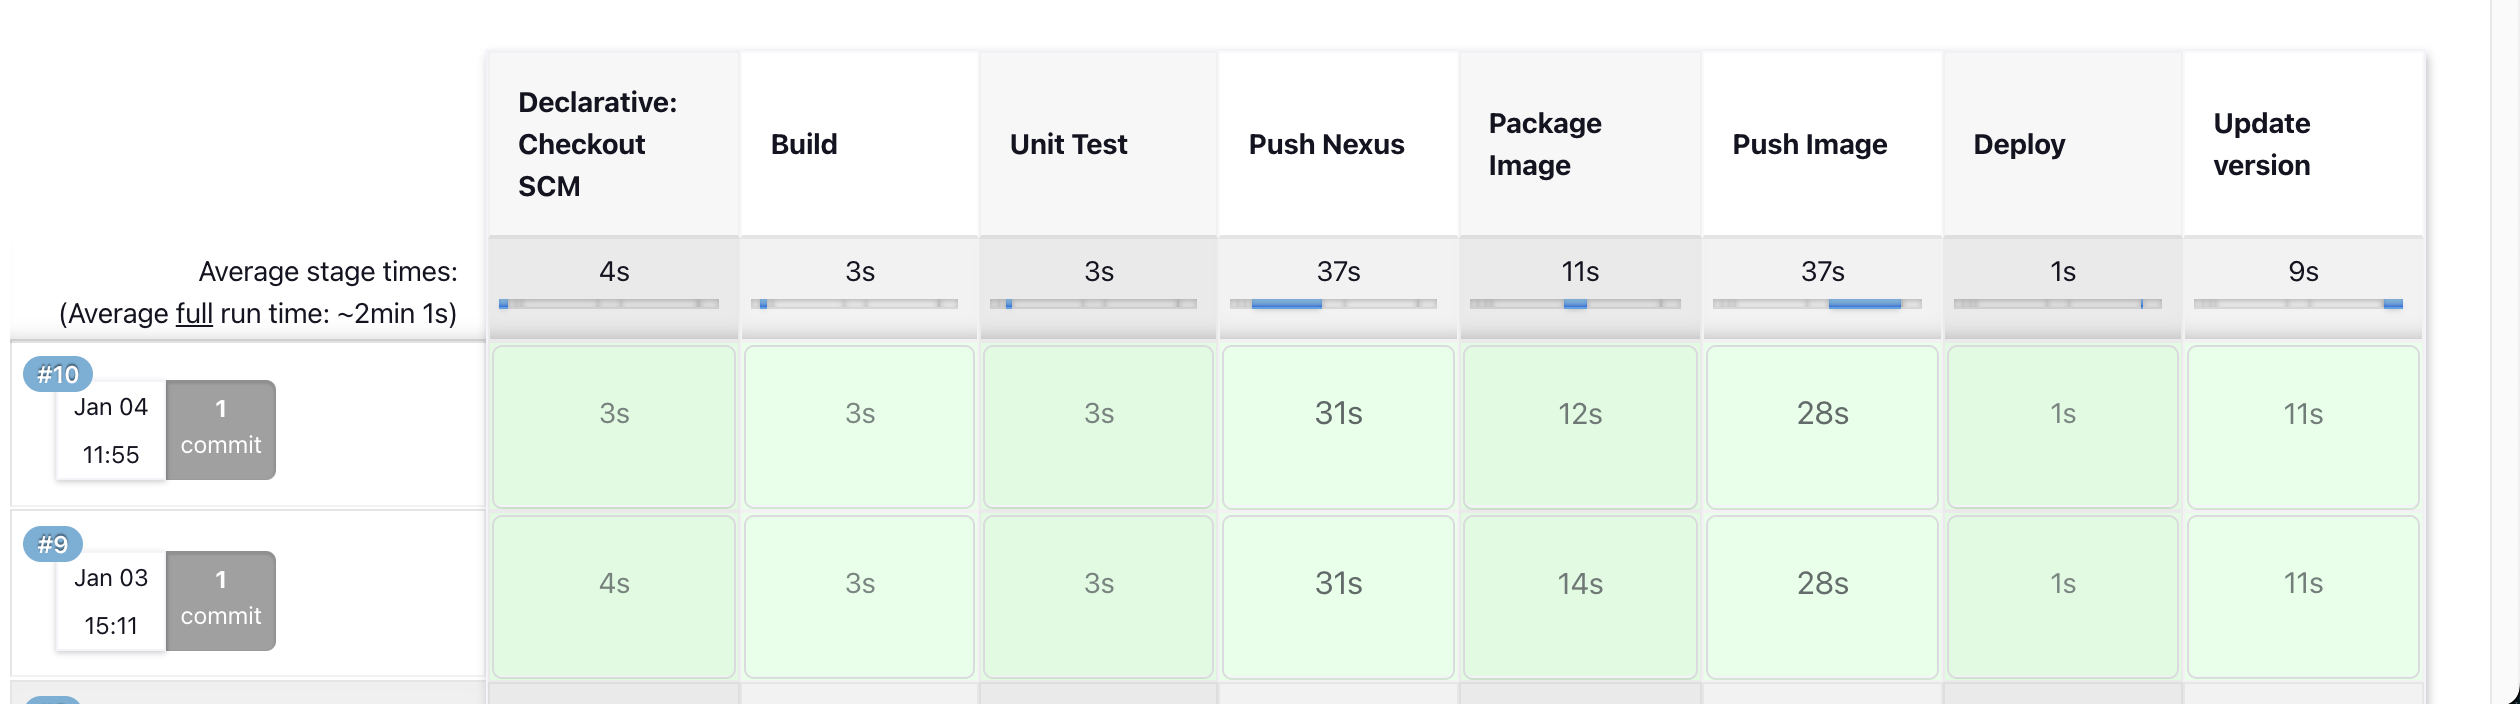
In the Jenkinsfile, I defined 7 stages: Build, Unit Test, Push Nexus, Package Image, Push Image, Deploy, Update version
When Jenkins builds, these stages will appear:
Due to length, I've used a separate article for detailed explanation: Jenkinsfile Detailed Explanation in demo-springboot-simple
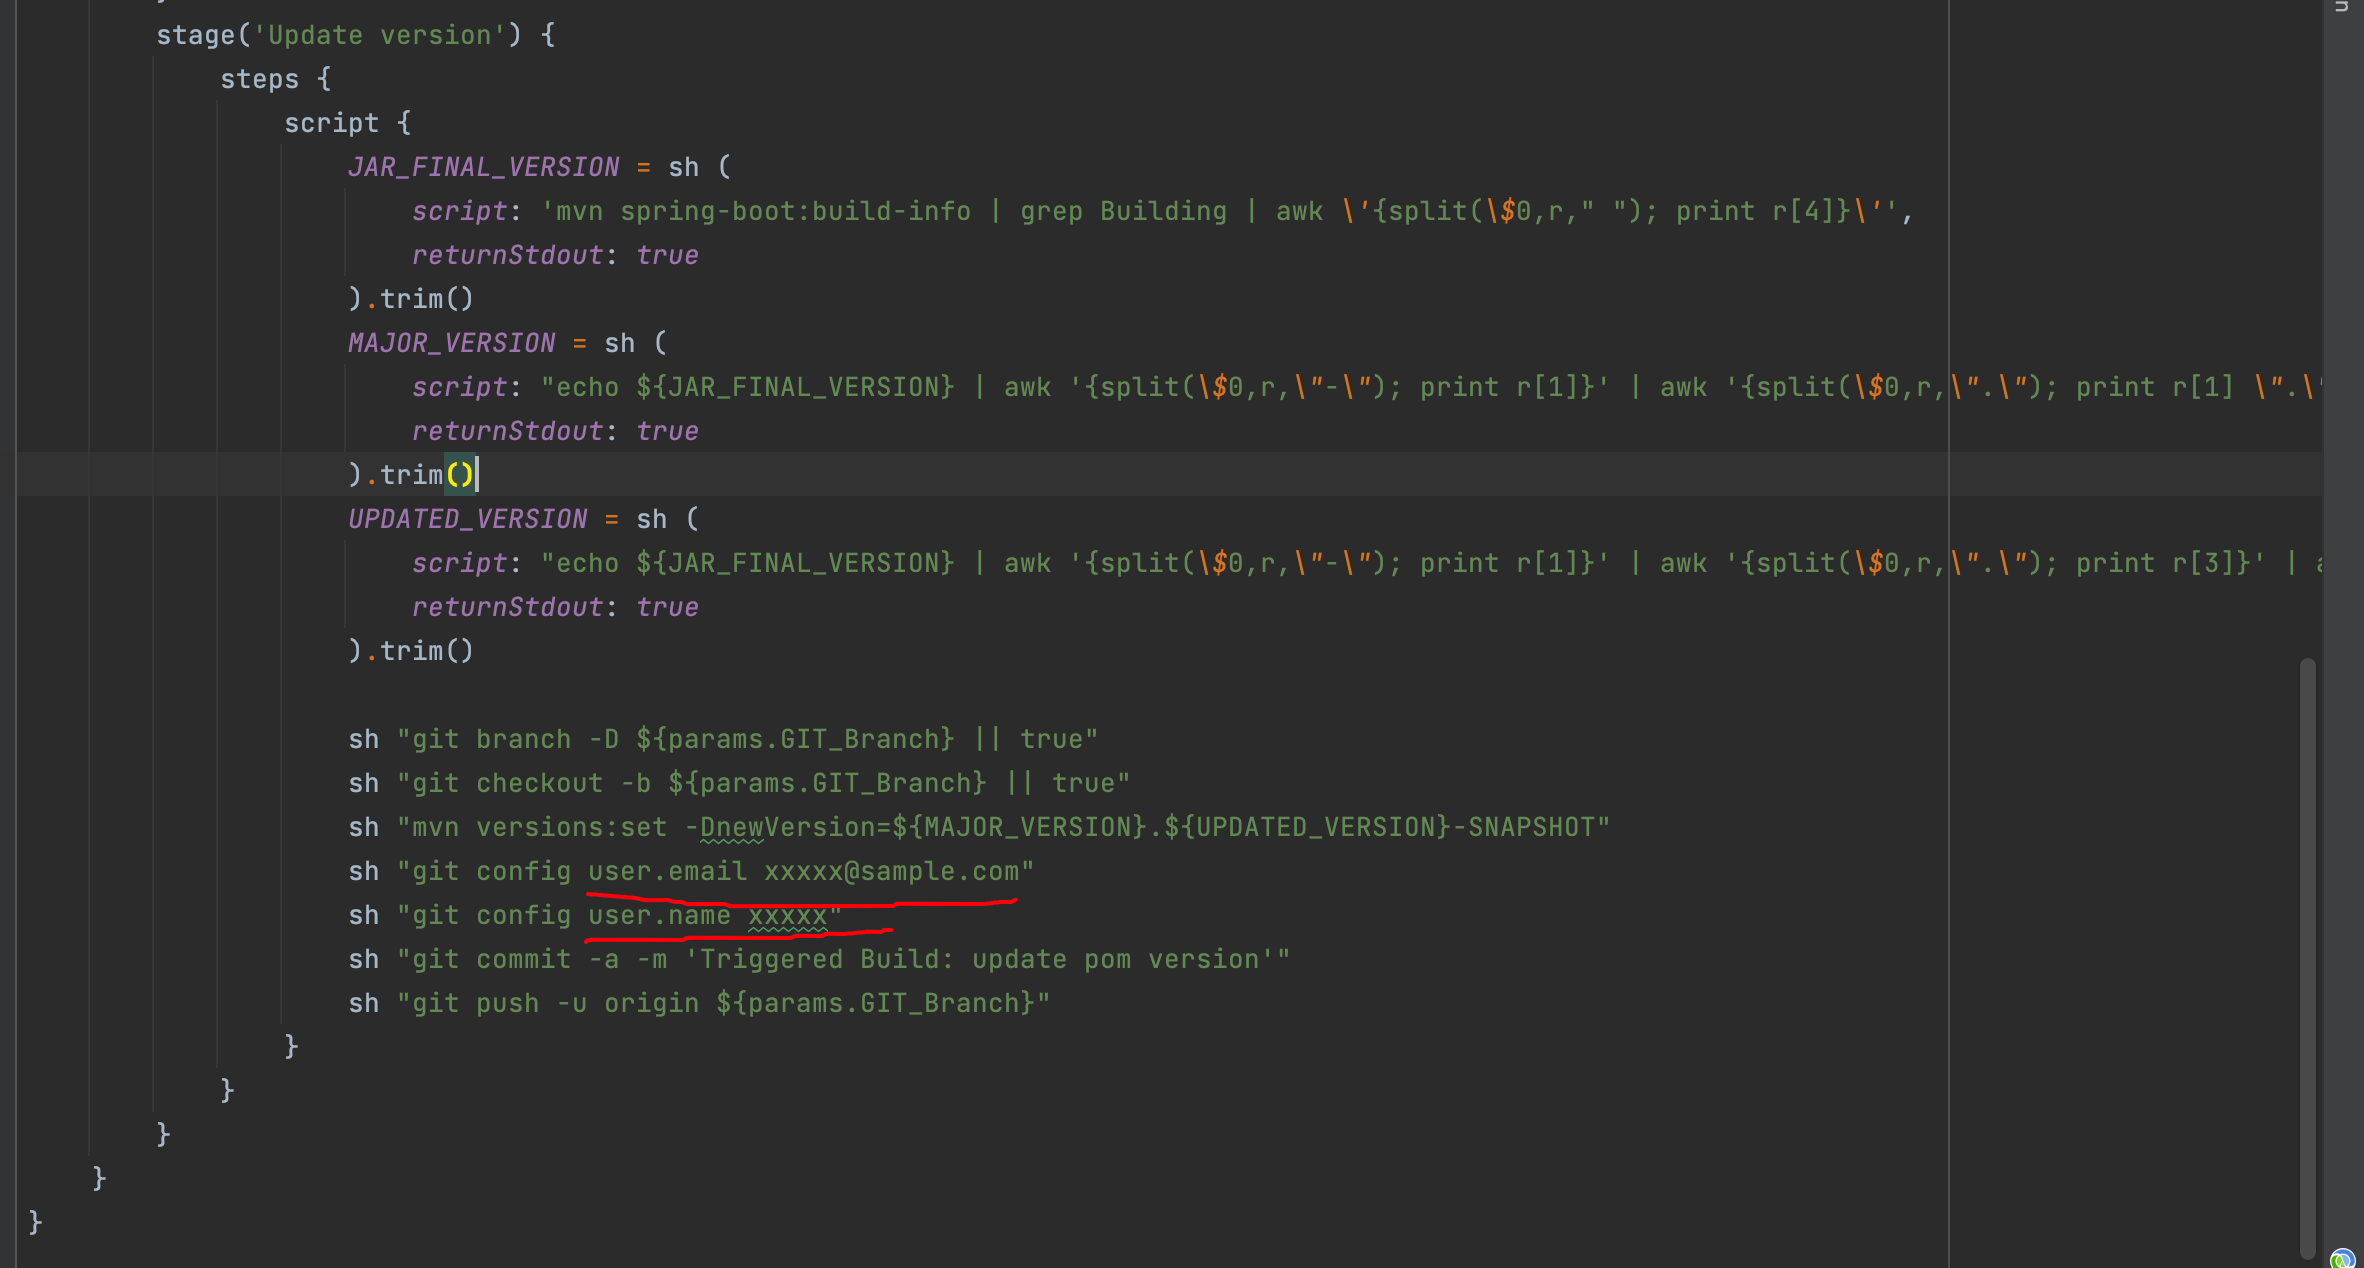
Content to modify:
In the Update version Stage, you need to modify your git email address and username. Since we've already configured the public key on GitHub in step 2.4 and configured /root/.ssh directory mapping in Jenkins agent, you only need to configure username and email here.
3.5 Project Configuration: deploy_docker.sh
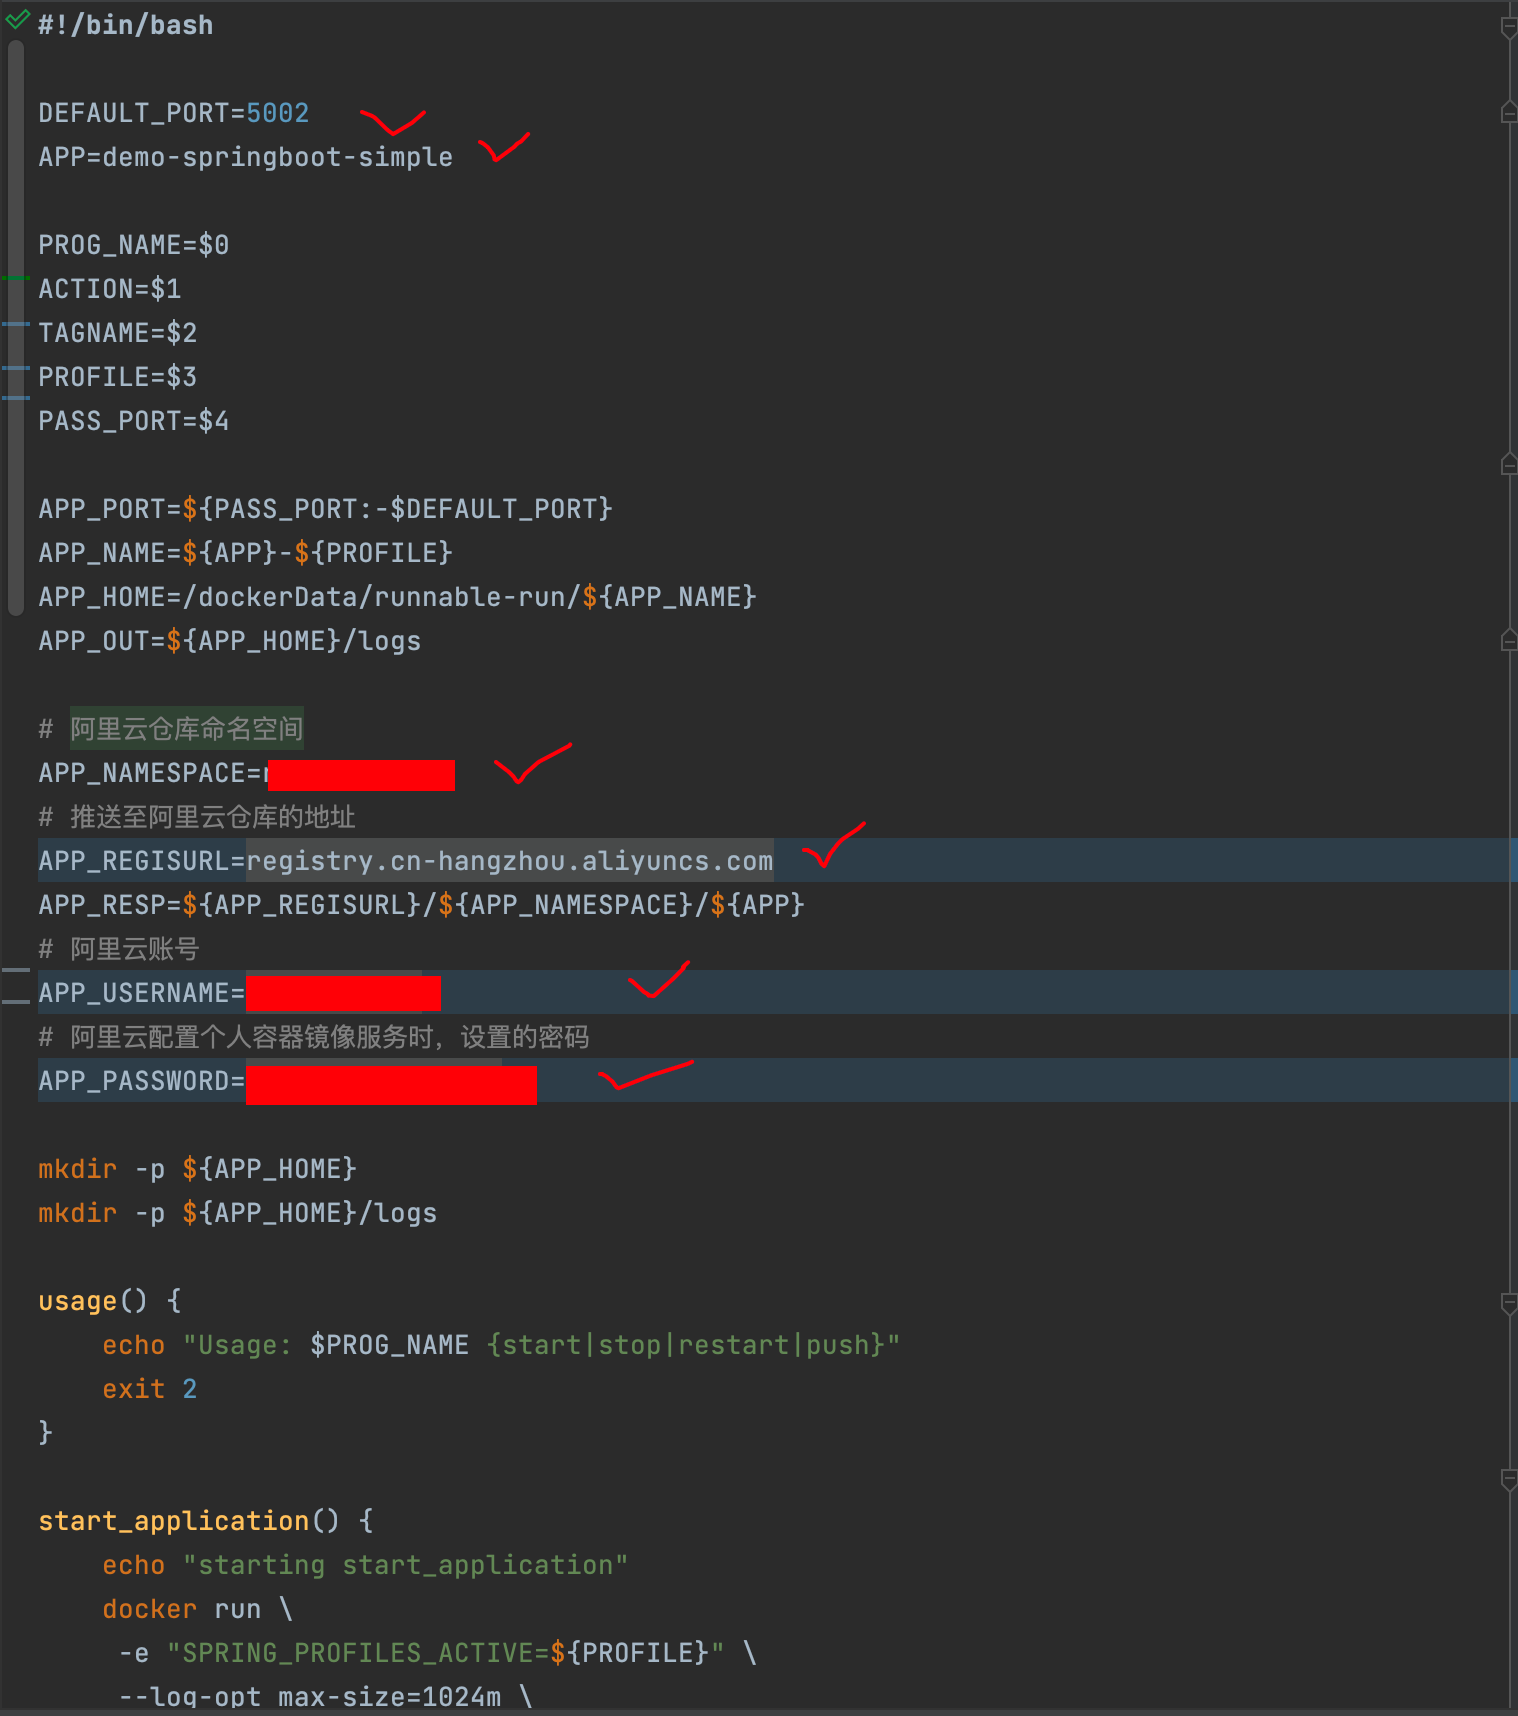
After explaining the Jenkinsfile, hopefully you understand Jenkins' main execution flow. The content in deploy_docker.sh contains commands for Docker deployment locally and pushing to Docker Container Image Repository.
Content you need to configure:
3.4 Project Configuration: pom.xml (Requires Modification)
Configuration to modify
In the pom.xml file, you need to modify the content in properties:
docker.namespaceis created in Alibaba Cloud's Docker Container Image Repositorydocker.registry.addressis the public address in the image repository basic information, e.g.:registry.cn-hangzhou.aliyuncs.com
<properties>
		<java.version>17</java.version>
		<docker.namespace></docker.namespace>
		<docker.registry.address></docker.registry.address>
	</properties>
In plugins, I added dockerfile-maven-plugin. Through this plugin, you can use Maven to build Docker images, but the project needs a Dockerfile, which I'll explain shortly.
<plugin>
	<groupId>com.spotify</groupId>
	<artifactId>dockerfile-maven-plugin</artifactId>
	<version>1.4.13</version>
	<configuration>
		<repository>${docker.registry.address}/${docker.namespace}/${project.artifactId}</repository>
		<tag>${project.version}</tag>
		<buildArgs>
			<JAR_NAME>${project.artifactId}</JAR_NAME>
			<JAR_FILE>target/${project.build.finalName}.jar</JAR_FILE>
		</buildArgs>
	</configuration>
</plugin>
Note that <JAR_NAME> and <JAR_FILE> defined under <buildArgs> will be passed to the Dockerfile for building the image.
3.4 Project Configuration: Dockerfile (No Modification)
The Dockerfile configures parameters for building the image:
FROM openjdk:17-jdk-slim-buster

ARG JAR_NAME
ENV PROJECT_NAME ${JAR_NAME}
ENV PROJECT_HOME /usr/local/${PROJECT_NAME}

RUN ln -sf /usr/share/zoneinfo/Asia/Shanghai /etc/localtime
RUN echo 'Asia/Shanghai' >/etc/timezone
RUN mkdir $PROJECT_HOME && mkdir $PROJECT_HOME/logs

ARG JAR_FILE
COPY ${JAR_FILE} $PROJECT_HOME/${JAR_NAME}.jar

ENTRYPOINT java -jar -Xmn128m -Xms256m -Xmx256m $PROJECT_HOME/$PROJECT_NAME.jar
Parameter explanations (for more details, refer to: What is a Dockerfile?):
FROM openjdk:17-jdk-slim-buster- Image based on openjdk:17-jdk-slim-busterENV PROJECT_NAME ${JAR_NAME}- Set environment variable. Once defined, it can be used in subsequent instructions. The parameter${JAR_NAME}comes from<JAR_NAME>${project.artifactId}</JAR_NAME>in pom.xmlRUN ln -sf /usr/share/zoneinfo/Asia/Shanghai /etc/localtime- Specify container runtime timezoneRUN mkdir $PROJECT_HOME && mkdir $PROJECT_HOME/logs- Create project pathCOPY ${JAR_FILE} $PROJECT_HOME/${JAR_NAME}.jar- Copy the Jar file built by Maven to a specific location in the containerENTRYPOINT java -jar -Xmn128m -Xms256m -Xmx256m $PROJECT_HOME/$PROJECT_NAME.jar- Container entry point, starting via java -jar with specified runtime parameters
After completing the above configuration, commit your code to the specific branch.
4. Build with Parameters
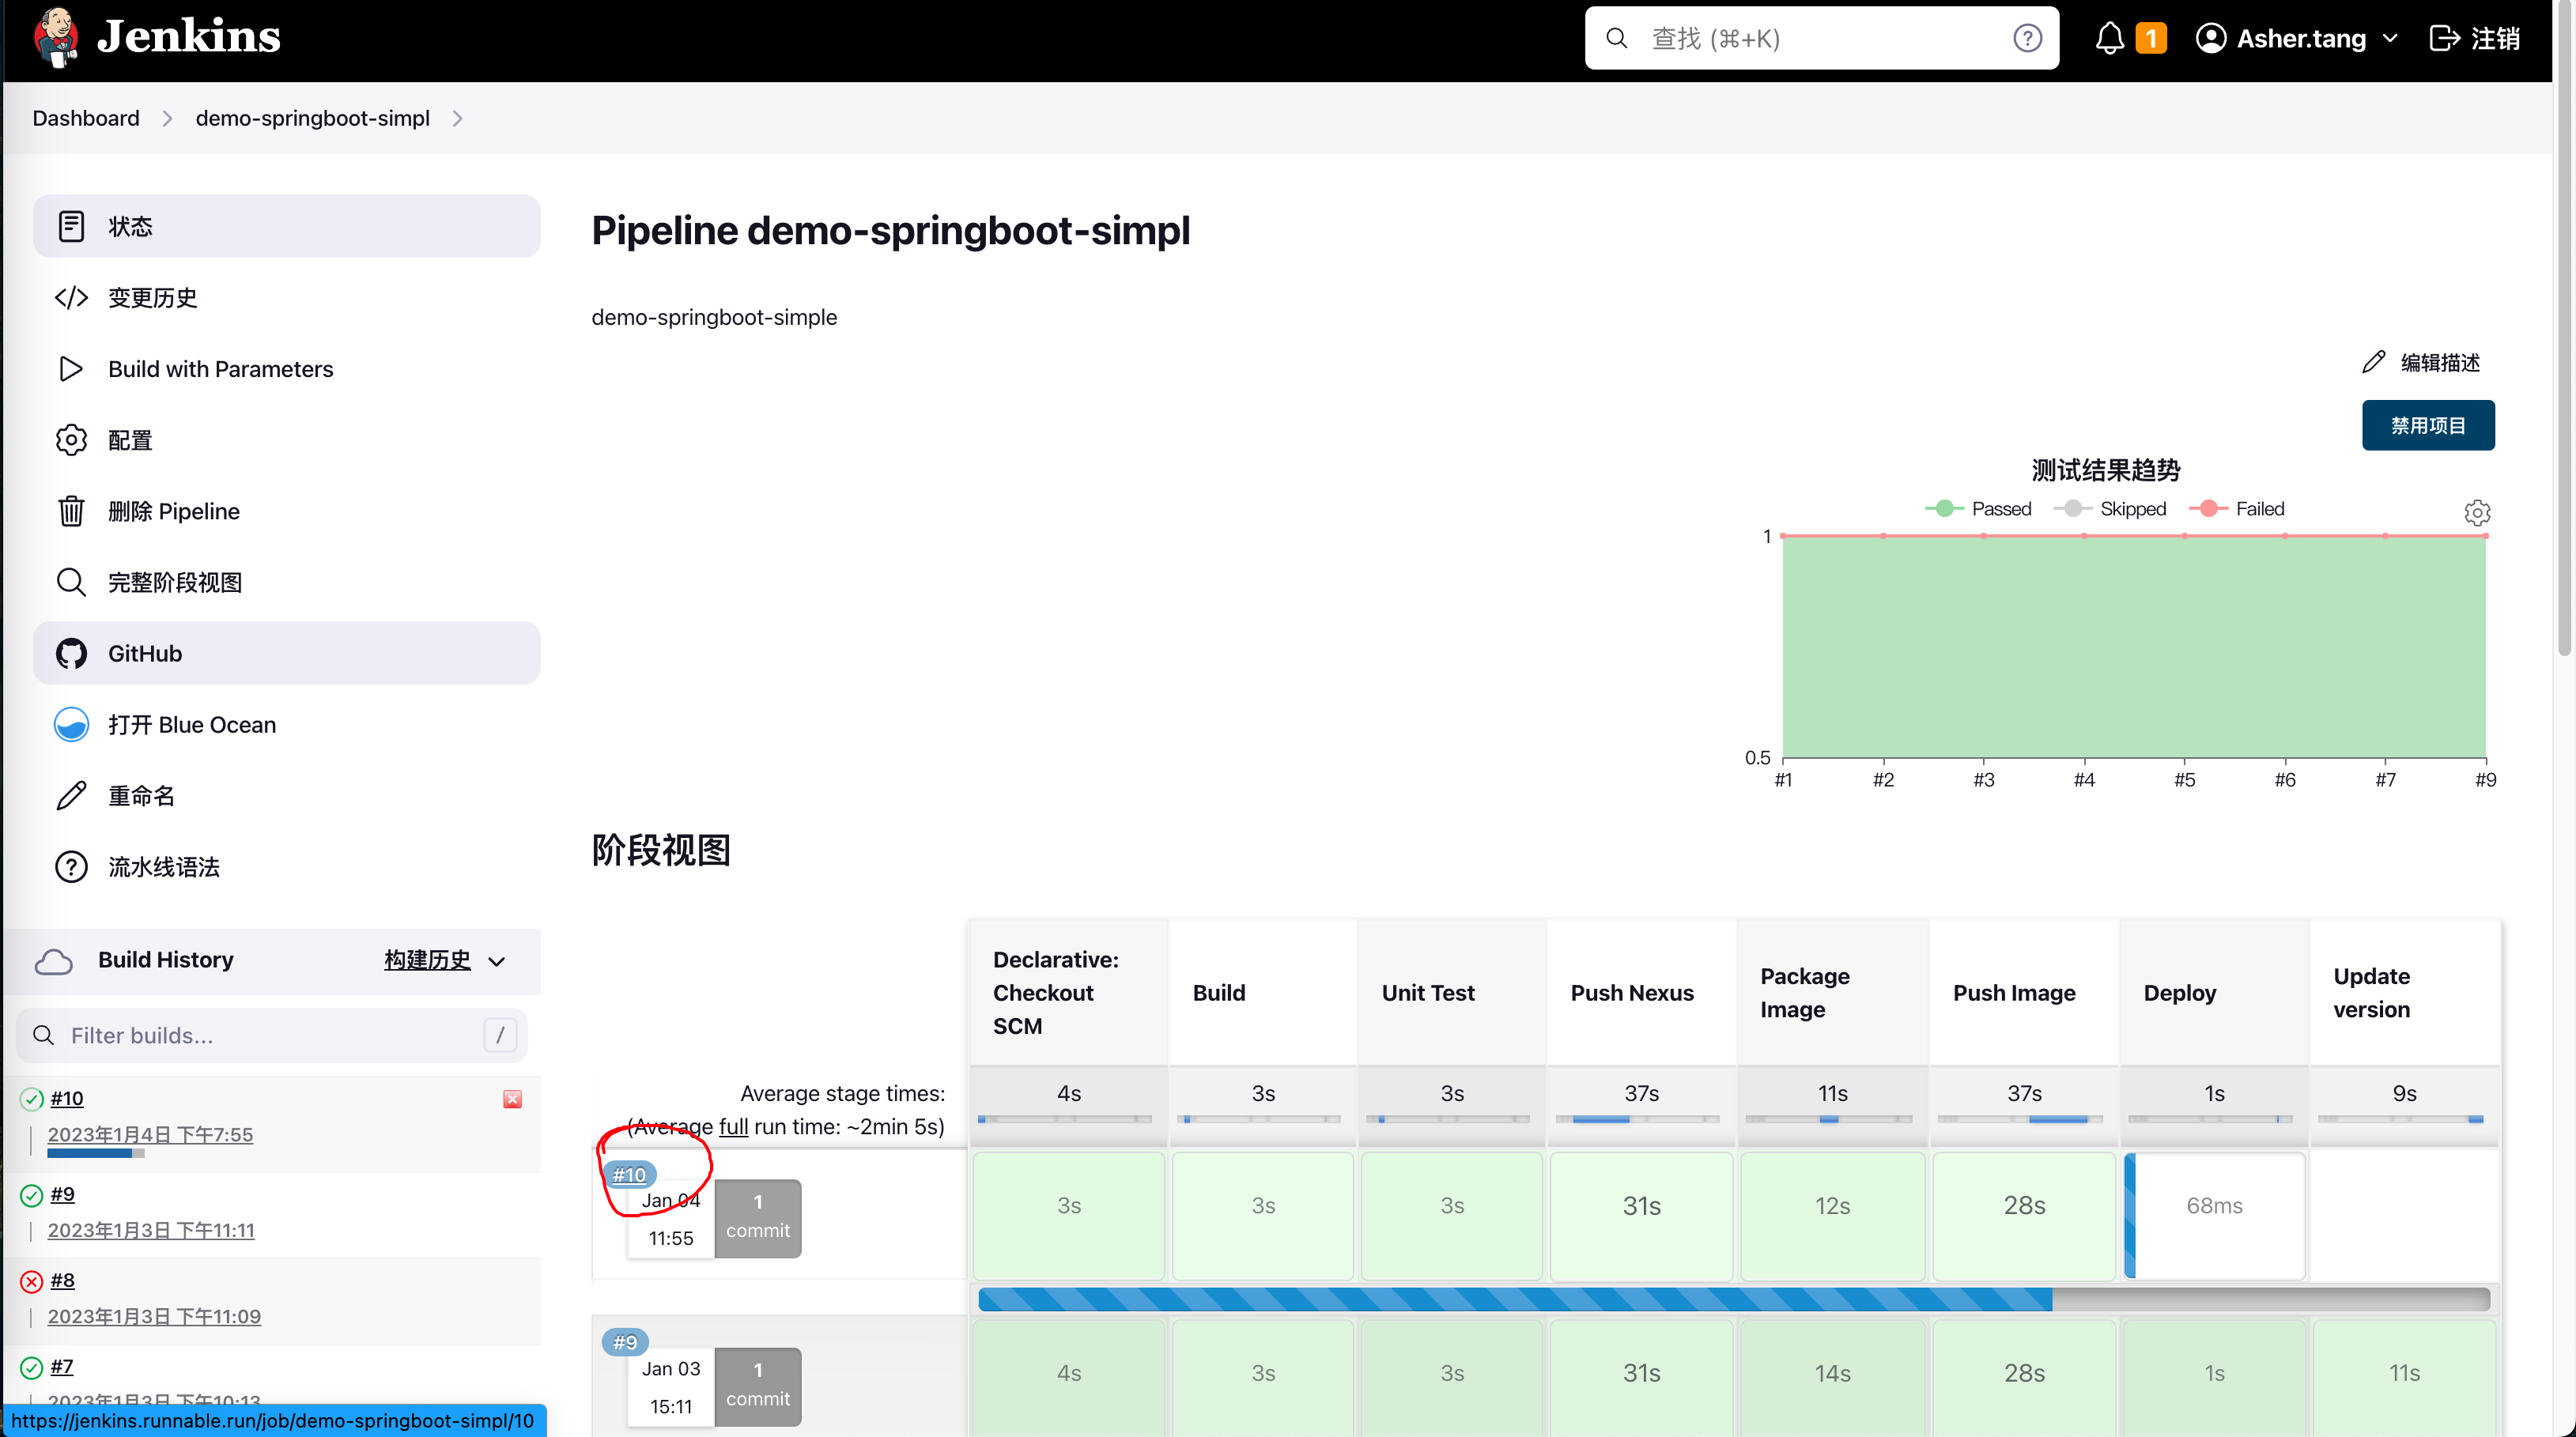
Finally, the last step. Return to the Jenkins panel, click Build with Parameters, enter your parameters, and build:

Now you can see the pipeline running:

The completed state should show all stages in green, and you should see a new container on your server:
[root@ecs-205431 ~]# docker ps -s
CONTAINER ID   IMAGE                                                                          COMMAND                  CREATED         STATUS         PORTS                                       NAMES                        SIZE
9c0ee6e2726f   registry.cn-hangzhou.aliyuncs.com/xxxx/demo-springboot-simple:0.0.4-SNAPSHOT   "/bin/sh -c 'java -j…"   3 minutes ago   Up 3 minutes   0.0.0.0:5002->5002/tcp, :::5002->5002/tcp   demo-springboot-simple-dev   32.8kB (virtual 419MB)
5. Troubleshooting
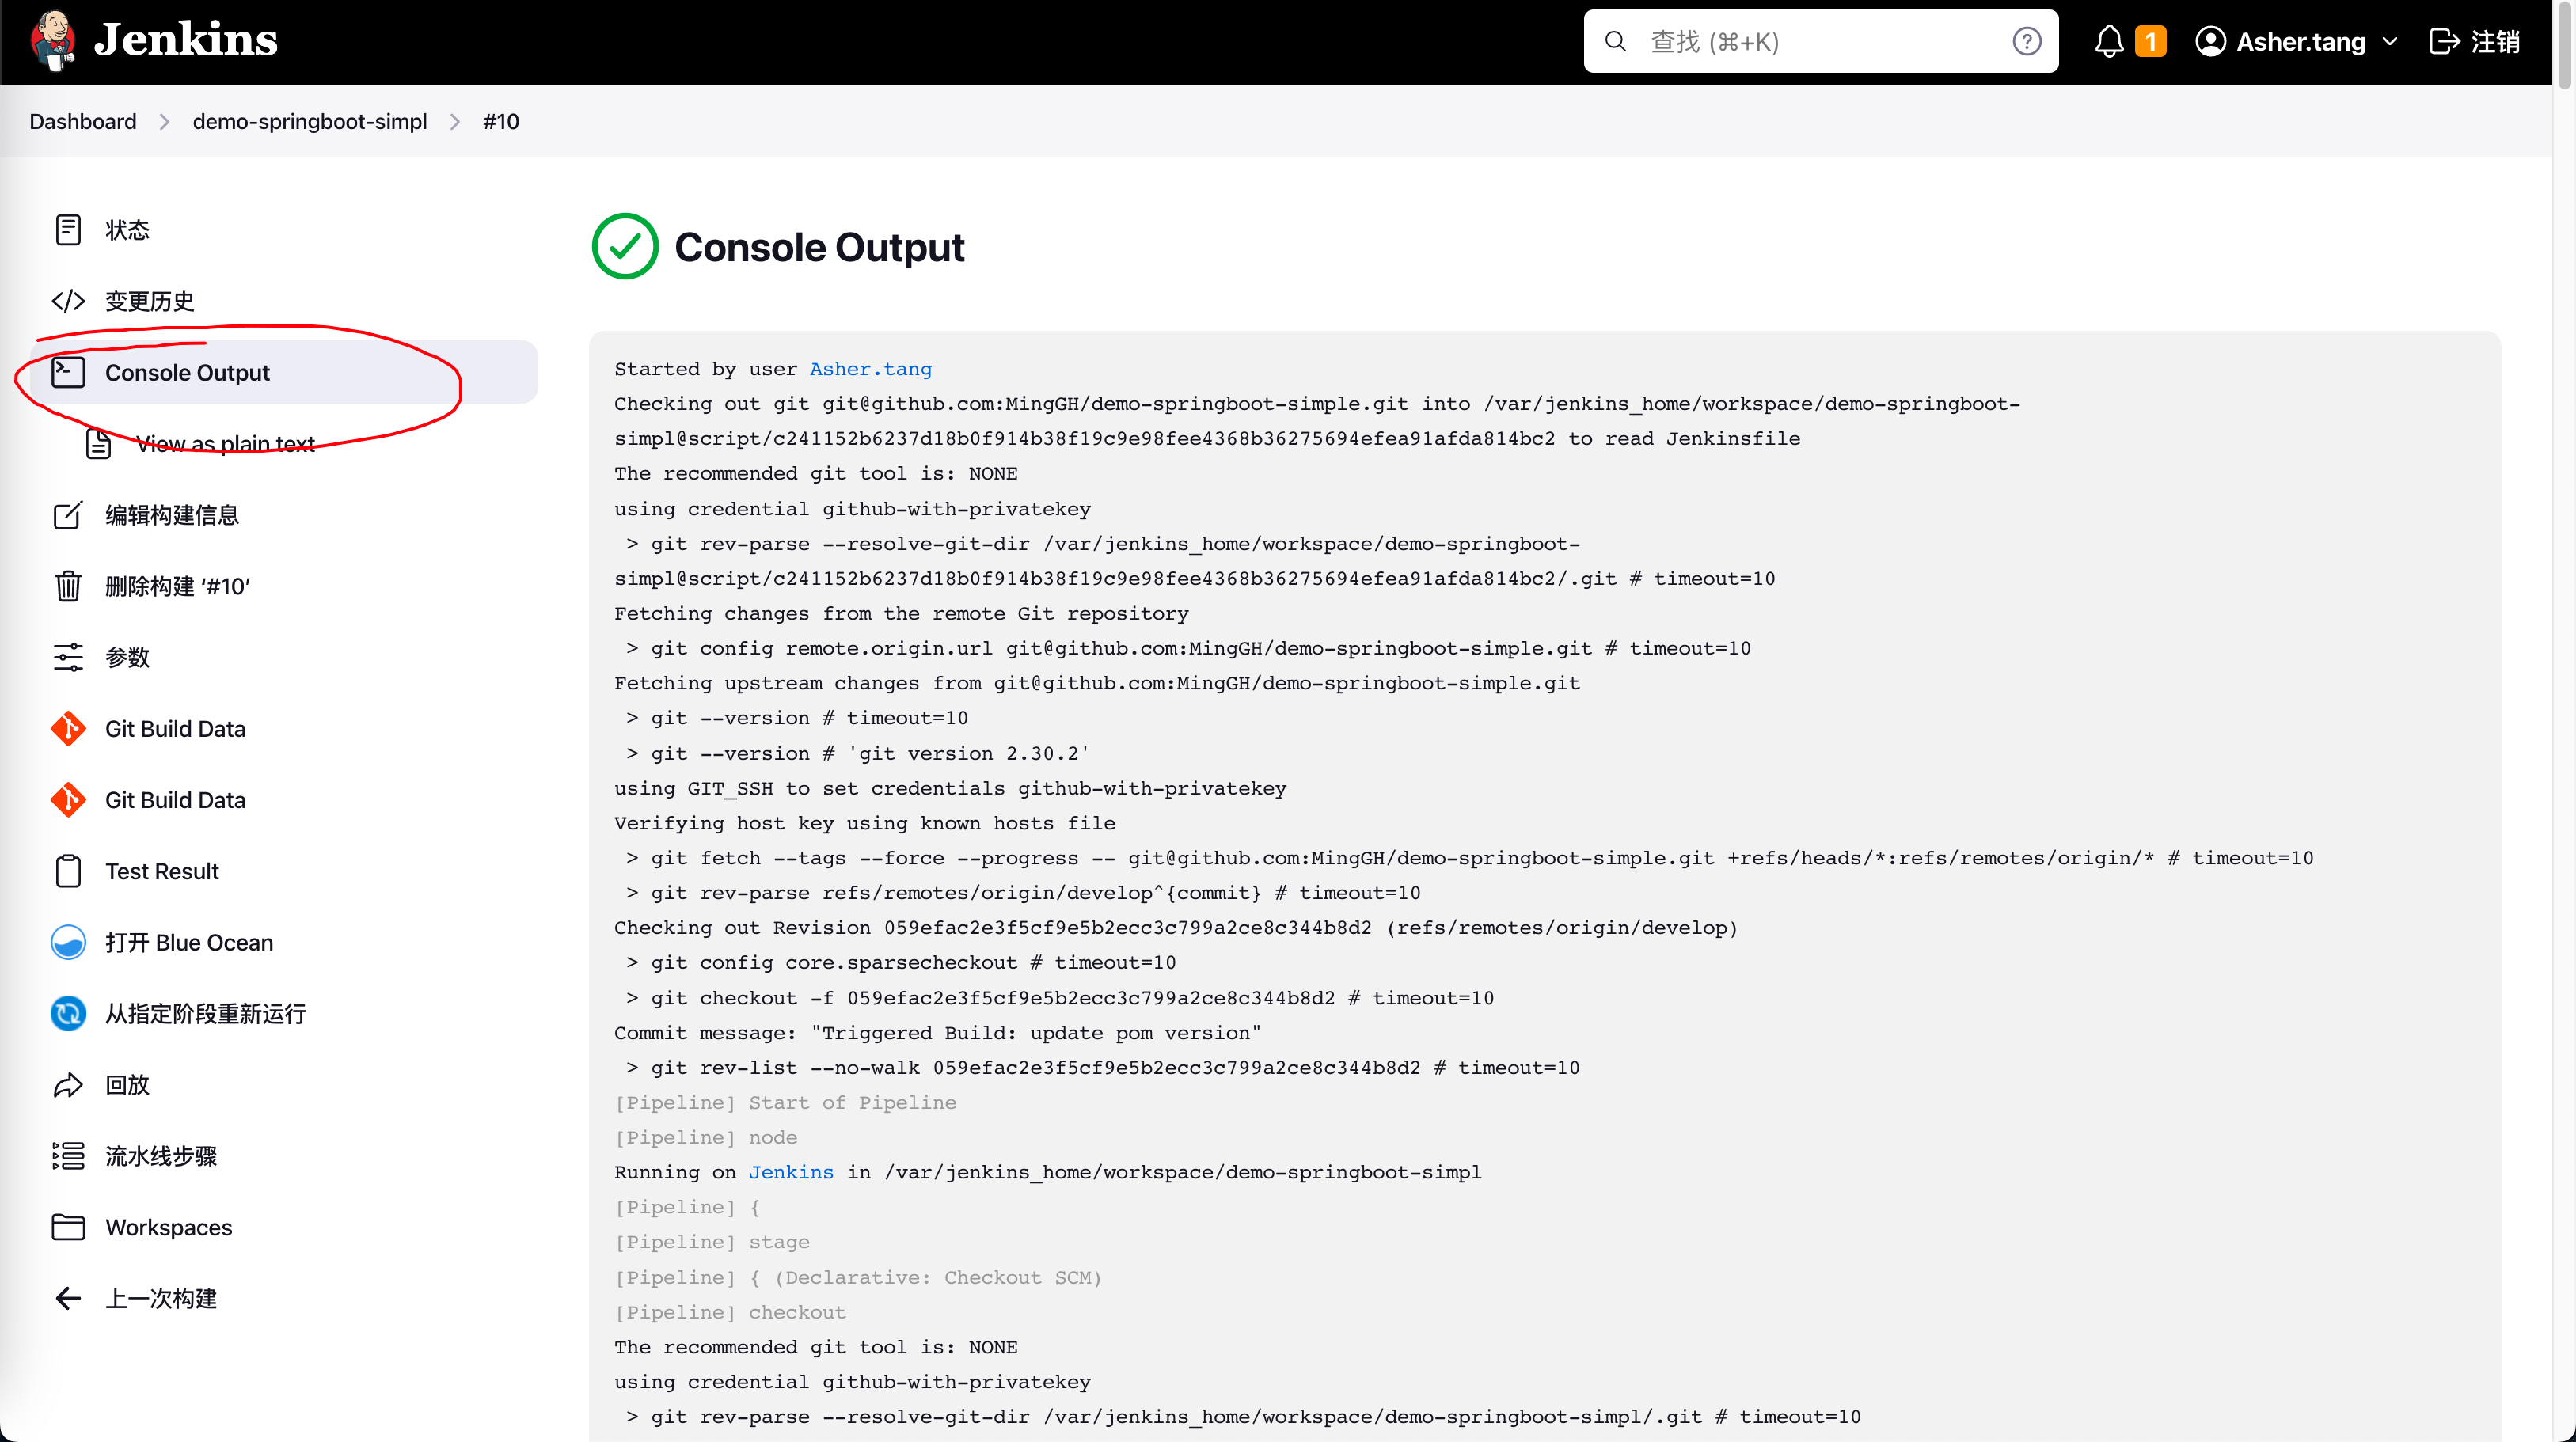
Since the process is long, don't panic when issues arise. Just click on that build process and check the logs.
6. References
The Problem With 'src refspec does not match any'
Error: src refspec master does not match any – How to Fix in Git
git: rename local branch failed
Jenkins Distributed and Parallel Builds
cut or awk command to print first field of first row
How to automatically increment pom version with maven, for example 1.2.0 to 1.3.0
Starting Spring Boot Application in Docker With Profile
One-Click Docker Image Deployment for SpringBoot Projects Using Jenkins