Part 2: Hands-on - SpringBoot and Elasticsearch Integration with WebFlux Reactive Programming
Part 2: SpringBoot Reactive Programming Integration with Elasticsearch
1. Preface
Last time we talked about installing Elasticsearch and Kibana. This time we'll cover SpringBoot Reactive Programming Integration with Elasticsearch.
I've already set up the project. I recommend pulling it down and running it first - reading along with the content below will give you a deeper understanding.
Code repository: demo-springboot-elasticsearch
2. How to Run the Project
After downloading the code, use the following command to copy http_ca.crt from the Elasticsearch container to overwrite elastic-search/http_ca.crt in the project:
docker cp elasticsearch:/usr/share/elasticsearch/config/certs/http_ca.crt .
Then change your Elasticsearch username and password in application-dev.yaml, and start!
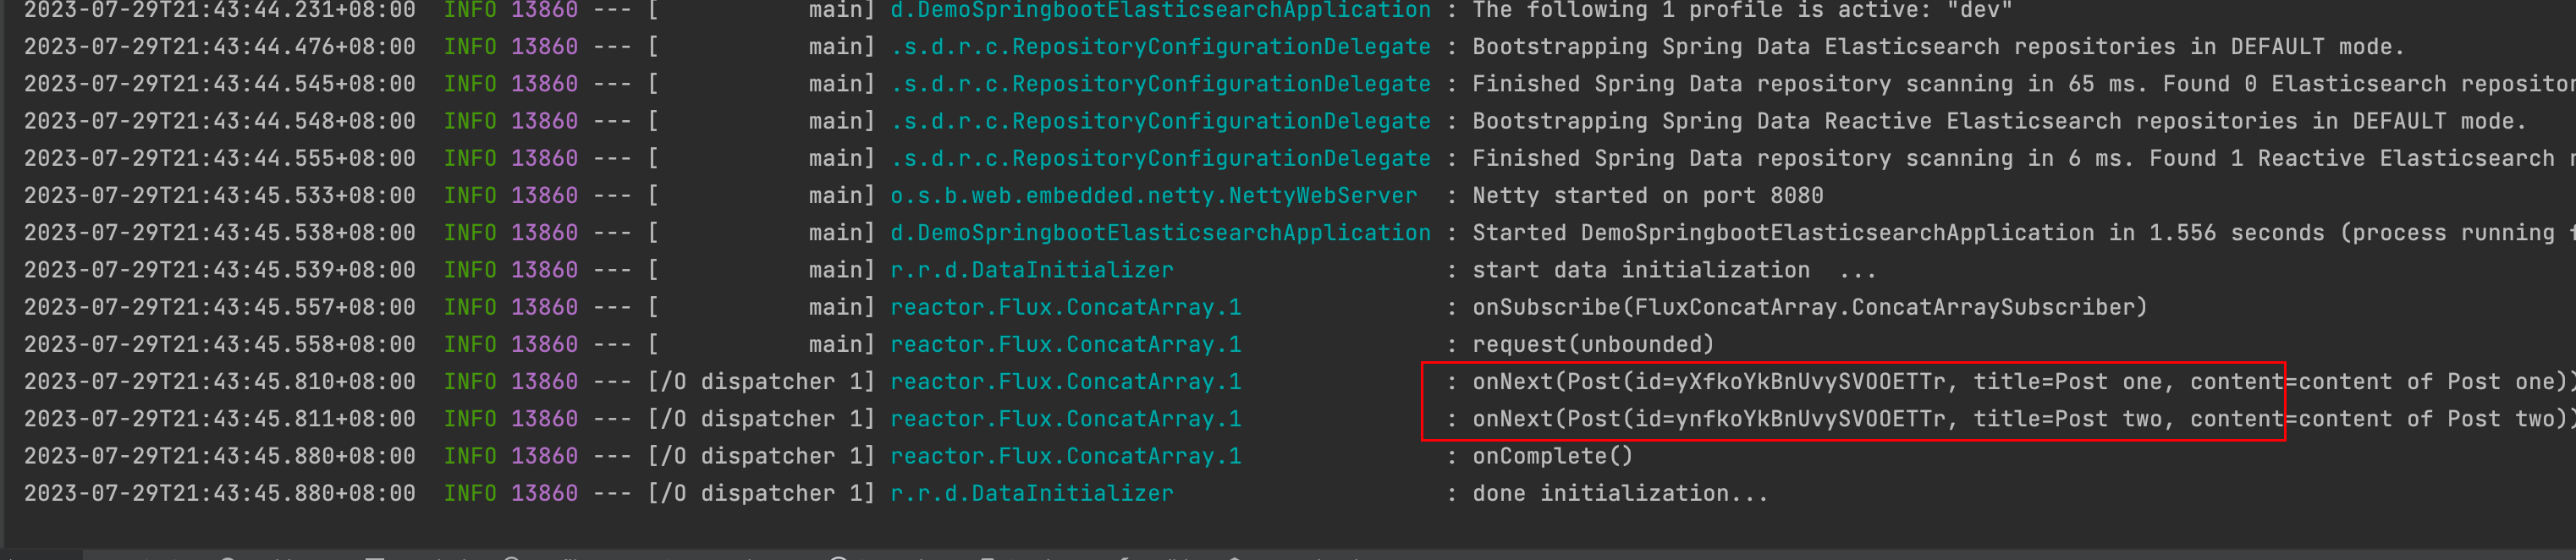
If everything goes well, you'll see two records inserted into ES.
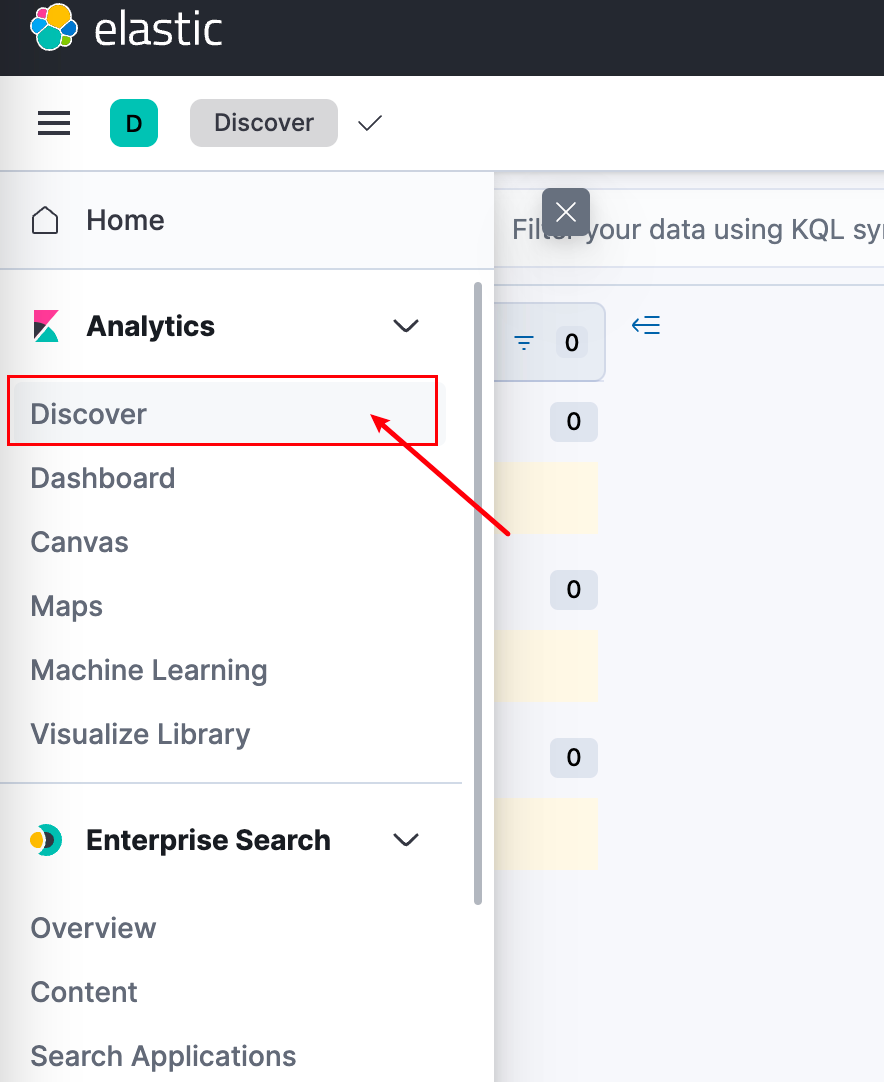
3. Viewing Data in ES
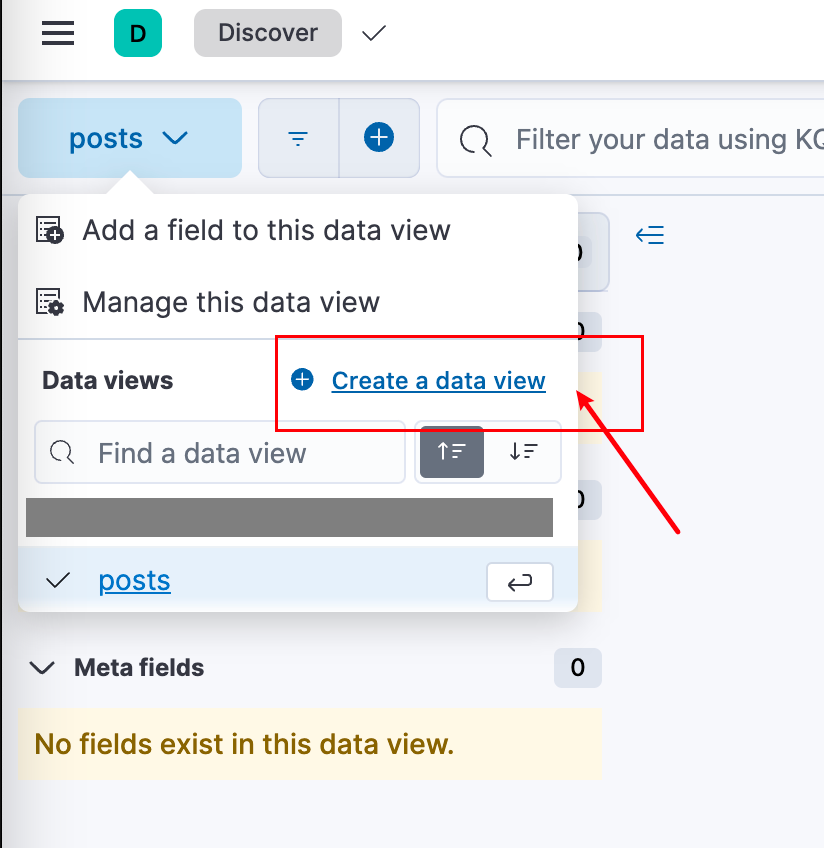
Create a DataView:
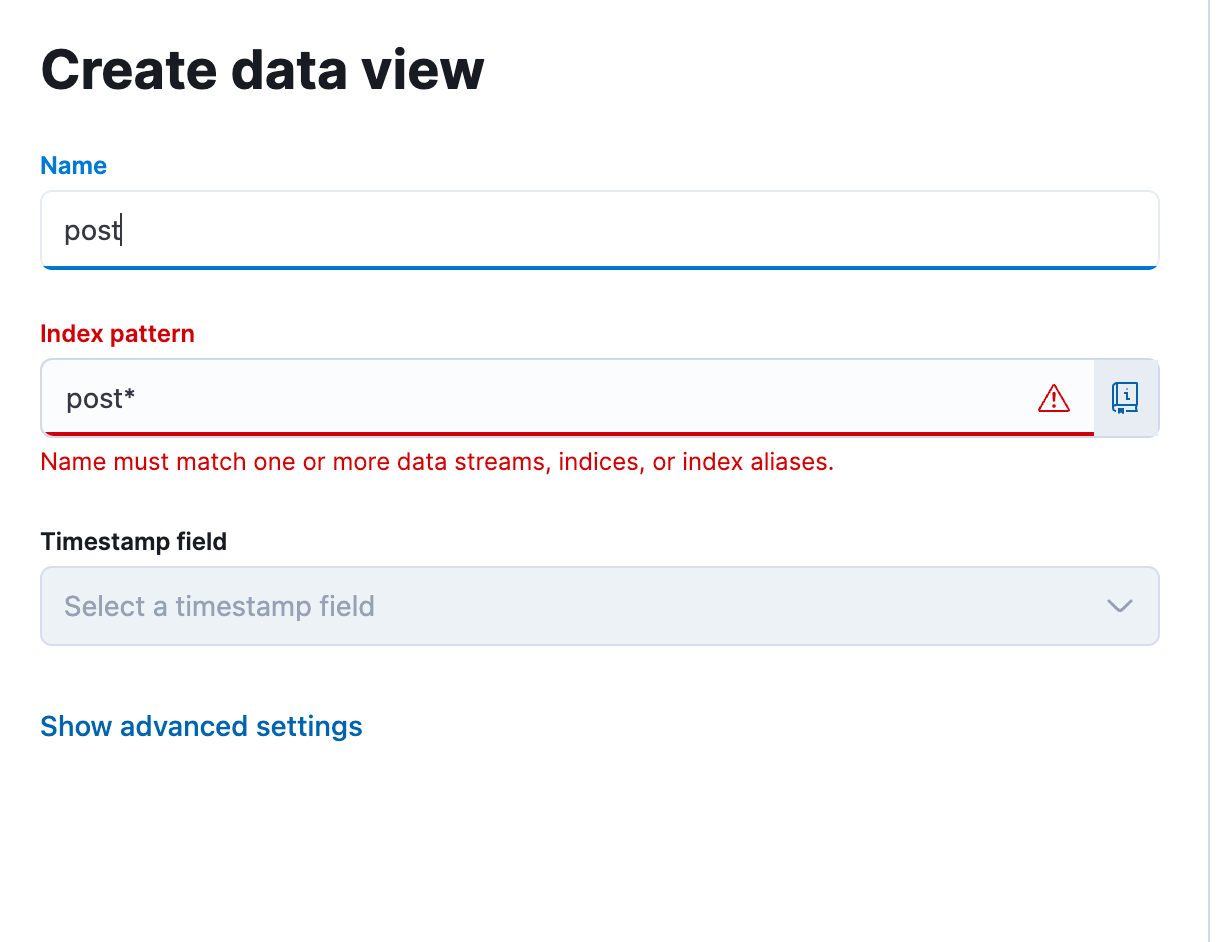
Then:
Then save:
4. Project Details
4.1 Choosing Spring Reactive Web Instead of spring-boot-starter-web
When building this SpringBoot WebFlux project, choose Spring Reactive Web, not spring-boot-starter-web.
Traditional spring-boot-starter-web is MVC architecture (model and view), which is very different from Spring Reactive.

Spring Reactive's most notable feature is the WebFlux framework, which provides a set of components for building reactive web applications. WebFlux supports two different programming models: functional programming model based on reactive streams and annotation-based reactive programming model.
All dependencies:
<dependencies>
    <dependency>
        <groupId>org.springframework.boot</groupId>
        <artifactId>spring-boot-starter-webflux</artifactId>
    </dependency>

    <dependency>
        <groupId>org.springframework.boot</groupId>
        <artifactId>spring-boot-starter-data-elasticsearch</artifactId>
    </dependency>

    <dependency>
        <groupId>org.projectlombok</groupId>
        <artifactId>lombok</artifactId>
        <optional>true</optional>
    </dependency>
    <dependency>
        <groupId>org.springframework.boot</groupId>
        <artifactId>spring-boot-starter-test</artifactId>
        <scope>test</scope>
    </dependency>
    <dependency>
        <groupId>io.projectreactor</groupId>
        <artifactId>reactor-test</artifactId>
        <scope>test</scope>
    </dependency>
</dependencies>
spring-boot-starter-data-elasticsearch is the dependency needed to connect to ES. Spring has created a dedicated documentation page explaining how to use it - many answers to questions I had while building this project were found there.
Link: Spring Data Elasticsearch - Reference Documentation
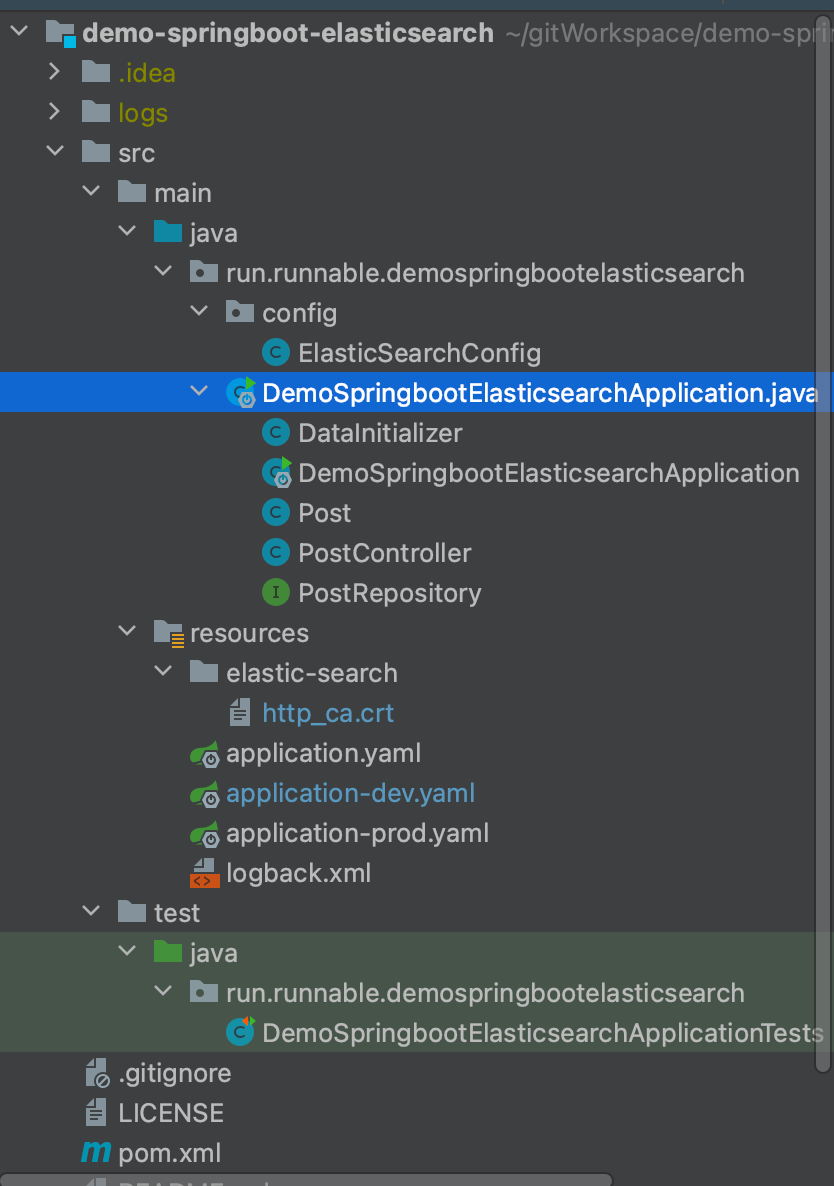
4.2 Project Structure
The entire project structure is as follows:
.
├── LICENSE
├── README.md
├── logs
│   └── start.log
├── pom.xml
└── src
    ├── main
    │   ├── java
    │   │   └── run
    │   │       └── runnable
    │   │           └── demospringbootelasticsearch
    │   │               ├── DemoSpringbootElasticsearchApplication.java
    │   │               └── config
    │   │                   └── ElasticSearchConfig.java
    │   └── resources
    │       ├── application-dev.yaml
    │       ├── application-prod.yaml
    │       ├── application.yaml
    │       ├── elastic-search
    │       │   └── http_ca.crt
    │       └── logback.xml
    └── test
        └── java
            └── run
                └── runnable
                    └── demospringbootelasticsearch
                        └── DemoSpringbootElasticsearchApplicationTests.java

15 directories, 12 files
When the project starts, it gets the specified configuration file based on the -Dspring.profiles.active=xxx startup parameter.
In ElasticSearchConfig, the object for connecting to Elasticsearch is created, which is ClientConfiguration.
4.3 ElasticSearchConfig
This class extends ReactiveElasticsearchConfiguration.
The main purpose of ReactiveElasticsearchConfiguration is to configure interaction with Elasticsearch for use as a data storage and retrieval backend in Reactive applications. By using this configuration class, you can:
- Set Elasticsearch connection information: Specify the Elasticsearch cluster's hostname, port, username, password, and other connection details.
- Configure Elasticsearch client: Set connection timeout, read timeout, and other client configuration parameters.
- Define ReactiveElasticsearchClient Bean: In the configuration class, define a ReactiveElasticsearchClient Bean that acts as the client for communicating with the Elasticsearch cluster.
- Set Elasticsearch index configuration: Define indexes and mappings for different entity classes, along with other index-related configurations.
- Integrate Spring Data Elasticsearch Repository: Create Reactive Elasticsearch Repositories by extending the
ReactiveElasticsearchRepositoryinterface for CRUD (Create, Read, Update, Delete) operations in your application.
@Configuration
public class ElasticSearchConfig extends ReactiveElasticsearchConfiguration {
    @Value("${spring.profiles.active}")
    public String env;
    @Value("${elastic.username}")
    public String esUsername;
    @Value("${elastic.password}")
    public String esPassword;
    @Value("${elastic.hostAndPort}")
    public String esHostAndPort;
    @Value("classpath:elastic-search/http_ca.crt")
    private Resource elasticCert;
    @SneakyThrows
    @Override
    public ClientConfiguration clientConfiguration() {
        return ClientConfiguration.builder()
                .connectedTo(esHostAndPort)
                .usingSsl(getSslContext(), (hostname, session) -> true)
                .withConnectTimeout(Duration.ofSeconds(5))
                .withSocketTimeout(Duration.ofSeconds(30))
                .withBasicAuth(esUsername, esPassword)
                .build();
    }

    /**
     * getSslContext
     */
    private SSLContext getSslContext()
            throws CertificateException, IOException, KeyStoreException, NoSuchAlgorithmException, KeyManagementException {

        Certificate ca = CertificateFactory.getInstance("X.509")
                .generateCertificate(elasticCert.getInputStream());

        // Create a KeyStore containing our trusted CAs
        String keyStoreType = KeyStore.getDefaultType();
        KeyStore keyStore = KeyStore.getInstance(keyStoreType);
        keyStore.load(null, null);
        keyStore.setCertificateEntry("ca", ca);

        // Create a TrustManager that trusts the CAs in our KeyStore
        String tmfAlgorithm = TrustManagerFactory.getDefaultAlgorithm();
        TrustManagerFactory tmf = TrustManagerFactory.getInstance(tmfAlgorithm);
        tmf.init(keyStore);

        // Create an SSLContext that uses our TrustManager
        SSLContext context = SSLContext.getInstance("TLS");
        context.init(null, tmf.getTrustManagers(), null);
        return context;
    }
}
In newer versions of ES, SSL connection is required, so the getSslContext method builds an sslContext object to put into the ClientConfiguration for ES requests, see this line:
.usingSsl(getSslContext(), (hostname, session) -> true)
(hostname, session) -> true is an optional parameter meaning don't verify ES's certificate, because ES's certificate is self-signed. What is self-signed?
A CA has a certificate (containing public and private keys). Public users on the internet trust the CA by verifying its signature. Anyone can get the CA's certificate (containing the public key) to verify certificates it issues. If a user wants their own certificate, they should apply to the CA. After the CA verifies the applicant's identity, it assigns a public key, binds it with the applicant's identity information, signs it, and issues the certificate. If a user wants to verify another certificate's authenticity, they use the CA's public key to verify the signature on that certificate. Once verified, the certificate is considered valid. A certificate is essentially the CA's authentication of a user's public key. -----------Baidu Encyclopedia
Self-signed means establishing your own CA and then issuing private and public keys. You can also read my previous blog post for more: From Scratch: Netty SSL-Based Bidirectional Encryption Verification for Message Transmission.
So when your code and ES host are on the same machine, you don't need this parameter. If on different machines, you need to add this parameter to skip ES certificate verification.
For more detailed configuration on connecting to ES in Spring Reactive, see: elasticsearch.clients.configuration
4.4 Data Initialization
In DemoSpringbootElasticsearchApplication, the DataInitializer's run method creates two records.
DataInitializer implements the CommandLineRunner interface, used to execute specific tasks or code blocks after Spring Boot application startup. It provides a simple way for developers to execute initialization logic or tasks immediately after application startup, such as loading initial data, executing scheduled tasks, initializing configurations, etc.
@Component
@Slf4j
class DataInitializer implements CommandLineRunner {
    private final PostRepository posts;
    public DataInitializer(PostRepository posts) {
        this.posts = posts;
    }

    @Override
    public void run(String[] args) {
        log.info("start data initialization  ...");
        final Flux<Post> saveFlux = Flux.just("Post one", "Post two")
							.map(title ->
										Post.builder().title(title).content("content of " + title).build()
							);
        this.posts.deleteAll()
                .thenMany(posts.saveAll(saveFlux))
                .log()
                .subscribe(
                        null,
                        null,
                        () -> log.info("done initialization...")
                );

    }
}
This code creates a reactive stream using Flux.just, and uses the map method to create Post objects for each item.
Then in the deleteAll method, all data in the ES index corresponding to Post is deleted, and the newly created Post objects are inserted:
this.posts.deleteAll().thenMany(posts.saveAll(saveFlux))
So what's the mapping relationship between the Post object and the ES index?
4.5 Post Object
Like most ORM frameworks, you can directly map table names and index names through annotations. Here we use the @Document annotation to map to the posts index in ES, but through SpEL expression, we dynamically get the -Dspring.profiles.active=xxx parameter at project startup. As an individual developer, the development environment is often the production environment, so we can only distinguish data by putting it in different tables and databases through naming.
If you're interested in SpEL expressions, Spring has a dedicated page explaining how to use them: Spring Expression Language (SpEL)
//get the active profile by SpEL Expression
@Document(indexName = "#{ @environment.getActiveProfiles()[0] + '-' + 'posts'}")
@Data
@ToString
@Builder
class Post {
    @Id
    private String id;

    @Field(store = true, type = FieldType.Text, fielddata = true)
    private String title;

    @Field(store = true, type = FieldType.Text, fielddata = true)
    private String content;
}
@Field(store = true, type = FieldType.Text, fielddata = true) - this Field specifies the type stored in the index and some default values. There are many optional parameters that I won't explain one by one here.
So the Post object provides the mapping relationship with the ES index, and finally inserts into ES through PostRepository.
PostRepository is simple - it extends ReactiveElasticsearchRepository, which already implements default methods for us to use, like save, saveAll, delete, etc. Since it's a reactive stream, they can be combined freely.
interface PostRepository extends ReactiveElasticsearchRepository<Post, String> {
}
That's all the content for this SpringBoot project. The next section will cover how to upload log files to ES for analysis using Filebeat.
Finally, you can combine this with my previous article Using Jenkins for one-click Docker image deployment of SpringBoot projects, jenkins + docker + springboot for one-click deployment to servers - that's what I do.
Next section: Part 3: Hands-on - SpringBoot and Elasticsearch Integration with WebFlux Reactive Programming