Mac Connecting to Windows Docker: Using ZeroTier to Connect Mac to WSL2 Docker on Windows 10
1. Background
Even the top-spec M1 MacBook only has 16GB RAM, which is tight for running VMs. But I wanted to develop on the M1-optimized JDK - projects that used to take 2 minutes to start now only take 20 seconds, which is incredibly tempting.
So why not use my 32GB Windows PC at home as a dedicated Docker server, while using the MacBook for development and remotely connecting to Docker on Windows?
2. Install WSL2 on Windows
Tutorial: Windows Subsystem for Linux Installation Guide (Windows 10)
After installation, open PowerShell and type wsl to enter WSL.
3. Install Docker on WSL2
Before installing, first change the package mirror source - otherwise downloads will be painfully slow.
3.1 Change Package Mirror Source
One command does it, from: http://mirrors.ustc.edu.cn/help/ubuntu.html
sudo sed -i 's/archive.ubuntu.com/mirrors.ustc.edu.cn/g' /etc/apt/sources.list
3.2 Install Docker
After installation, when starting you'll see: Cannot connect to the Docker daemon at unix:///var/run/docker.sock. Is the docker daemon running?
This is because the Docker service hasn't started yet. Since this is Docker installed on Ubuntu, start it with:
sudo service docker start
Now docker ps -a should show no images.
I'll build a Jenkins image to complete the remaining steps - Jenkins opens port 8080 on startup, so I can verify connectivity from Mac's browser using ip+port.
3.3 Install Jenkins via Docker
- Create a Dockerfile with the following content:
FROM jenkins/jenkins:2.289.3-lts-jdk11
USER root
RUN apt-get update && apt-get install -y apt-transport-https \
       ca-certificates curl gnupg2 \
       software-properties-common
RUN curl -fsSL https://download.docker.com/linux/debian/gpg | apt-key add -
RUN apt-key fingerprint 0EBFCD88
RUN add-apt-repository \
       "deb [arch=amd64] https://download.docker.com/linux/debian \
       $(lsb_release -cs) stable"
RUN apt-get update && apt-get install -y docker-ce-cli
USER jenkins
RUN jenkins-plugin-cli --plugins "blueocean:1.24.7 docker-workflow:1.26"
Build a new Docker image from this Dockerfile with a meaningful name like "myjenkins-blueocean:1.1":
docker build -t myjenkins-blueocean:1.1 .
Don't forget the "." at the end!
Run your myjenkins-blueocean:1.1 image as a container:
docker run \
  --name jenkins-blueocean \
  --detach \
  --env DOCKER_HOST=tcp://docker:2376 \
  --env DOCKER_CERT_PATH=/certs/client \
  --env DOCKER_TLS_VERIFY=1 \
  --publish 8080:8080 \
  --publish 50000:50000 \
  --volume jenkins-data:/var/jenkins_home \
  --volume jenkins-docker-certs:/certs/client:ro \
  myjenkins-blueocean:1.1
If this command has issues, try removing the \ and executing.
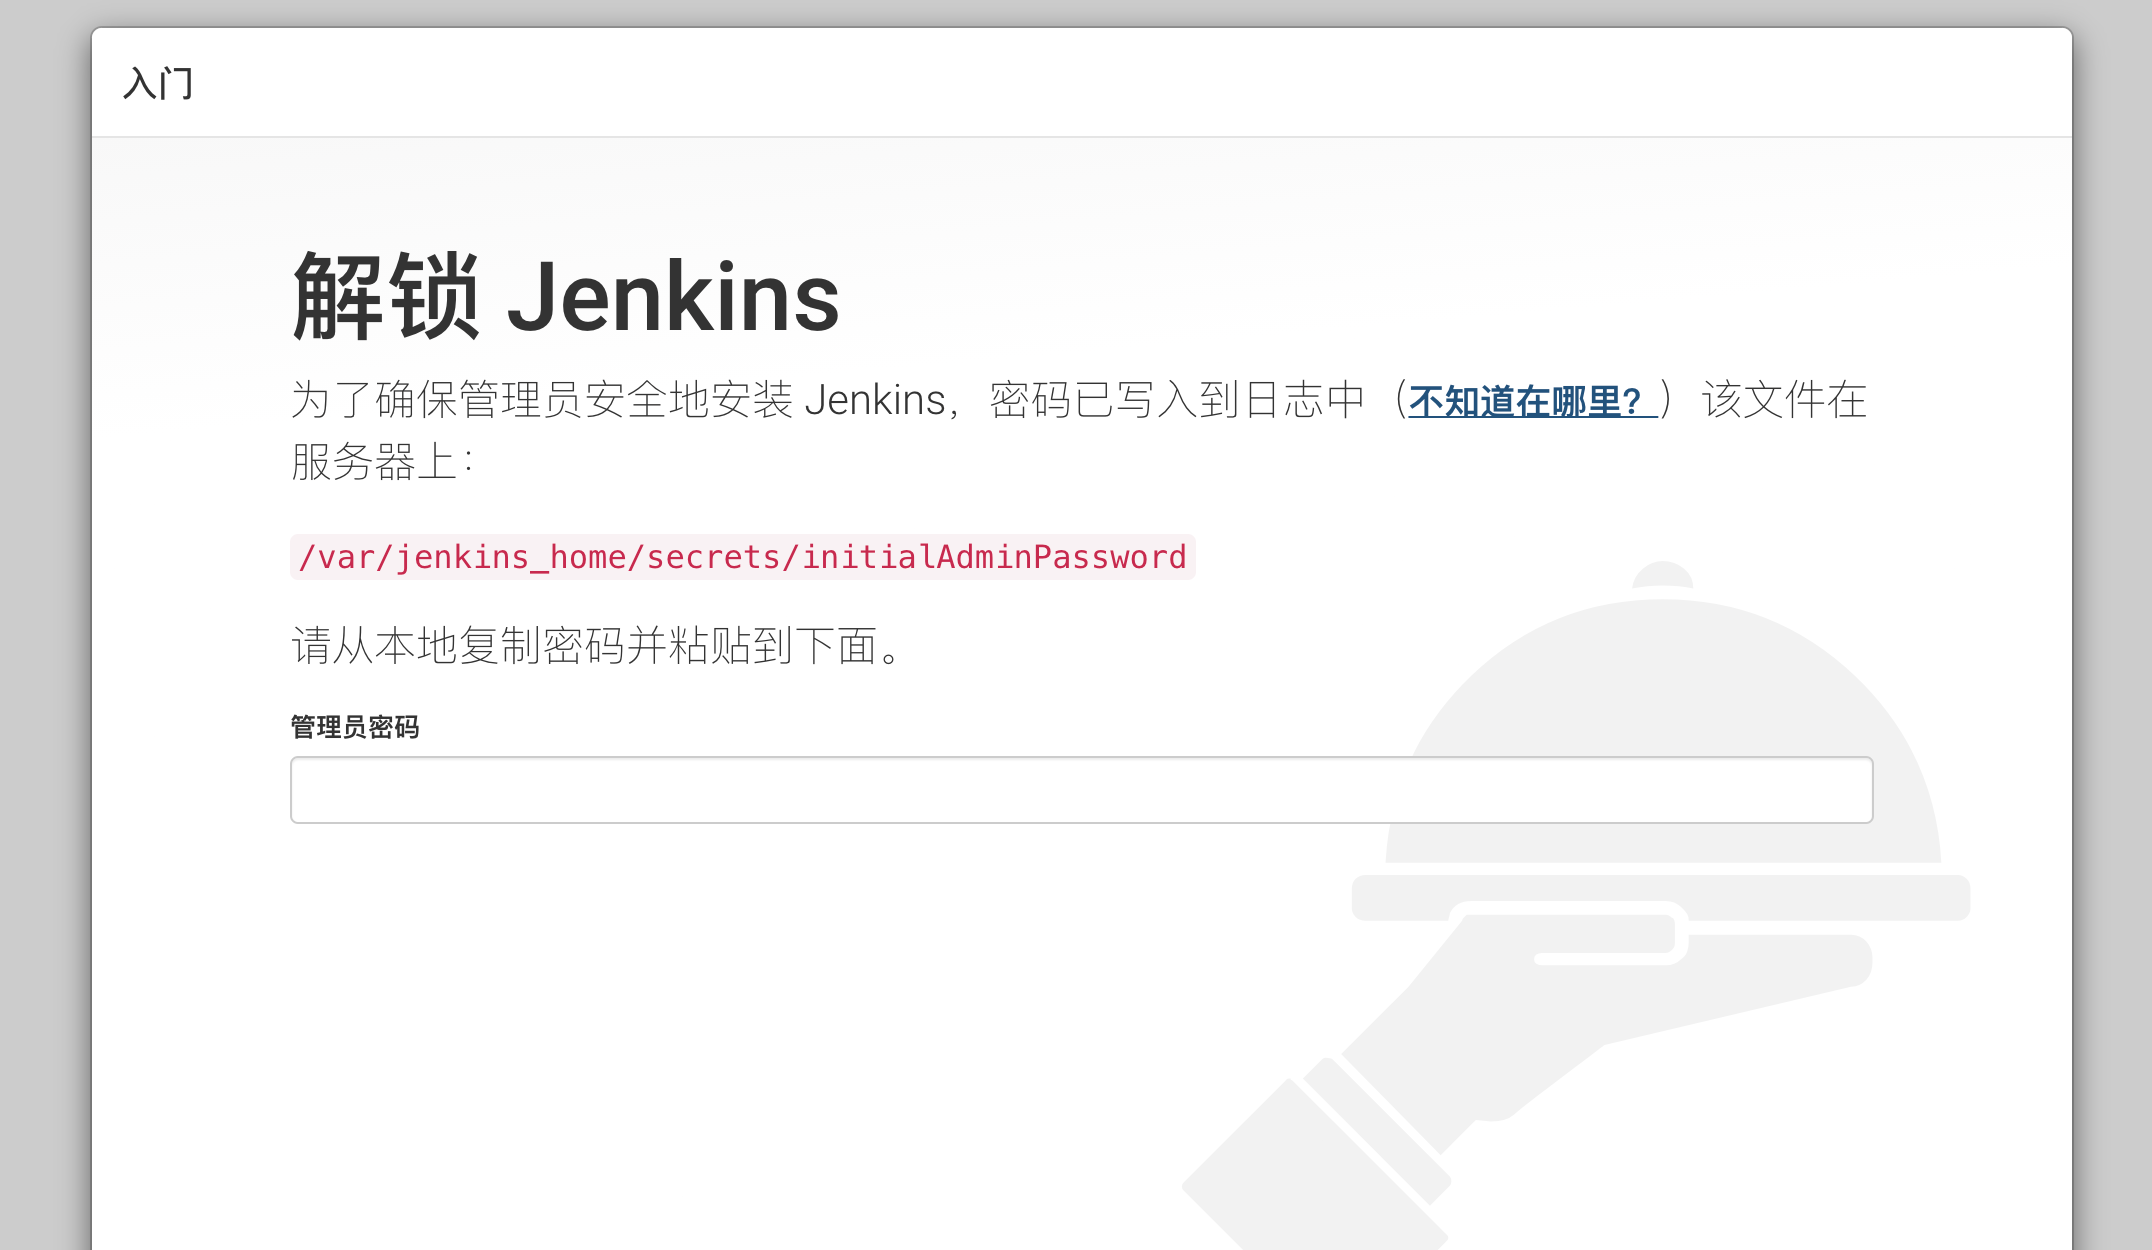
After installation, accessing http://127.0.0.1:8080 should show:
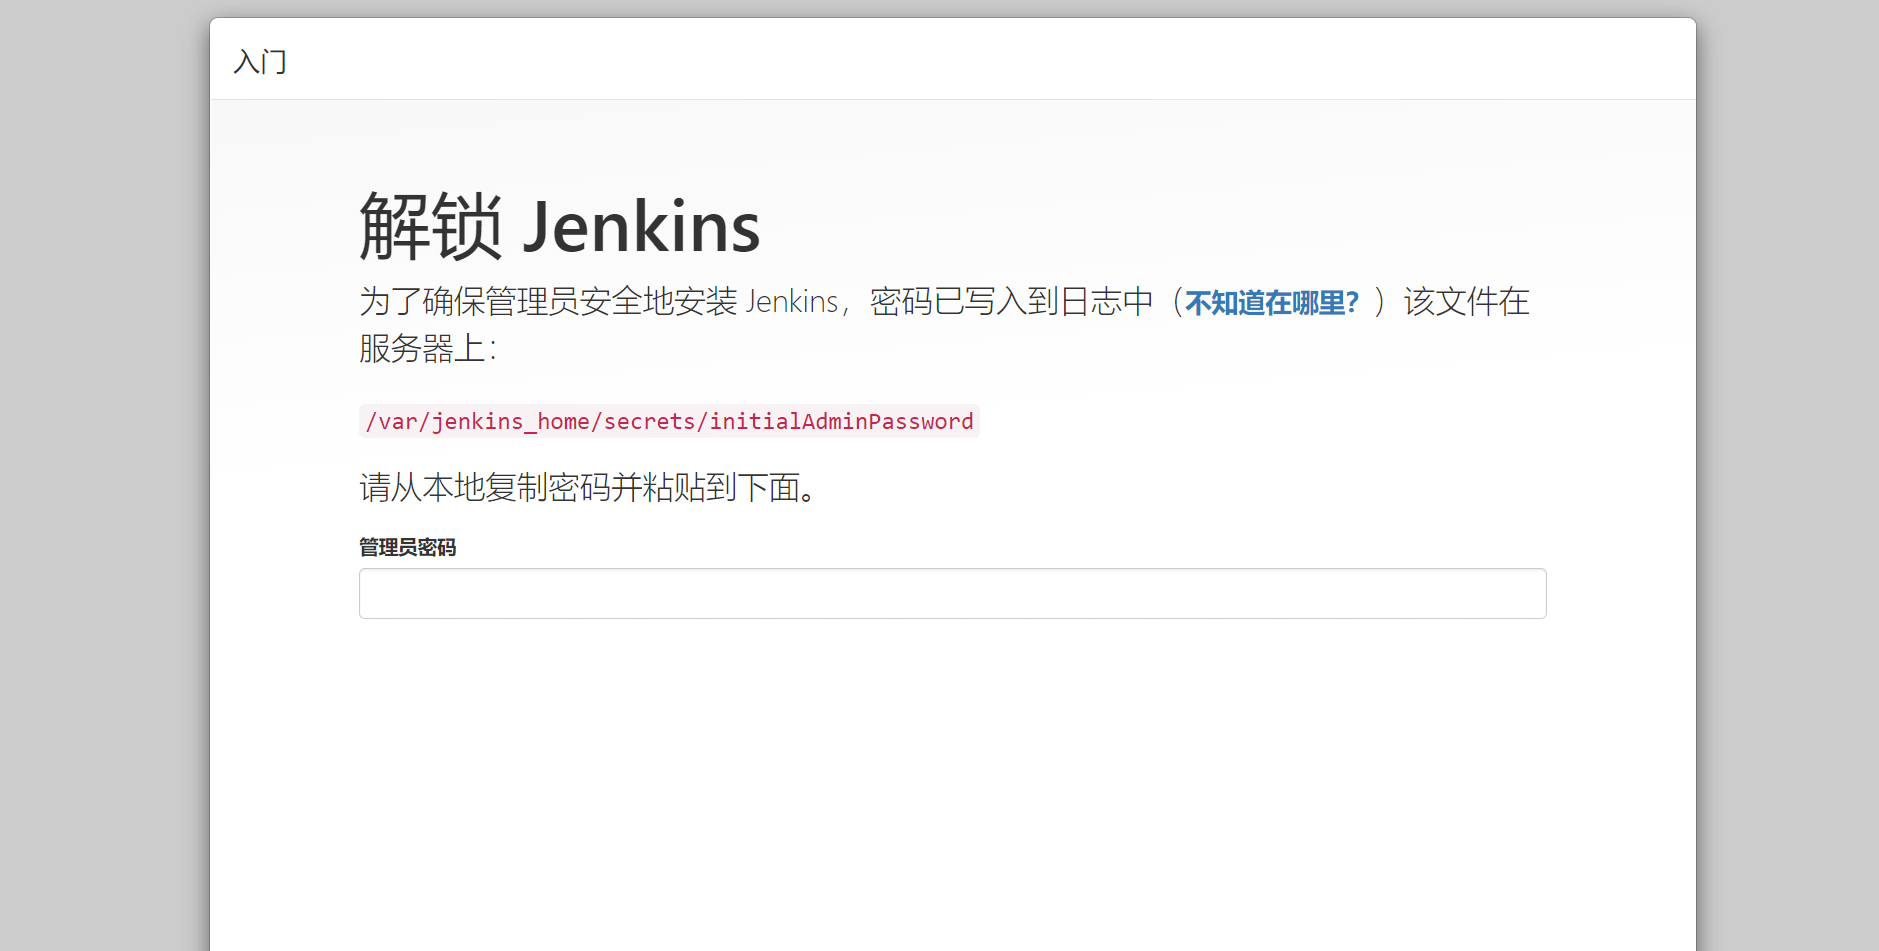
This confirms Docker on WSL2 is working.
4. Install SSH on WSL2
Ubuntu doesn't include SSH server and client by default, so you need to install them.
4.1 Install via apt
apt-get update
sudo apt-get install openssh-server
After installation, start the service:
sudo service ssh start
sudo /etc/init.d/ssh start
Test:
ssh <username>@<ip>
It probably won't work, showing 'Permission denied (publickey)'
4.2 Fixing 'Permission denied (publickey)'
In /etc/ssh/sshd_config, change PasswordAuthentication no to PasswordAuthentication yes
Then restart SSH:
/etc/init.d/ssh restart
Connection should work now.
5. Install ZeroTier
ZeroTier is a network tunneling tool. First, register an account on their website.
After logging in, you'll see:
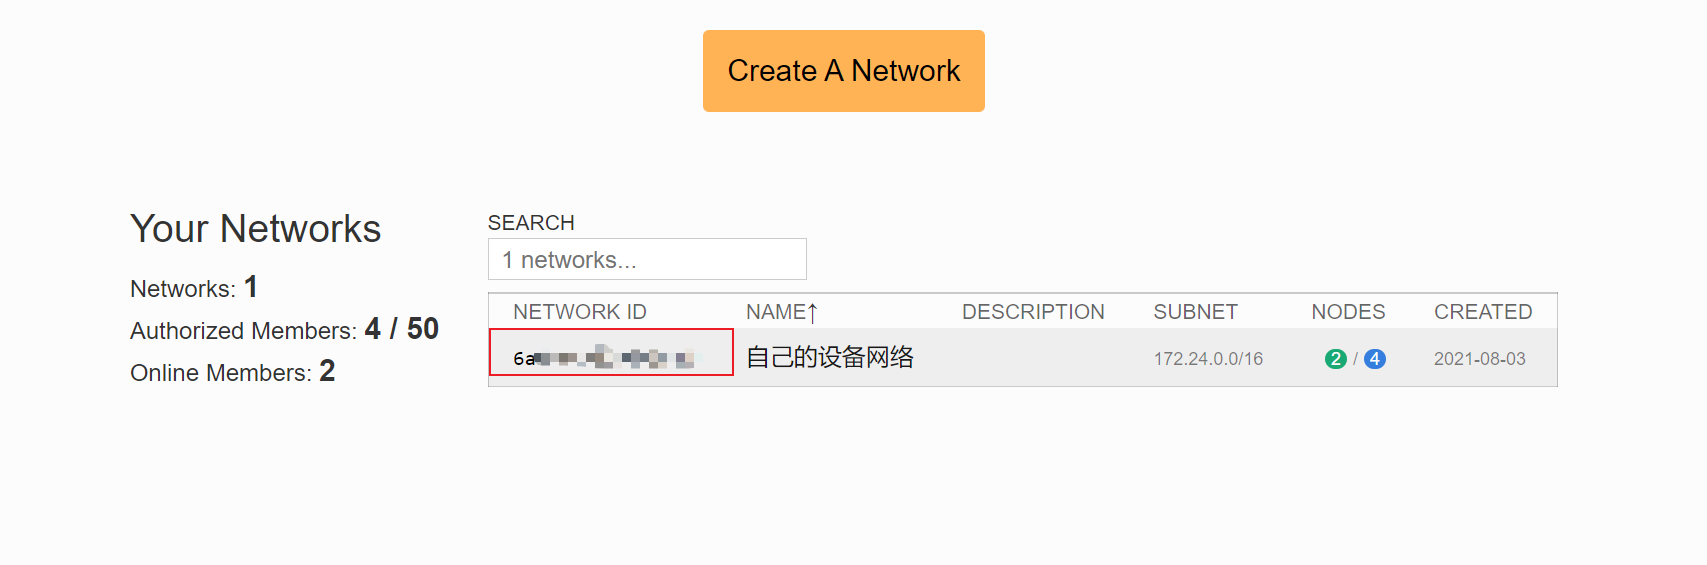
The circled NETWORK ID is what your Mac and WSL will join.
Find the download page:
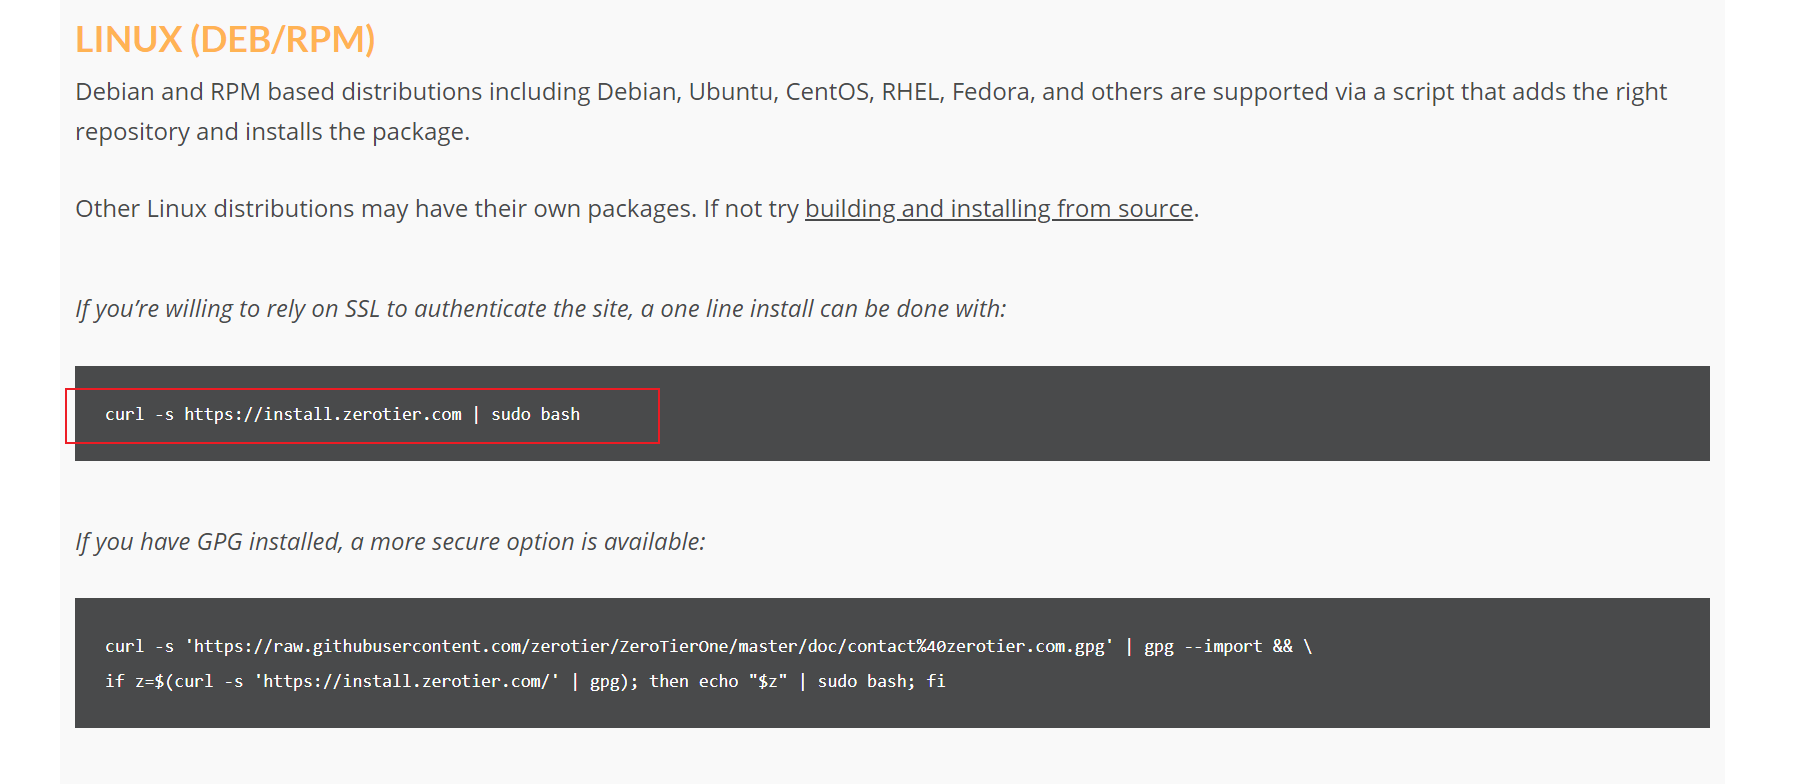
Enter this command in WSL:
curl -s https://install.zerotier.com | sudo bash
After installation, join the network:
sudo zerotier-cli join ################(networkid)
You might get an error: zerotier-cli: missing port and zerotier-one.port not found in /var/lib/zerot
5.1 Fixing zerotier-cli: missing port and zerotier-one.port not found in /var/lib/zerot
Just enter:
zerotier-one -d
Then rejoin your network.
After completion, go to the ZeroTier web page and authorize your new device:
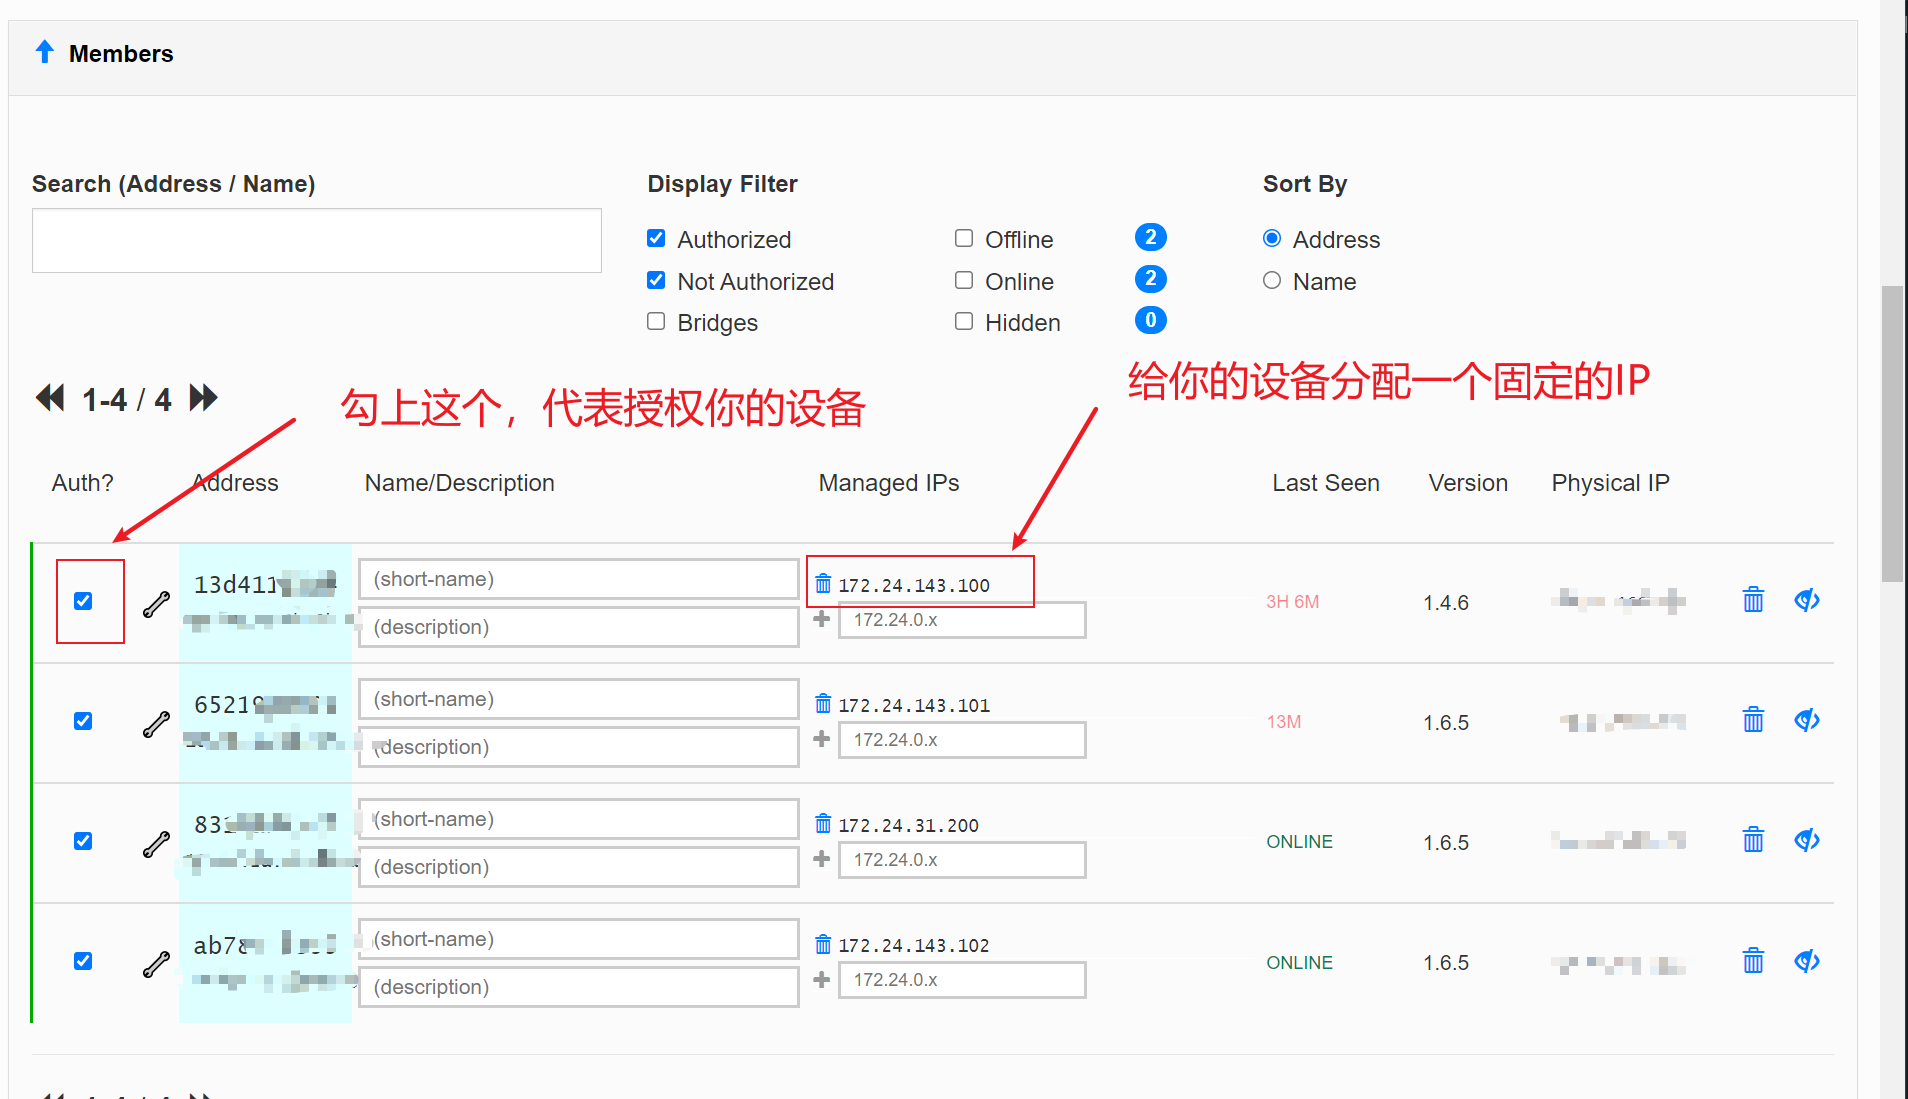
6. Install ZeroTier on Mac
This is even simpler - install and join the network:
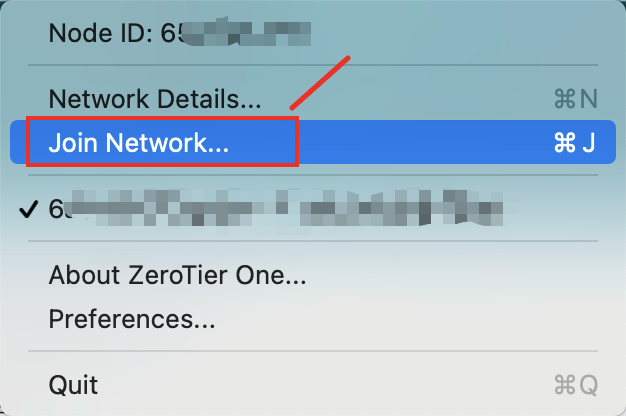
6.1 Try Connecting via Mac Terminal
Open Terminal, then create a new remote connection:
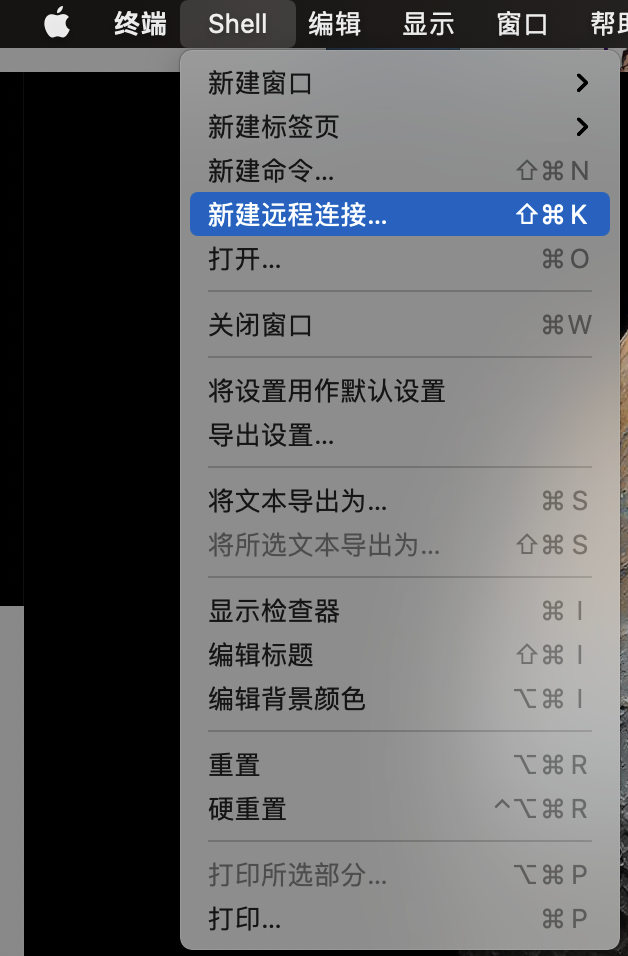
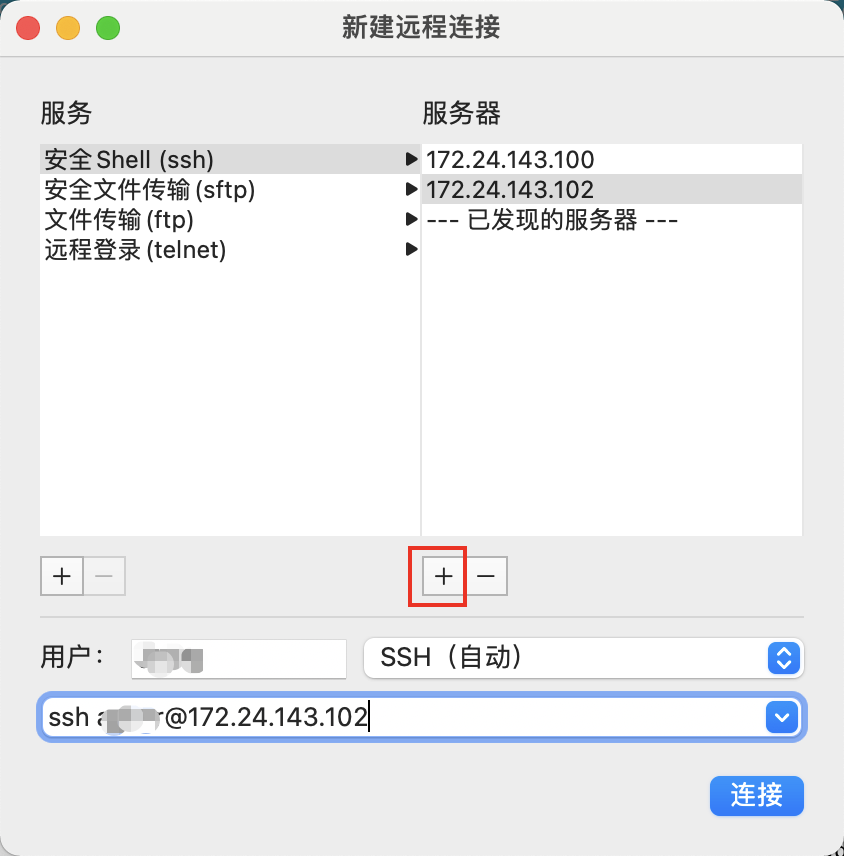
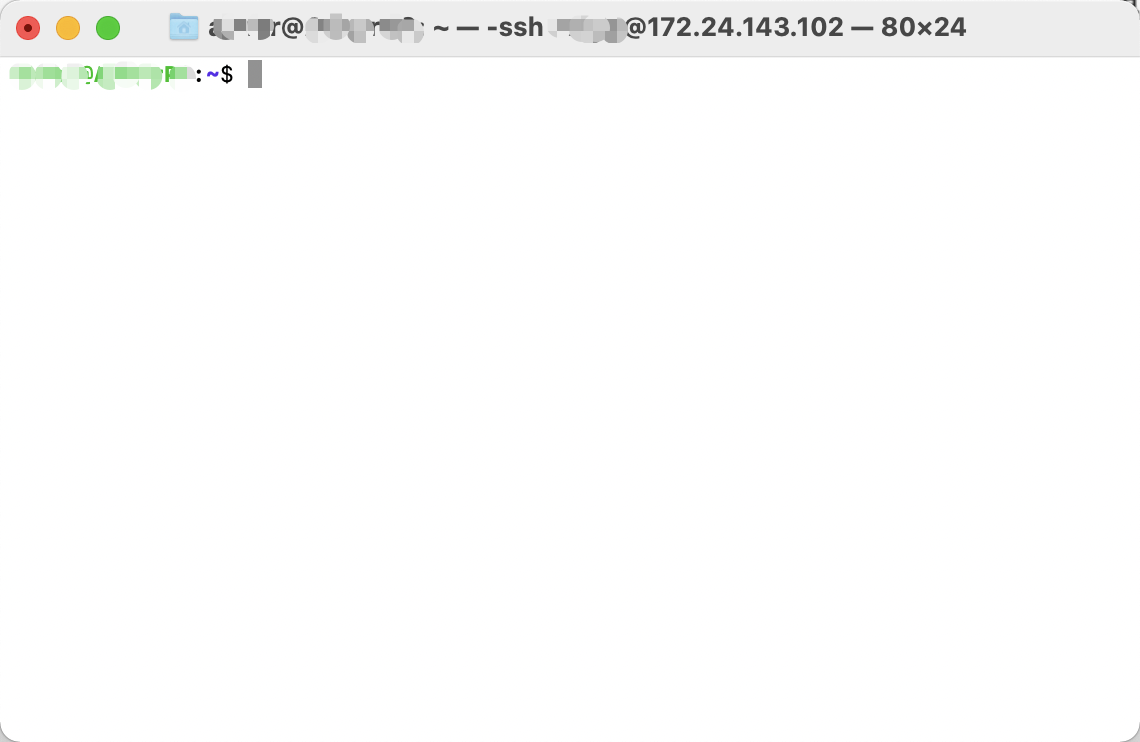
6.2 Test Access to WSL Service on Windows - Open Browser
Enter the ZeroTier-assigned IP for WSL + port:
If you've reached this step, congratulations - you've completed all the operations!