Original: https://docs.microsoft.com/en-us/windows-server/administration/openssh/openssh_install_firstuse
Installing OpenSSH
Applies to Windows Server 2019, Windows 10: Windows Server 2022
OpenSSH is a remote login connectivity tool using the SSH protocol. It encrypts all traffic between client and server to eliminate eavesdropping, connection hijacking, and other attacks.
OpenSSH can be used to connect Windows 10 (build 1809 and later) or Windows Server 2019 devices with OpenSSH Client installed to devices with OpenSSH Server installed.
Important If you downloaded OpenSSH from the PowerShell/openssh-portable GitHub repository, follow the instructions listed there, not the ones in this article.
Install OpenSSH Using Windows Settings
Both OpenSSH components can be installed using Windows Settings on Windows Server 2019 and Windows 10 devices.
To install OpenSSH components:
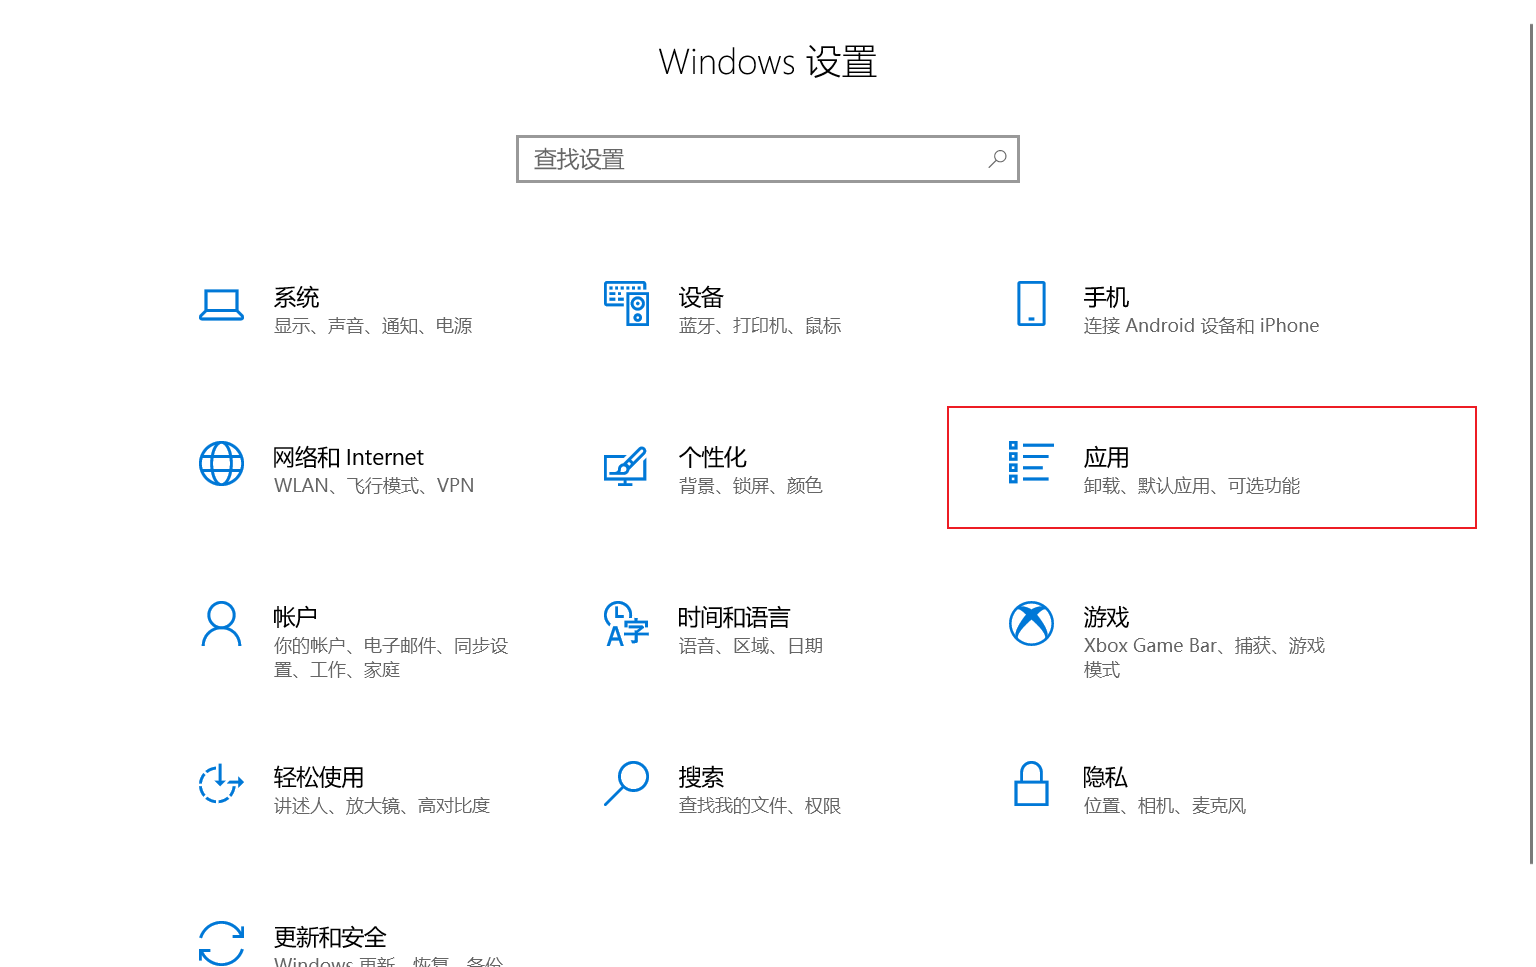
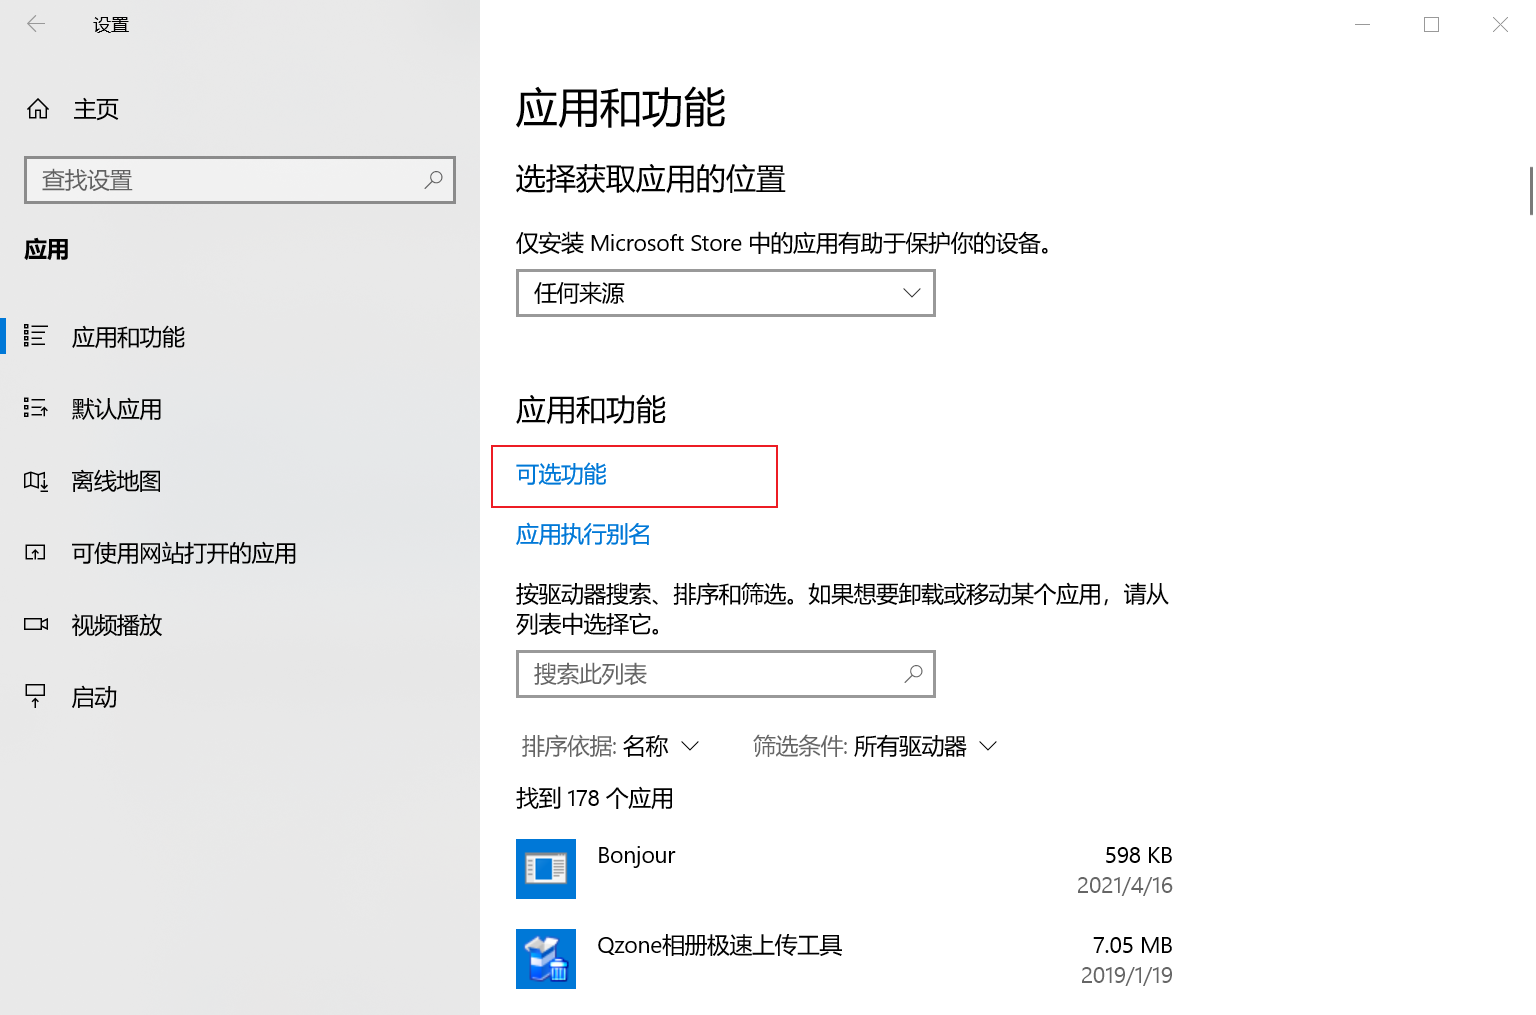
- Open Settings, select Apps > Apps & Features, then select Optional Features.
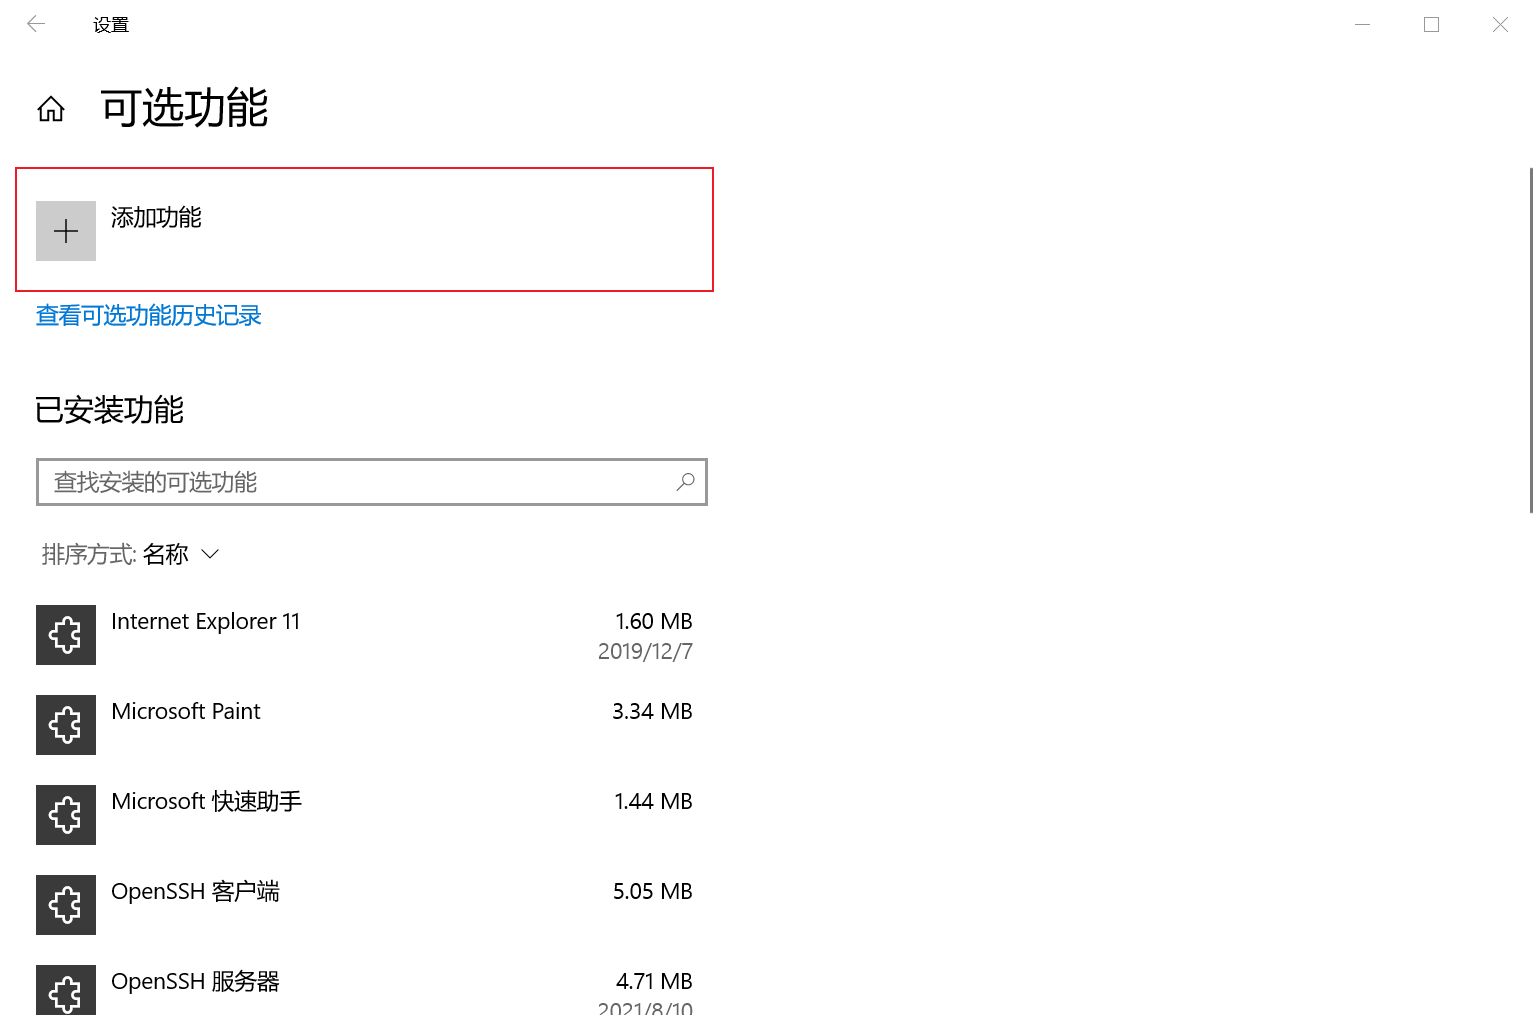 2. Scan the list to see if OpenSSH is already installed. If not, select Add a feature at the top of the page, then:
- Find OpenSSH Client, then click Install
- Find OpenSSH Server, then click Install
After setup is complete, return to Apps > Apps & Features and Optional Features, and you should see OpenSSH listed.
Note Installing OpenSSH Server will create and enable a firewall rule named OpenSSH-Server-In-TCP. This allows inbound SSH traffic on port 22. If this rule is not enabled and this port is not open, connections will be refused or reset.
Install OpenSSH Using PowerShell
To install OpenSSH using PowerShell, run PowerShell as Administrator. To ensure OpenSSH is available, run the following cmdlet:
Get-WindowsCapability -Online | ? Name -like 'OpenSSH*'
If neither is installed, this should return the following output:
Name  : OpenSSH.Client~~~~0.0.1.0
State : NotPresent

Name  : OpenSSH.Server~~~~0.0.1.0
State : NotPresent
Then install the server or client components as needed:
# Install PowerShell Client
Add-WindowsCapability -Online -Name OpenSSH.Client~~~~0.0.1.0

# Install PowerShell Server
Add-WindowsCapability -Online -Name OpenSSH.Server~~~~0.0.1.0
Both should return the following output:
Path          :
Online        : True
RestartNeeded : False
Start and Configure OpenSSH Server
To start and configure OpenSSH Server for initial use, open PowerShell as Administrator and run the following commands to start the sshd service:
# Start sshd service
Start-Service sshd

# Optional but recommended:
Set-Service -Name sshd -StartupType 'Automatic'

# Confirm the firewall rule is configured. It should be created automatically by the installer.
Get-NetFirewallRule -Name *ssh*

# There should be a firewall rule named "OpenSSH-Server-In-TCP", which should be enabled
# If the firewall doesn't exist, create one
New-NetFirewallRule -Name sshd -DisplayName 'OpenSSH Server (sshd)' -Enabled True -Direction Inbound -Protocol TCP -Action Allow -LocalPort 22
Connect to OpenSSH Server
Once installed, you can connect to OpenSSH Server from a Windows 10 or Windows Server 2019 device with OpenSSH Client installed using PowerShell as follows. Be sure to run PowerShell as Administrator:
ssh username@servername
Once connected, you'll receive a message similar to the following:
The authenticity of host 'servername (10.00.00.001)' can't be established.
ECDSA key fingerprint is SHA256:(<a large string>).
Are you sure you want to continue connecting (yes/no)?
Selecting yes adds that server to the list of known SSH hosts on your Windows client.
At this point, you'll be prompted for your password. For security, your password won't be displayed as you type.
Once connected, you'll see the Windows command shell prompt:
domain\username@SERVERNAME C:\Users\username>
Uninstall OpenSSH Using Windows Settings
To uninstall OpenSSH using Windows Settings:
- Open Settings, then go to Apps > Apps & Features.
- Go to Optional Features.
- In the list, select OpenSSH Client or OpenSSH Server.
- Select Uninstall.
Uninstall OpenSSH Using PowerShell
# Uninstall OpenSSH Client
Remove-WindowsCapability -Online -Name OpenSSH.Client~~~~0.0.1.0

# Uninstall OpenSSH Server
Remove-WindowsCapability -Online -Name OpenSSH.Server~~~~0.0.1.0
You may need to restart Windows after uninstalling if the service was in use at the time.