Complete Beginner's Guide to C++ SQLite Connection with CRUD Operations
1. Preface
Originally, a friend was about to graduate from college but still didn't know anything, and he was studying embedded development, so I wrote this tutorial for him to get started quickly.
2. Download CLion Nova and DataGrip
CLion: A Cross-Platform IDE for C and C++ by JetBrains
Make sure to download the latest version of DataGrip!
DataGrip: The Cross-Platform IDE for Databases & SQL by JetBrains

3. Understanding Databases
A database is a warehouse that stores data using specific structures. It's nothing fancy - Excel is also a form of database.
The format of data queried from a database is no different from Excel.
SQLite is just one type of database that supports common CRUD operations. Due to SQLite's characteristics, data is stored in a single file, so we can directly create a file test.sqlite as the database file for subsequent operations.
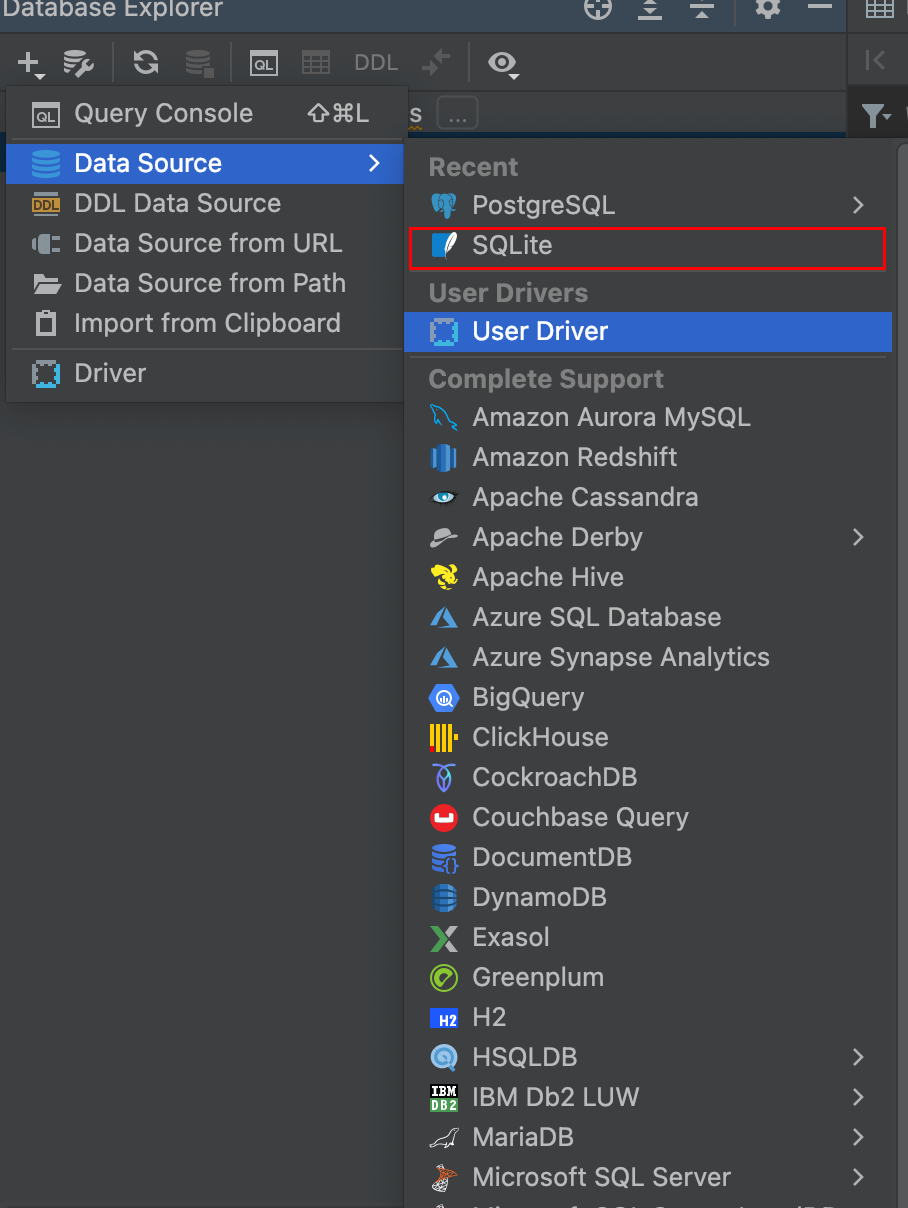
3.1 Using DataGrip to Connect to Database
Select SQLite:
Select the file you just created, then save:
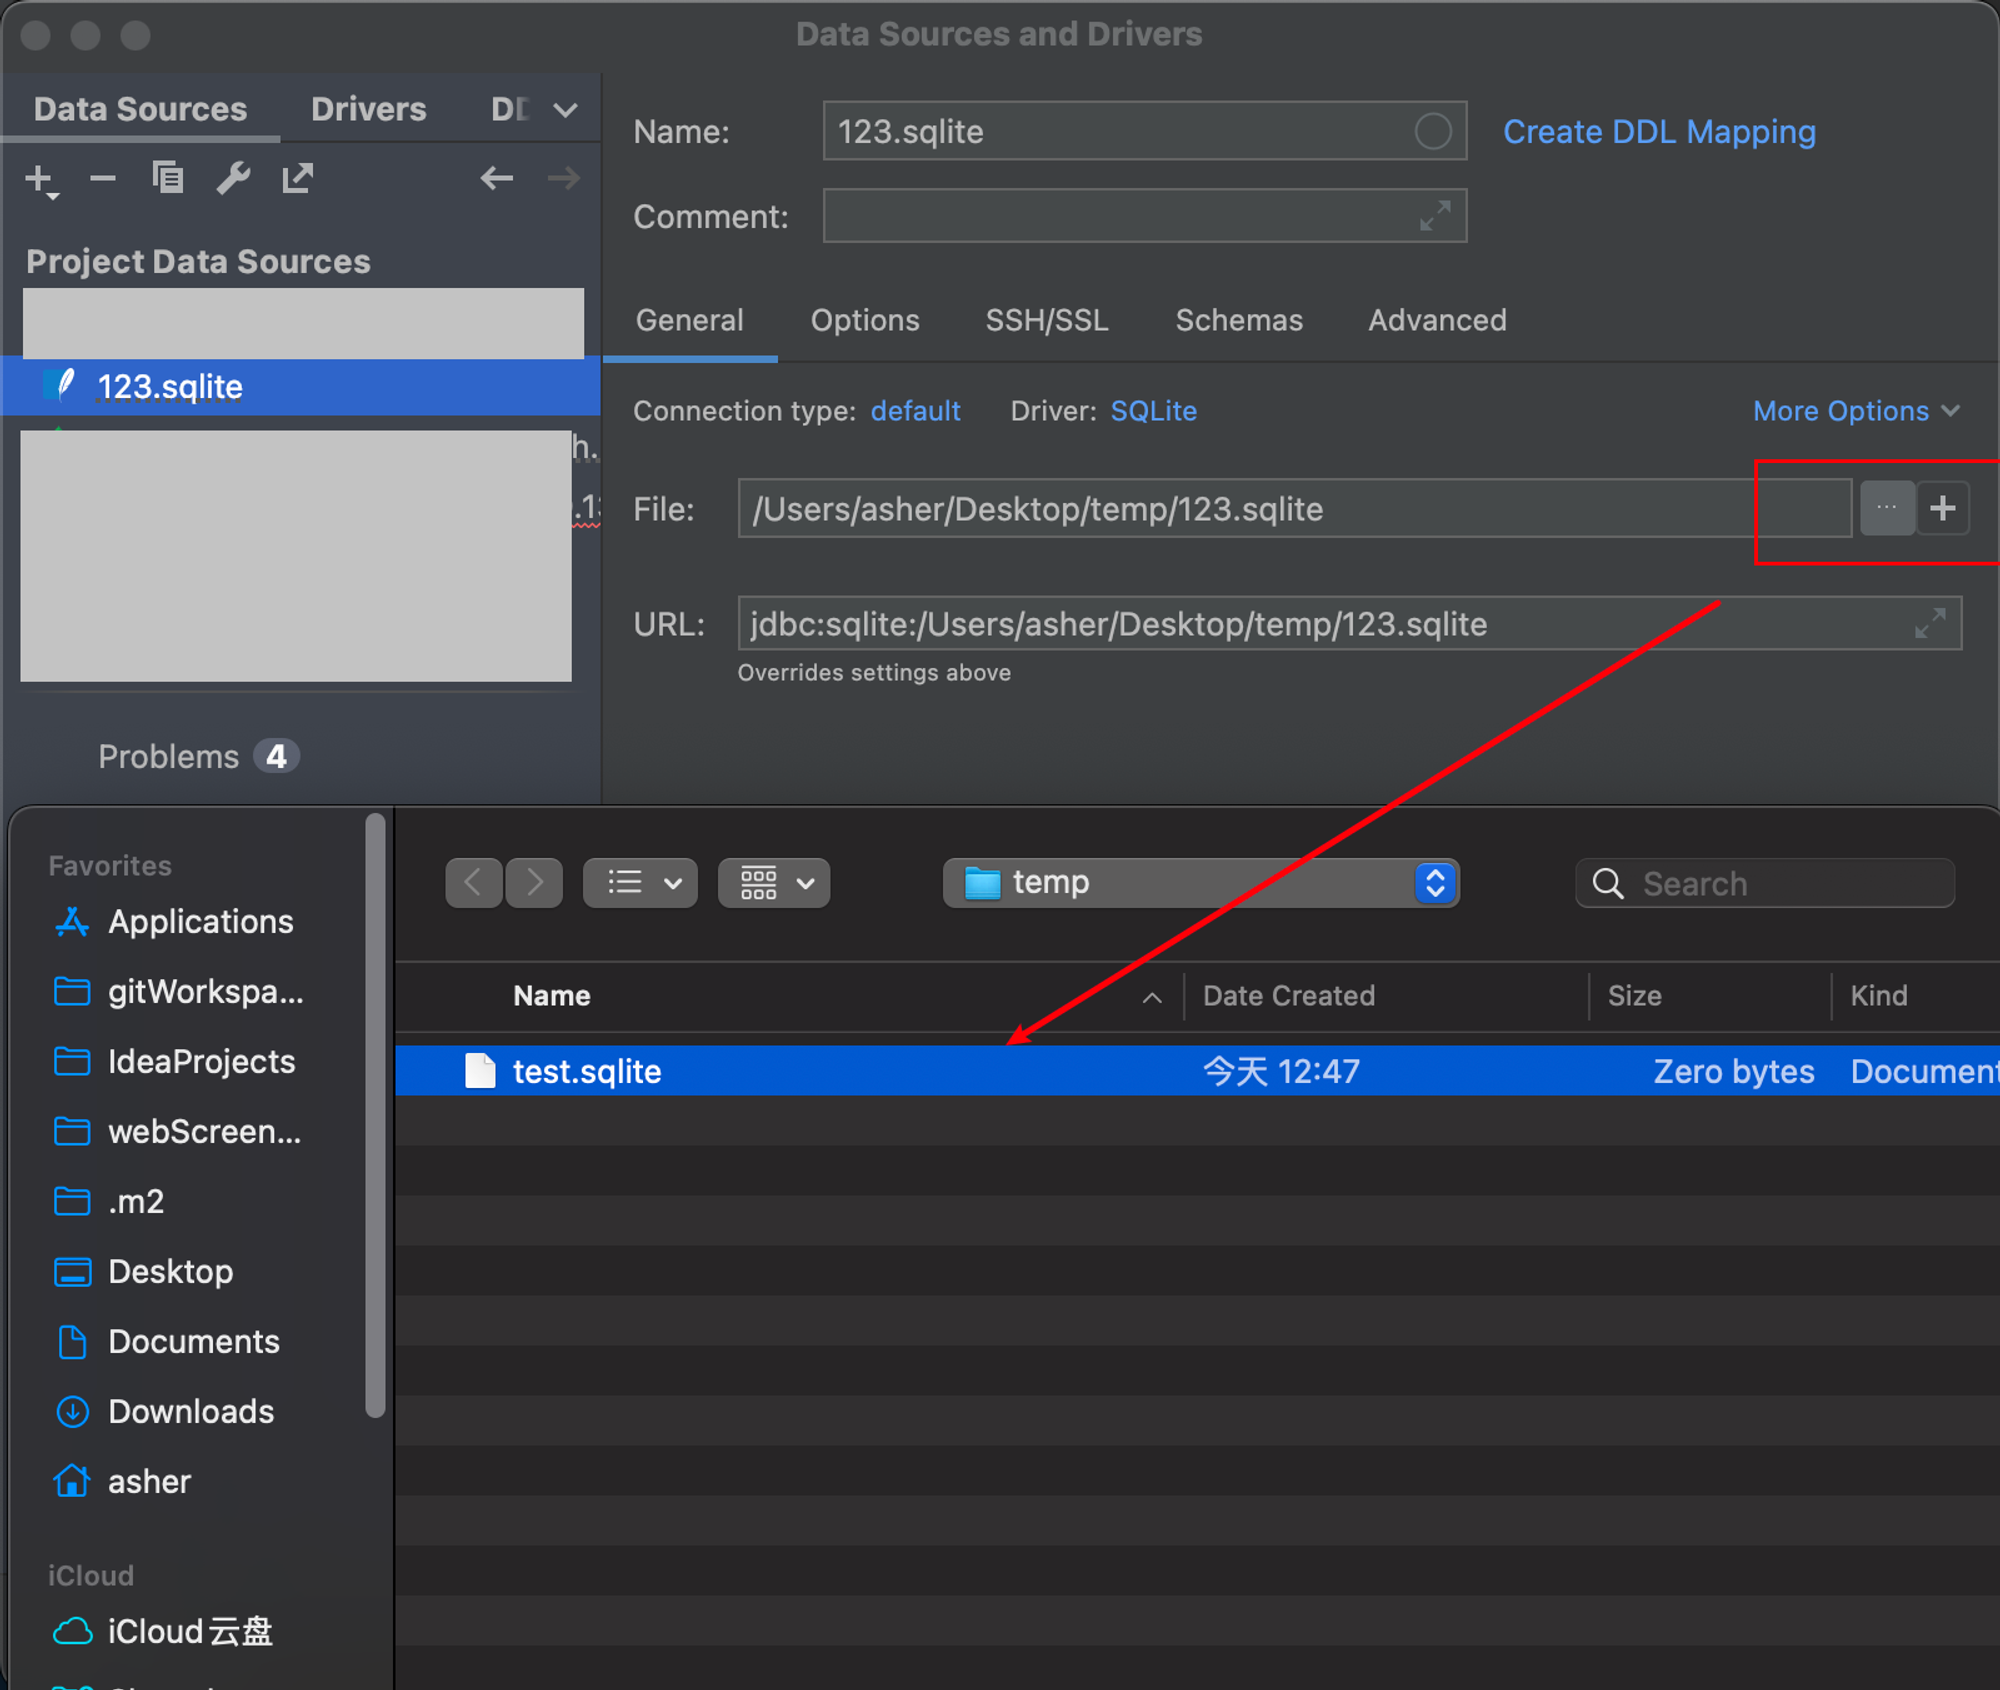
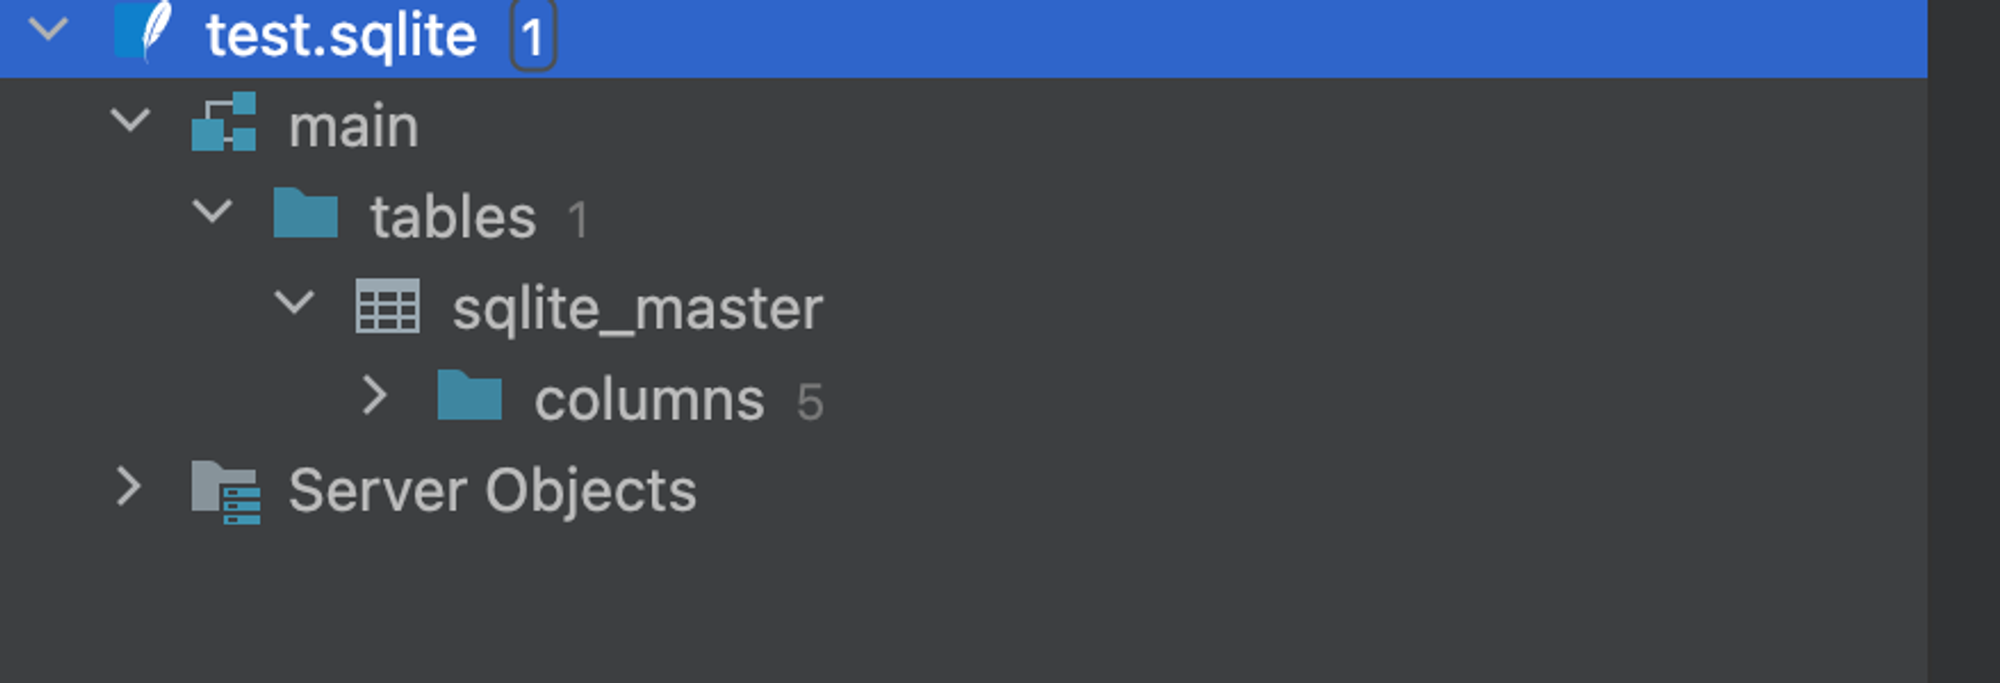
The connection is now created. Expand the connection info and you'll find a table has already been initialized for us:
3.2 SQL CRUD Operations
First, we need to create a new table for our later testing:
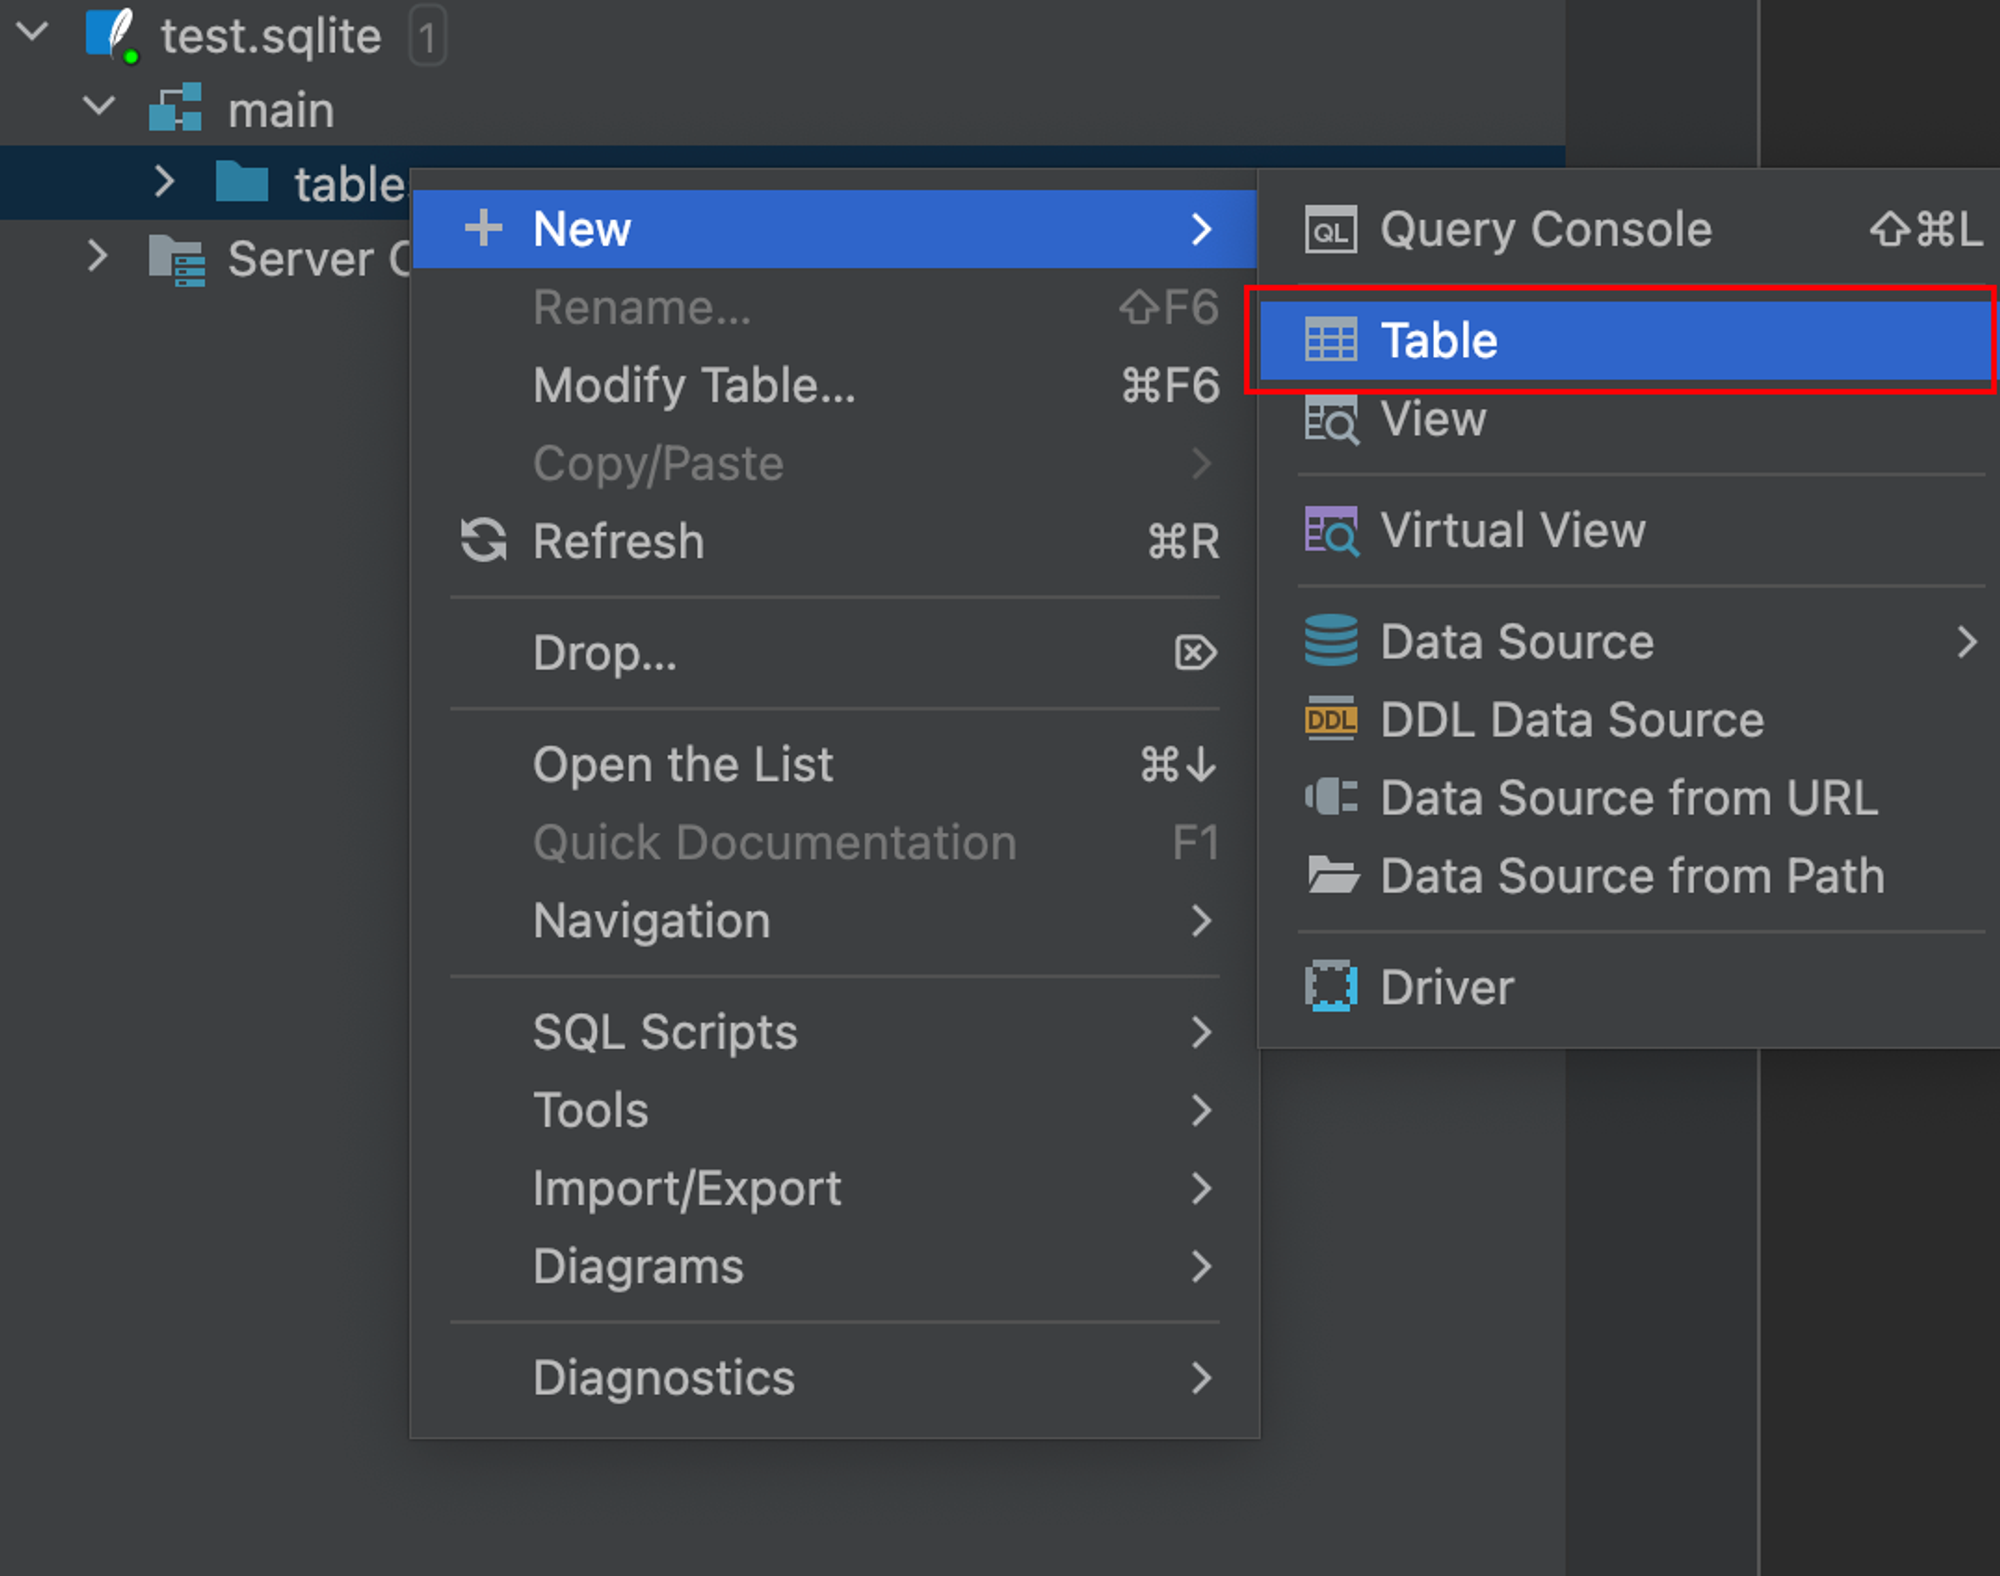
Give it a table name, similar to an Excel filename:

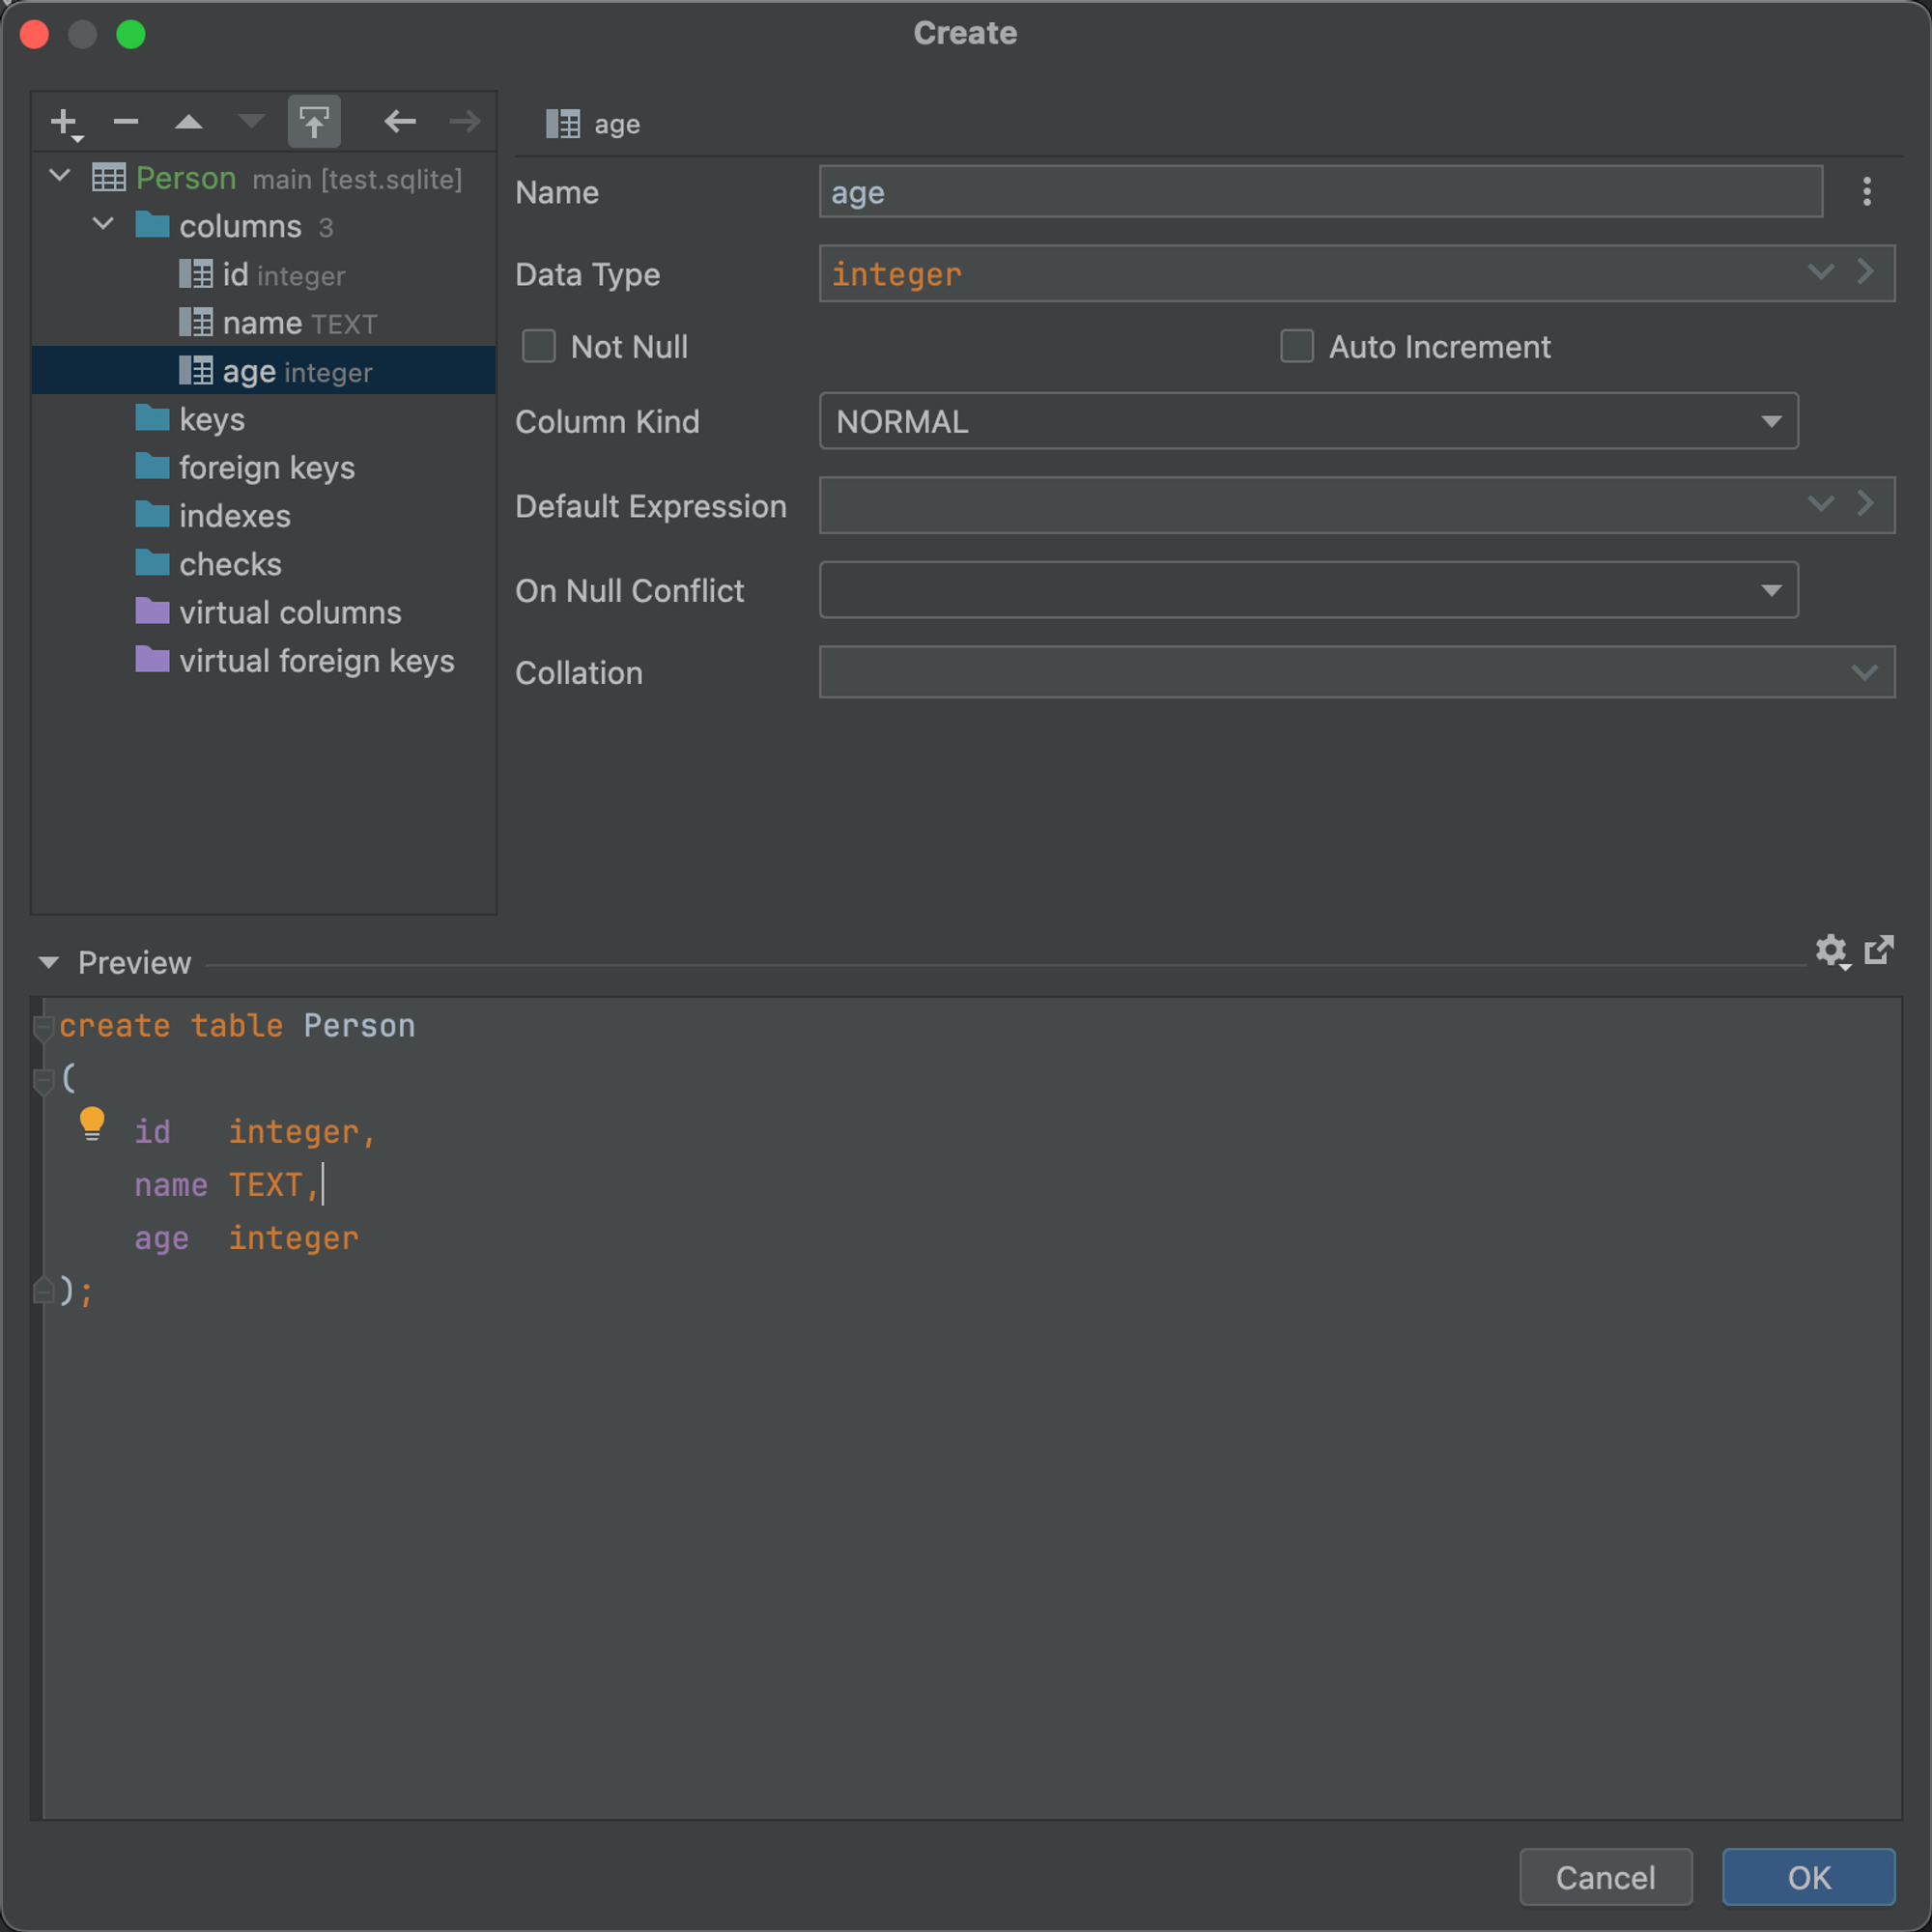
Then select Columns, click the + button to create columns, defining the column's data structure like name and whether the property is text or number.
At the bottom of the window, corresponding SQL is generated in real-time for your reference:

Here I created three columns: id, name, age
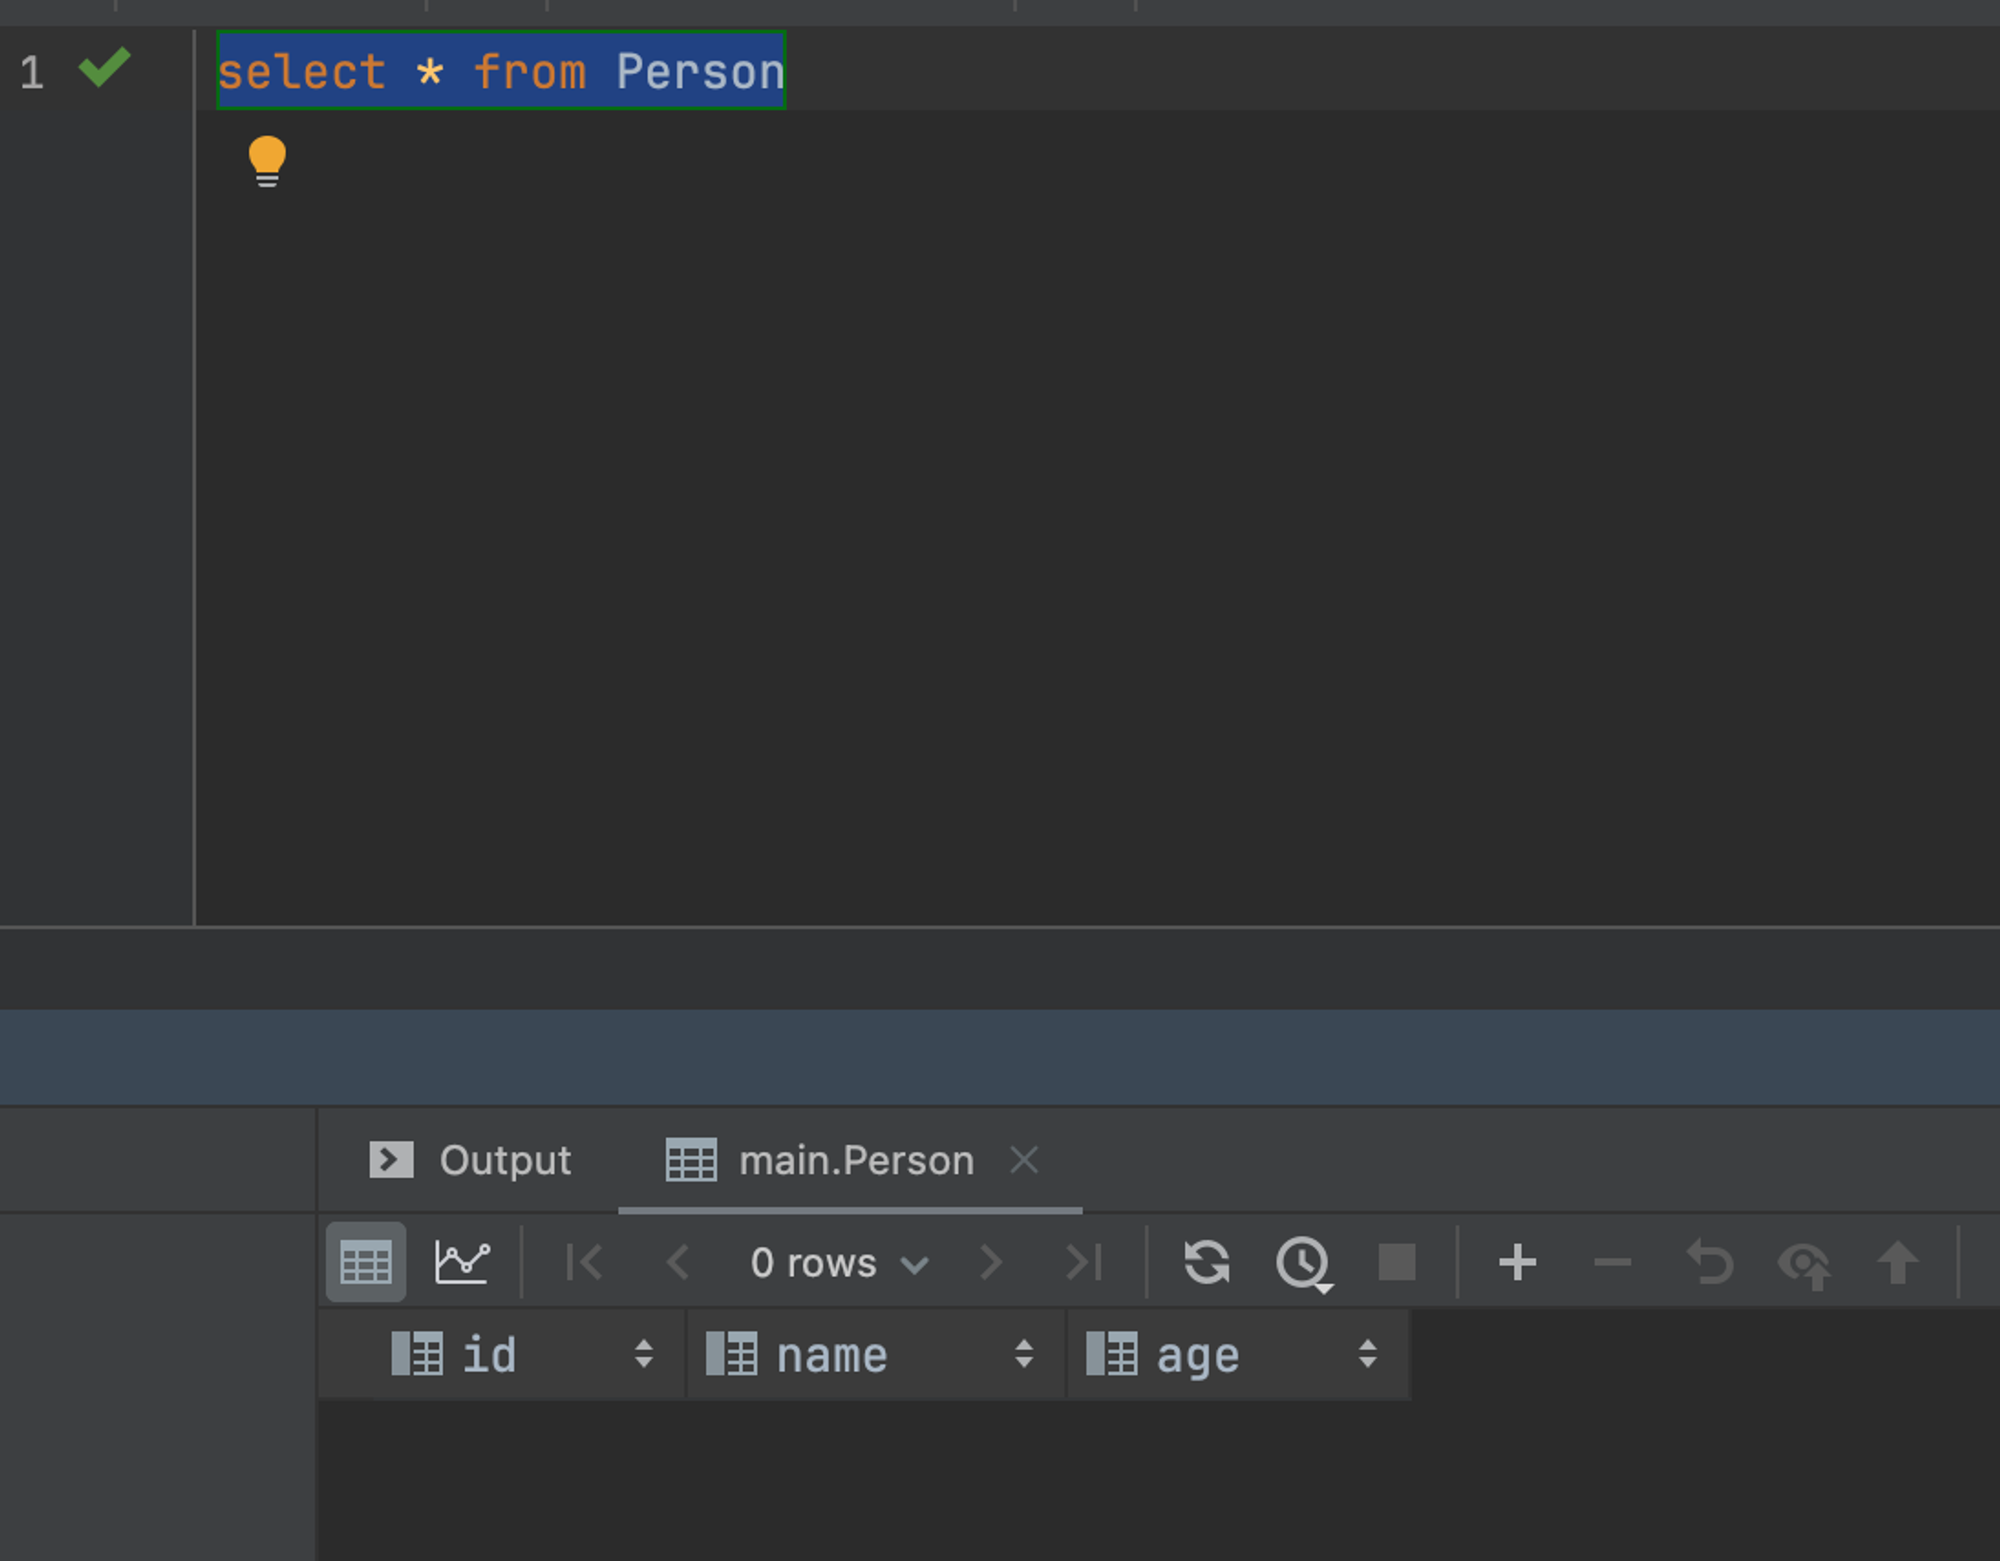
3.3 Query Statement
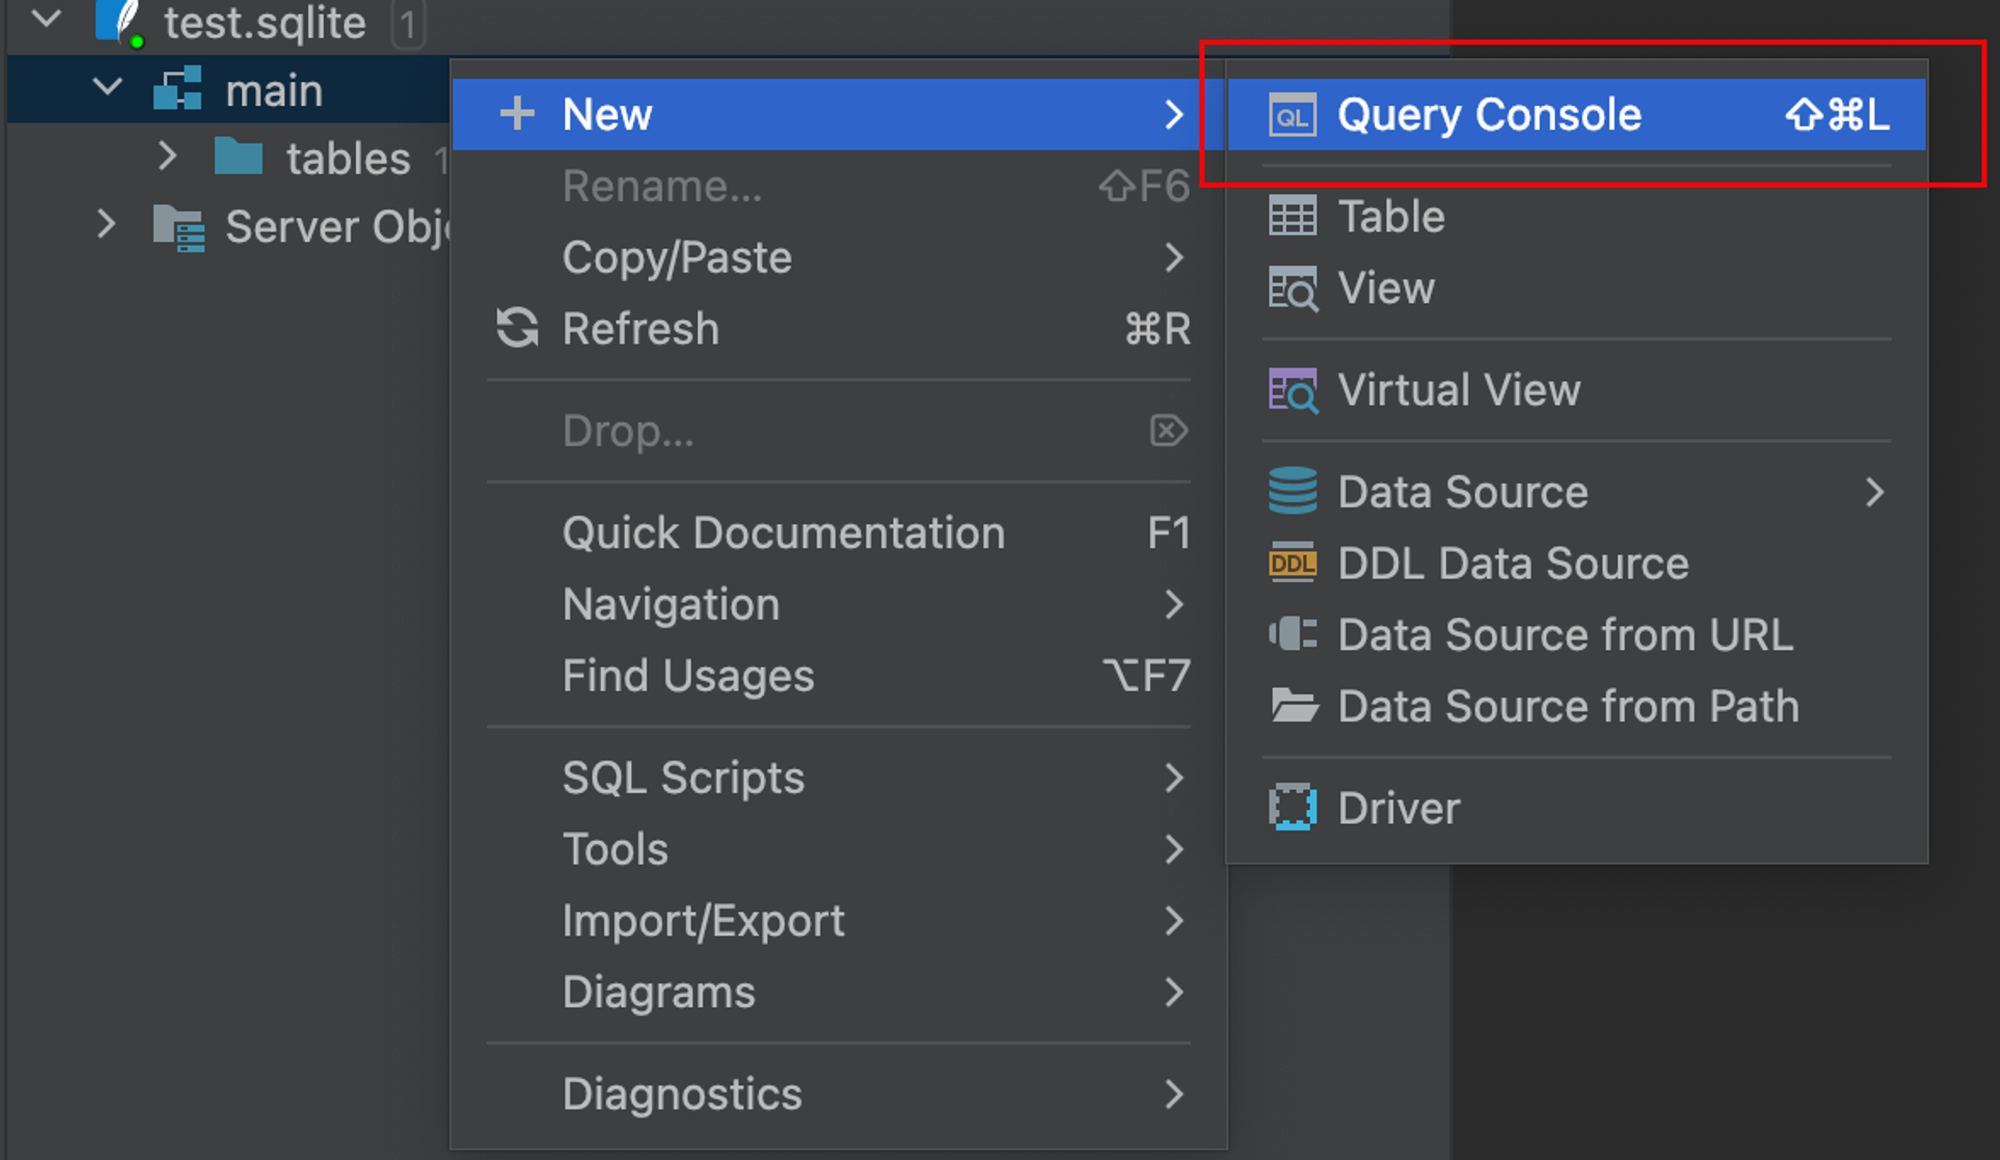
Right-click to create a new query window:
Use the statement: select * from Person to query the table we just created
- select indicates query syntax
-
- means all columns
- from person indicates we're querying the person table
3.4 Insert, Update, Delete
Refer to this blog:
SQLite Update Statement | Runoob Tutorial
4. Using CLion for C++
After opening CLion, you'll see this screen. Click new project to create a new project:
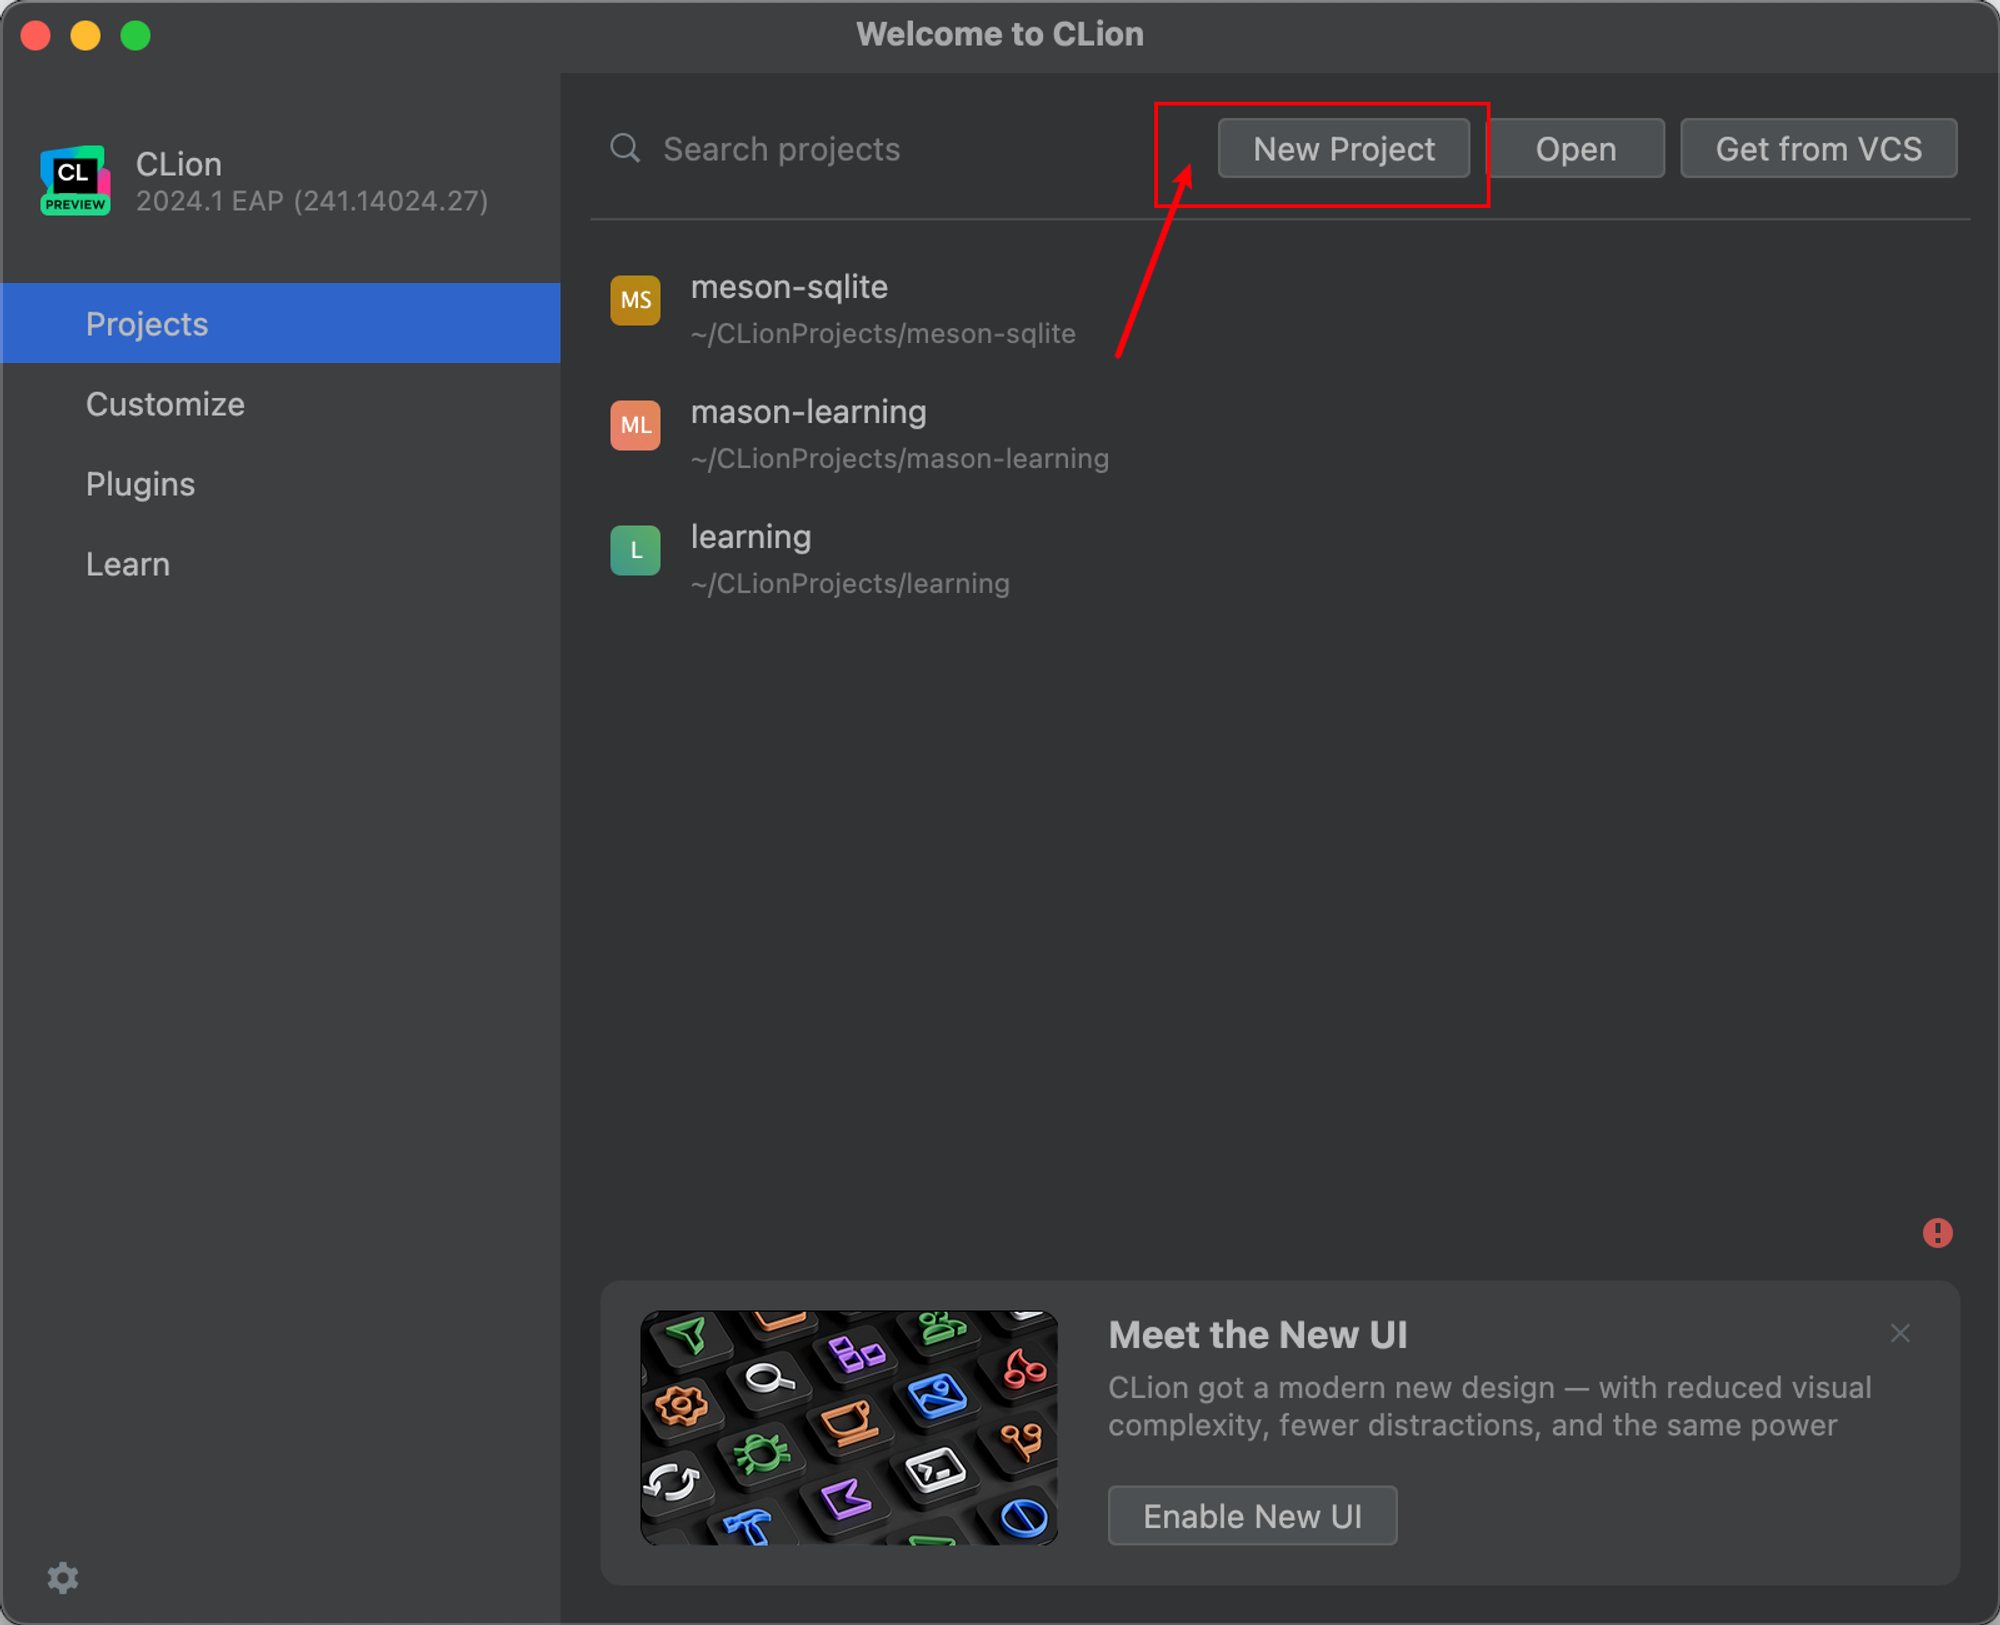
Looking at the content on the right, you might wonder what to choose.
I directly recommend choosing Meson. Why?
Meson is free software for build automation, written in Python, released under the Apache License version 2.0. Its main goal is to save developers time configuring build systems.
In short, it saves you from worrying about the complexity of traditional C++ builds and simplifies your development.
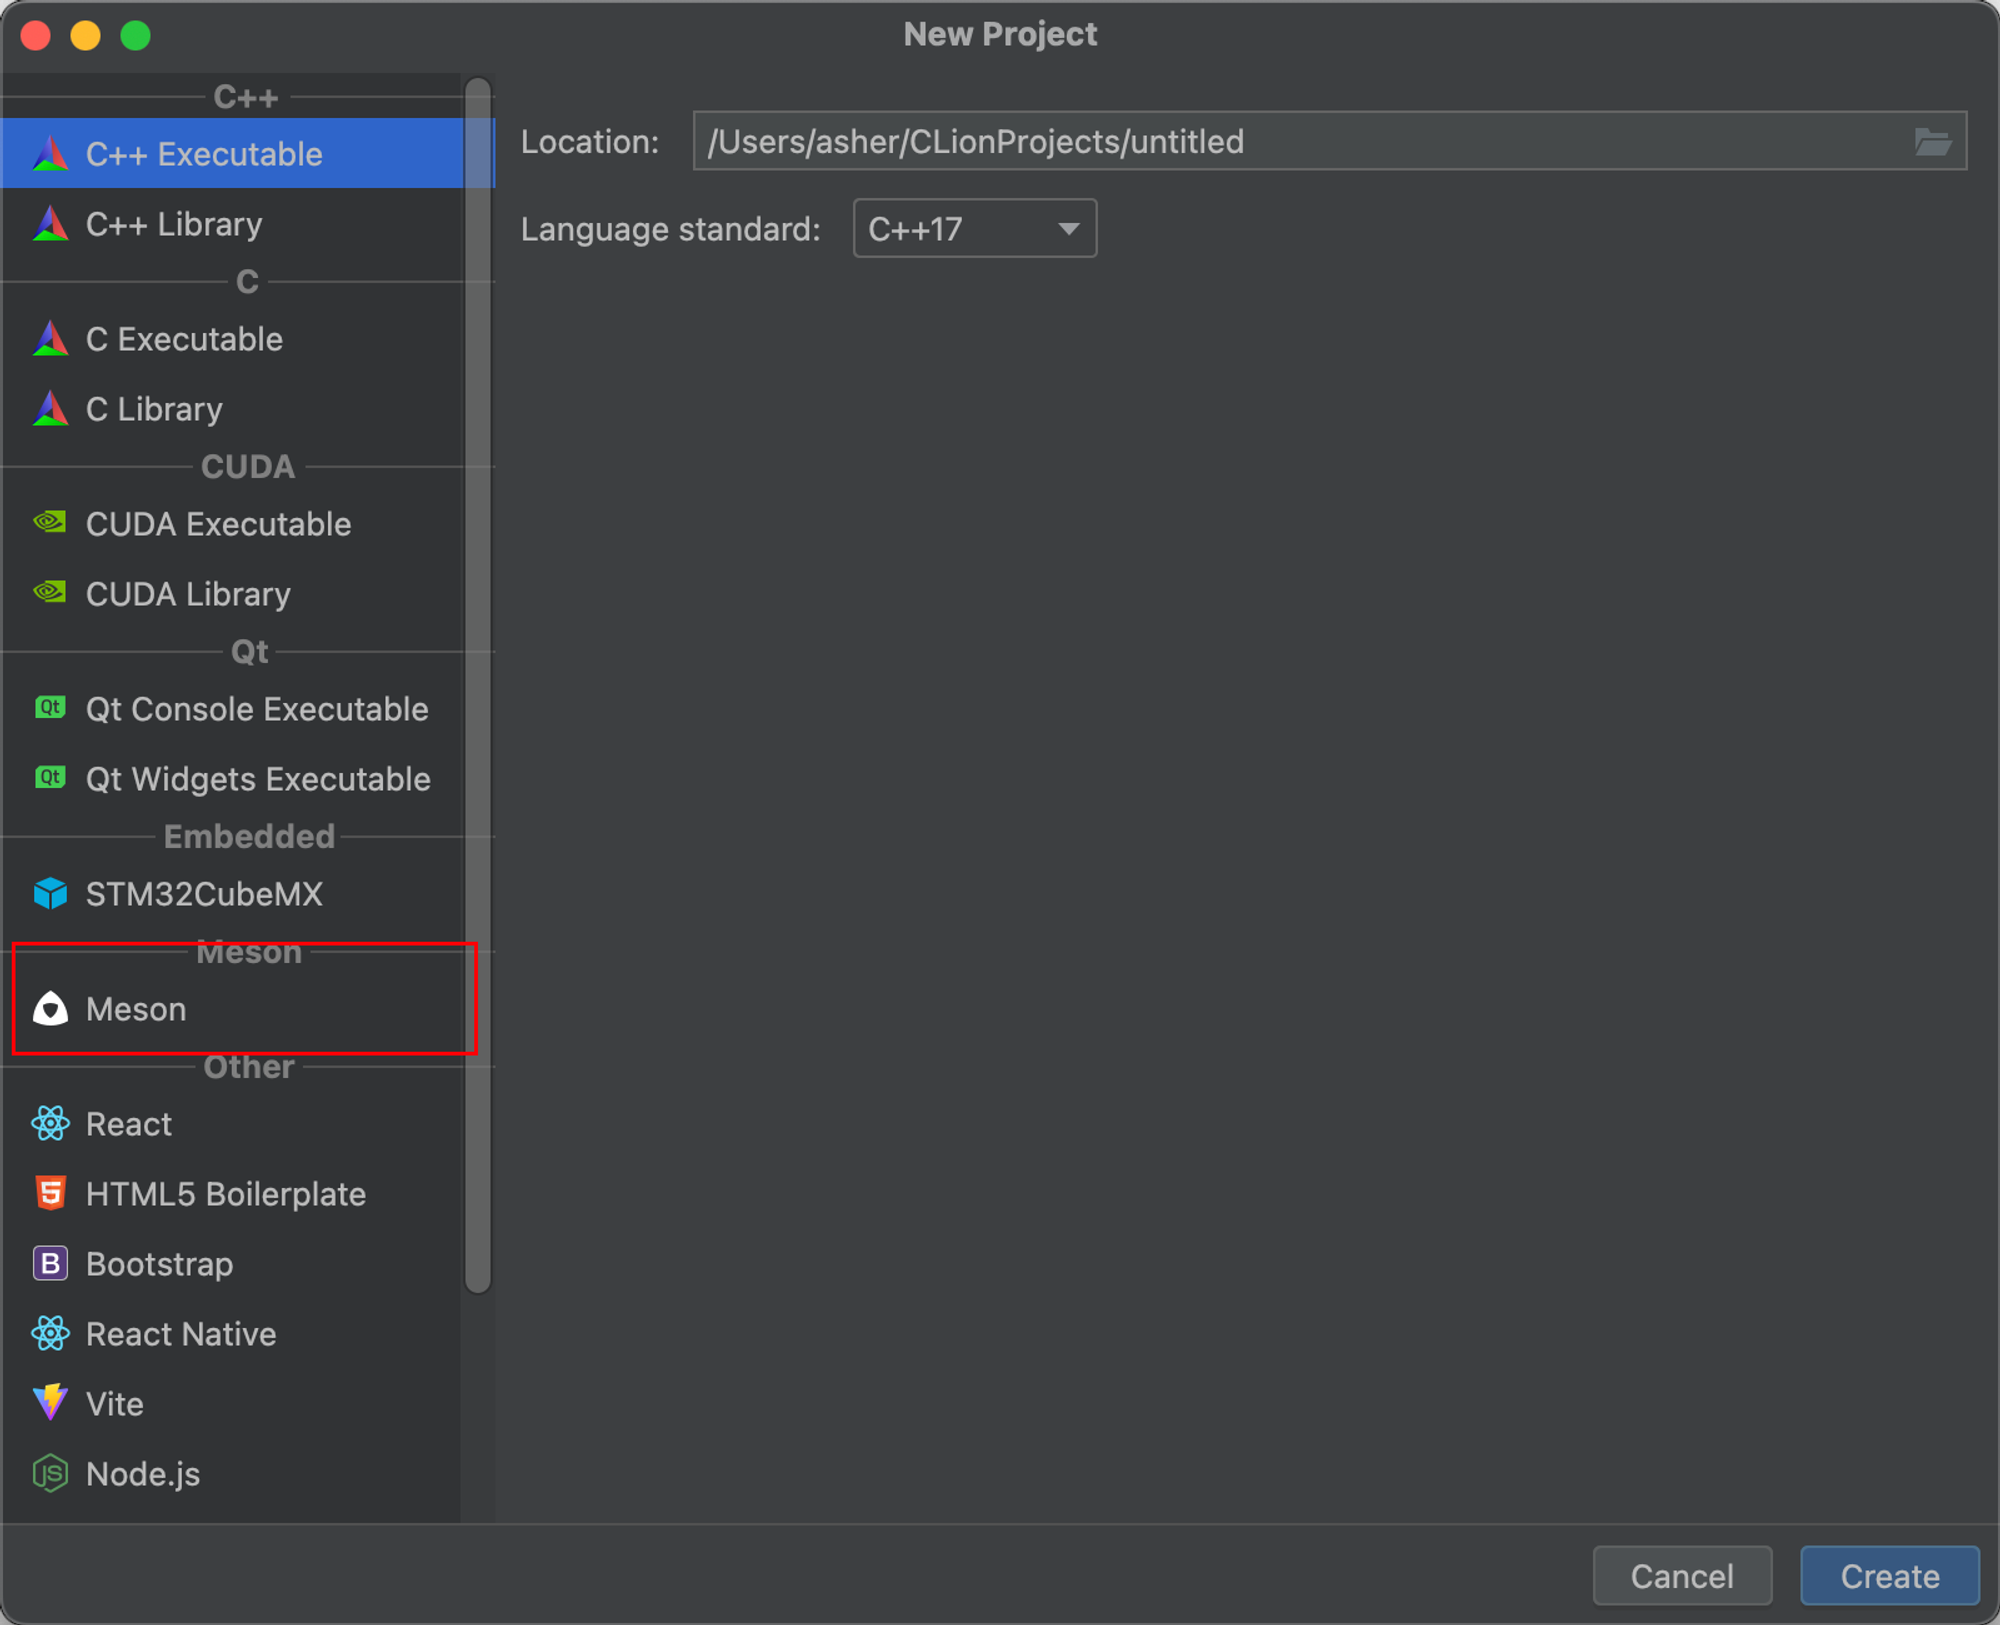
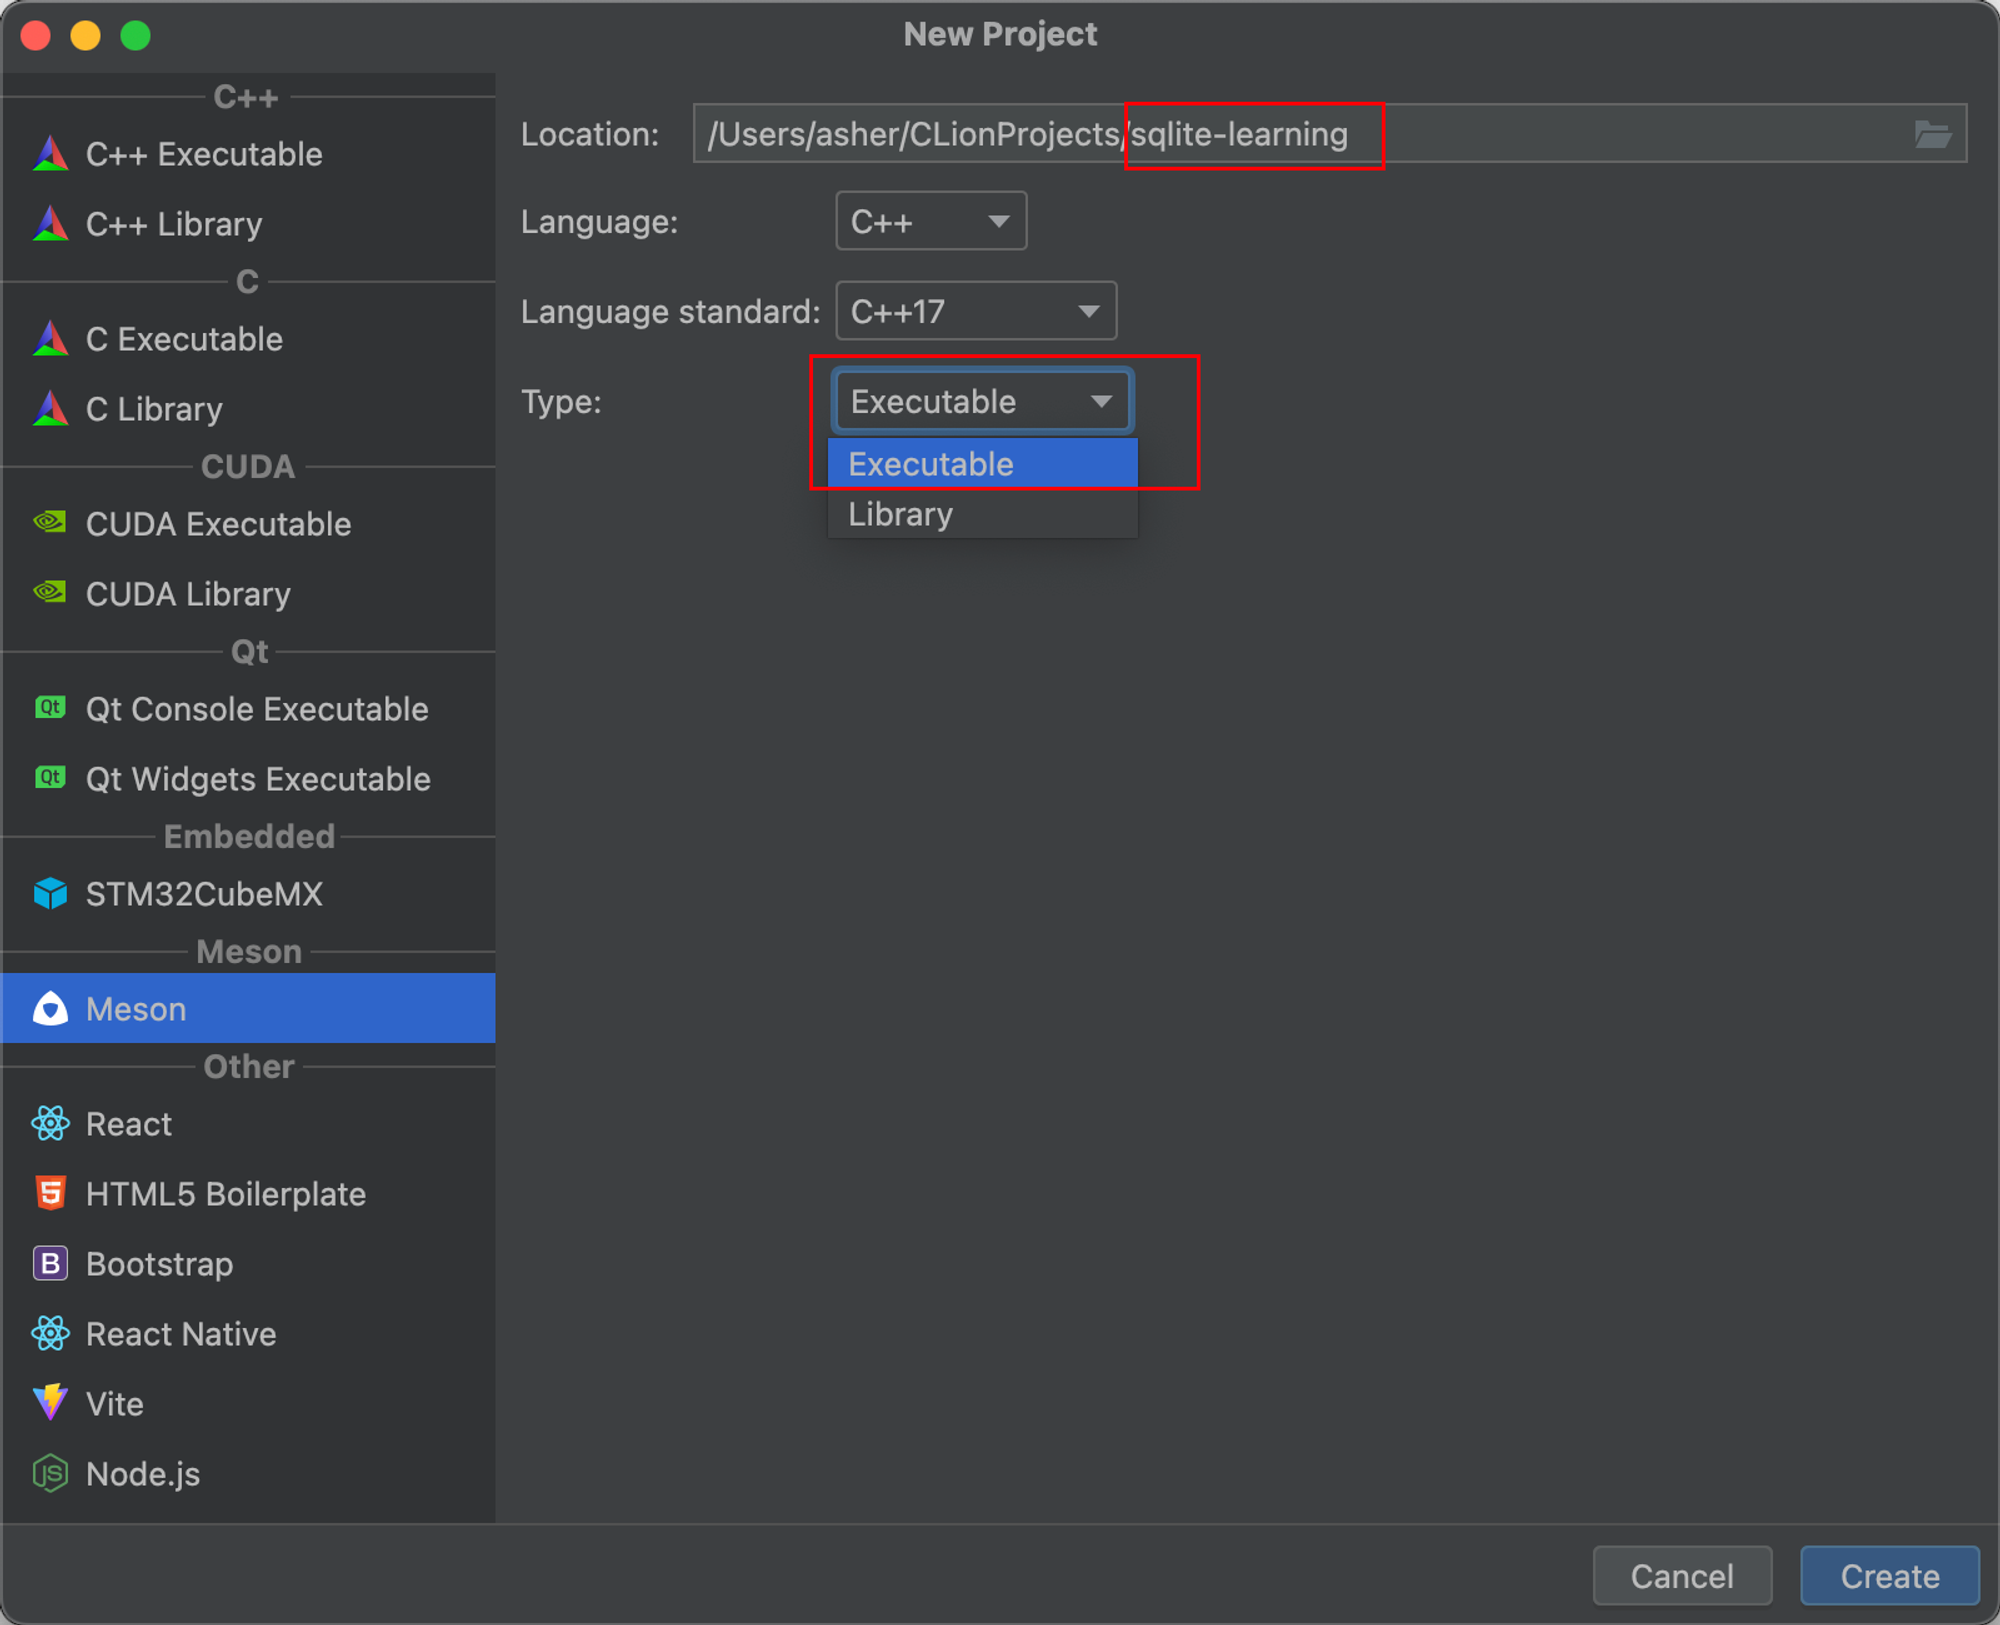
Give it a cool name and select type as executable - because executable means runnable program
After creation, CLion tells us meson isn't installed:
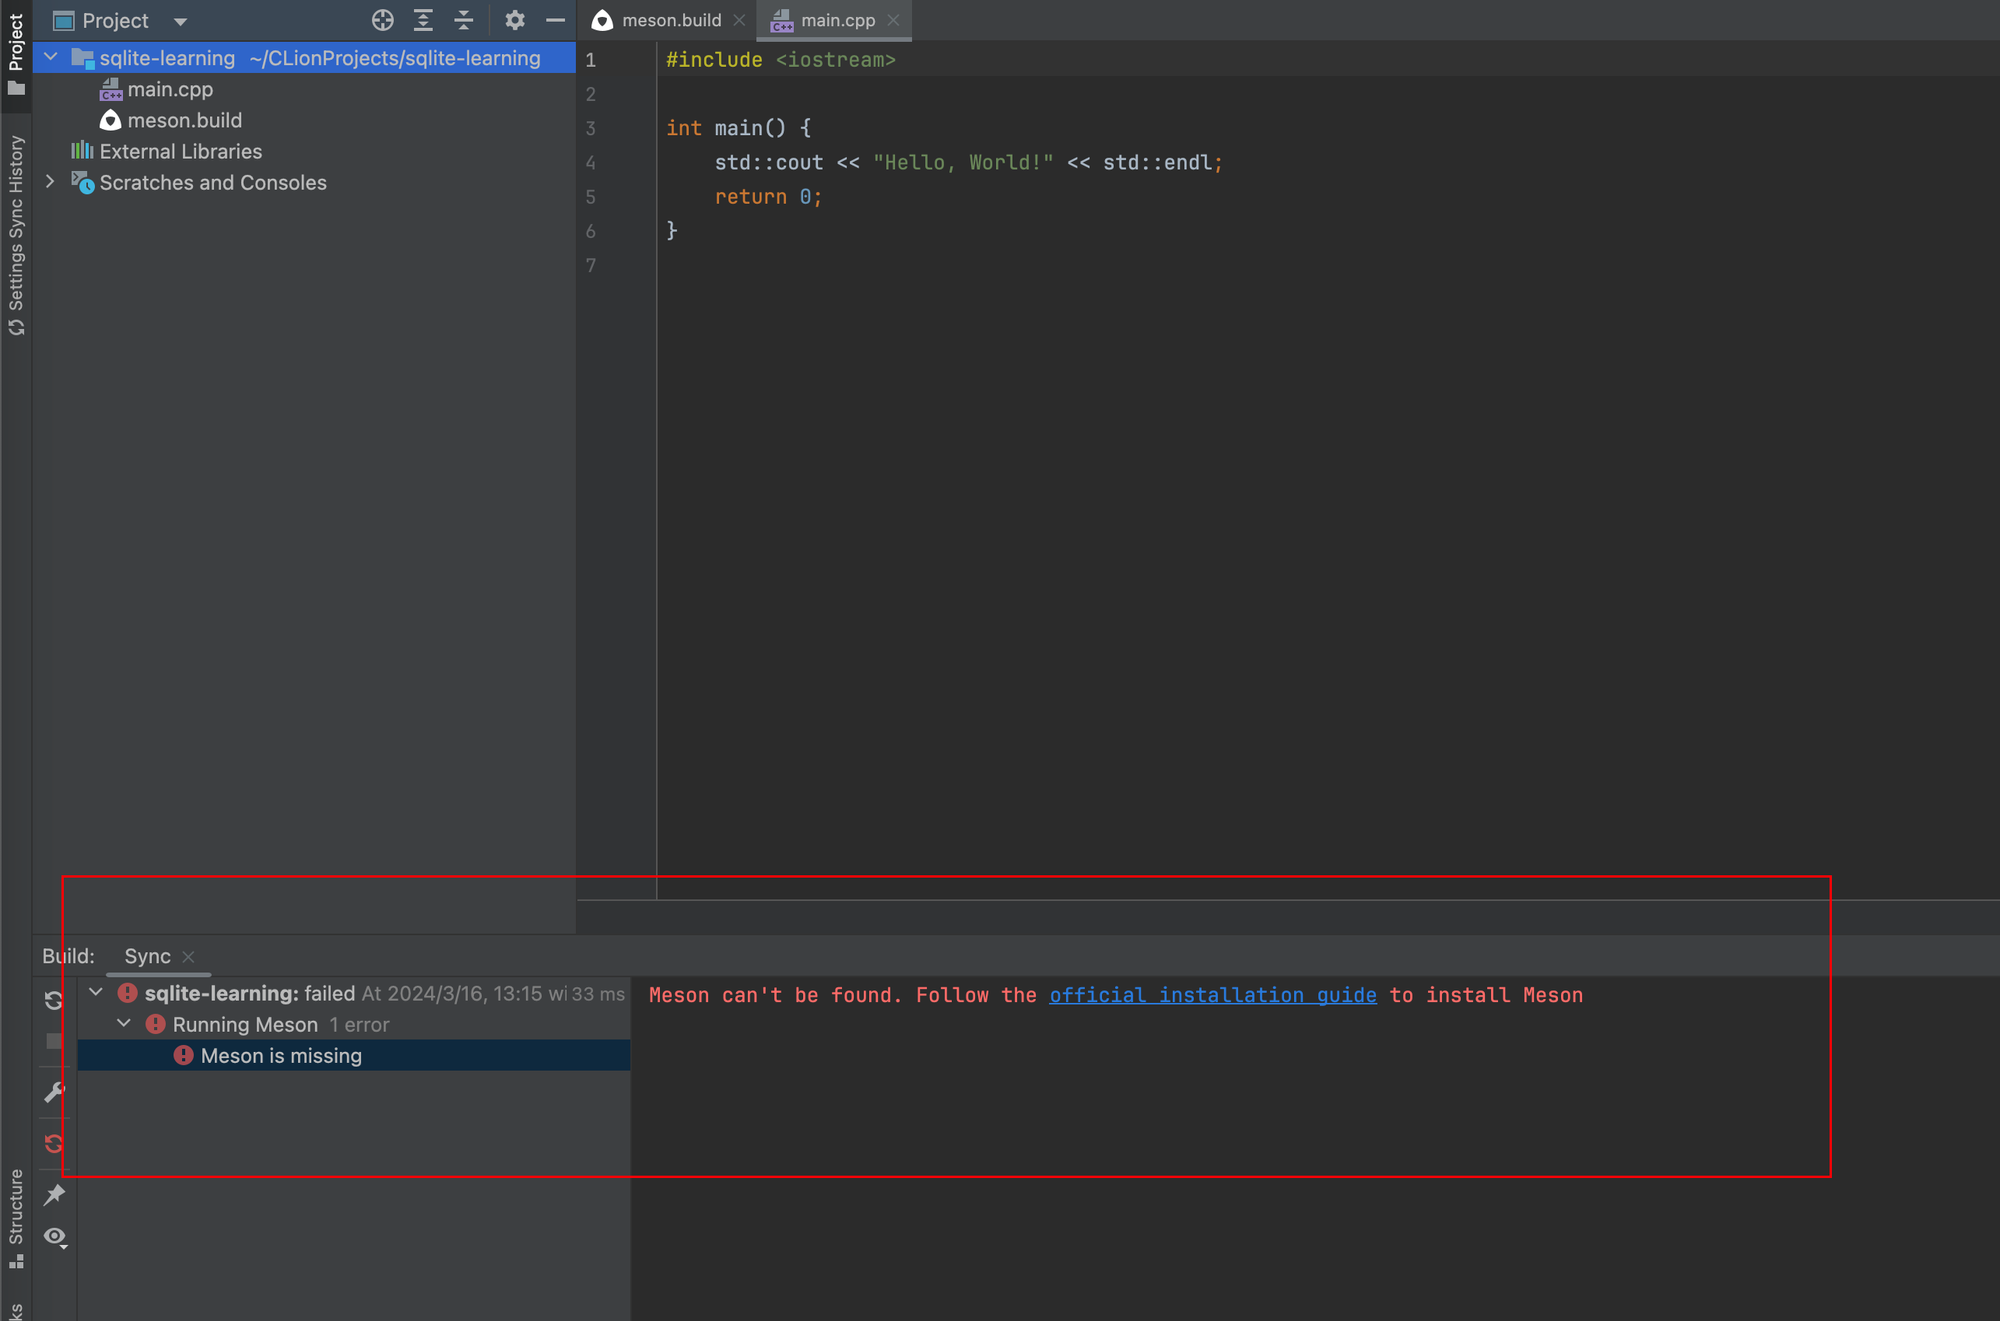
4.1 Installing Meson
Let's install it directly. Search Bing or Google for Meson - usually the first result:
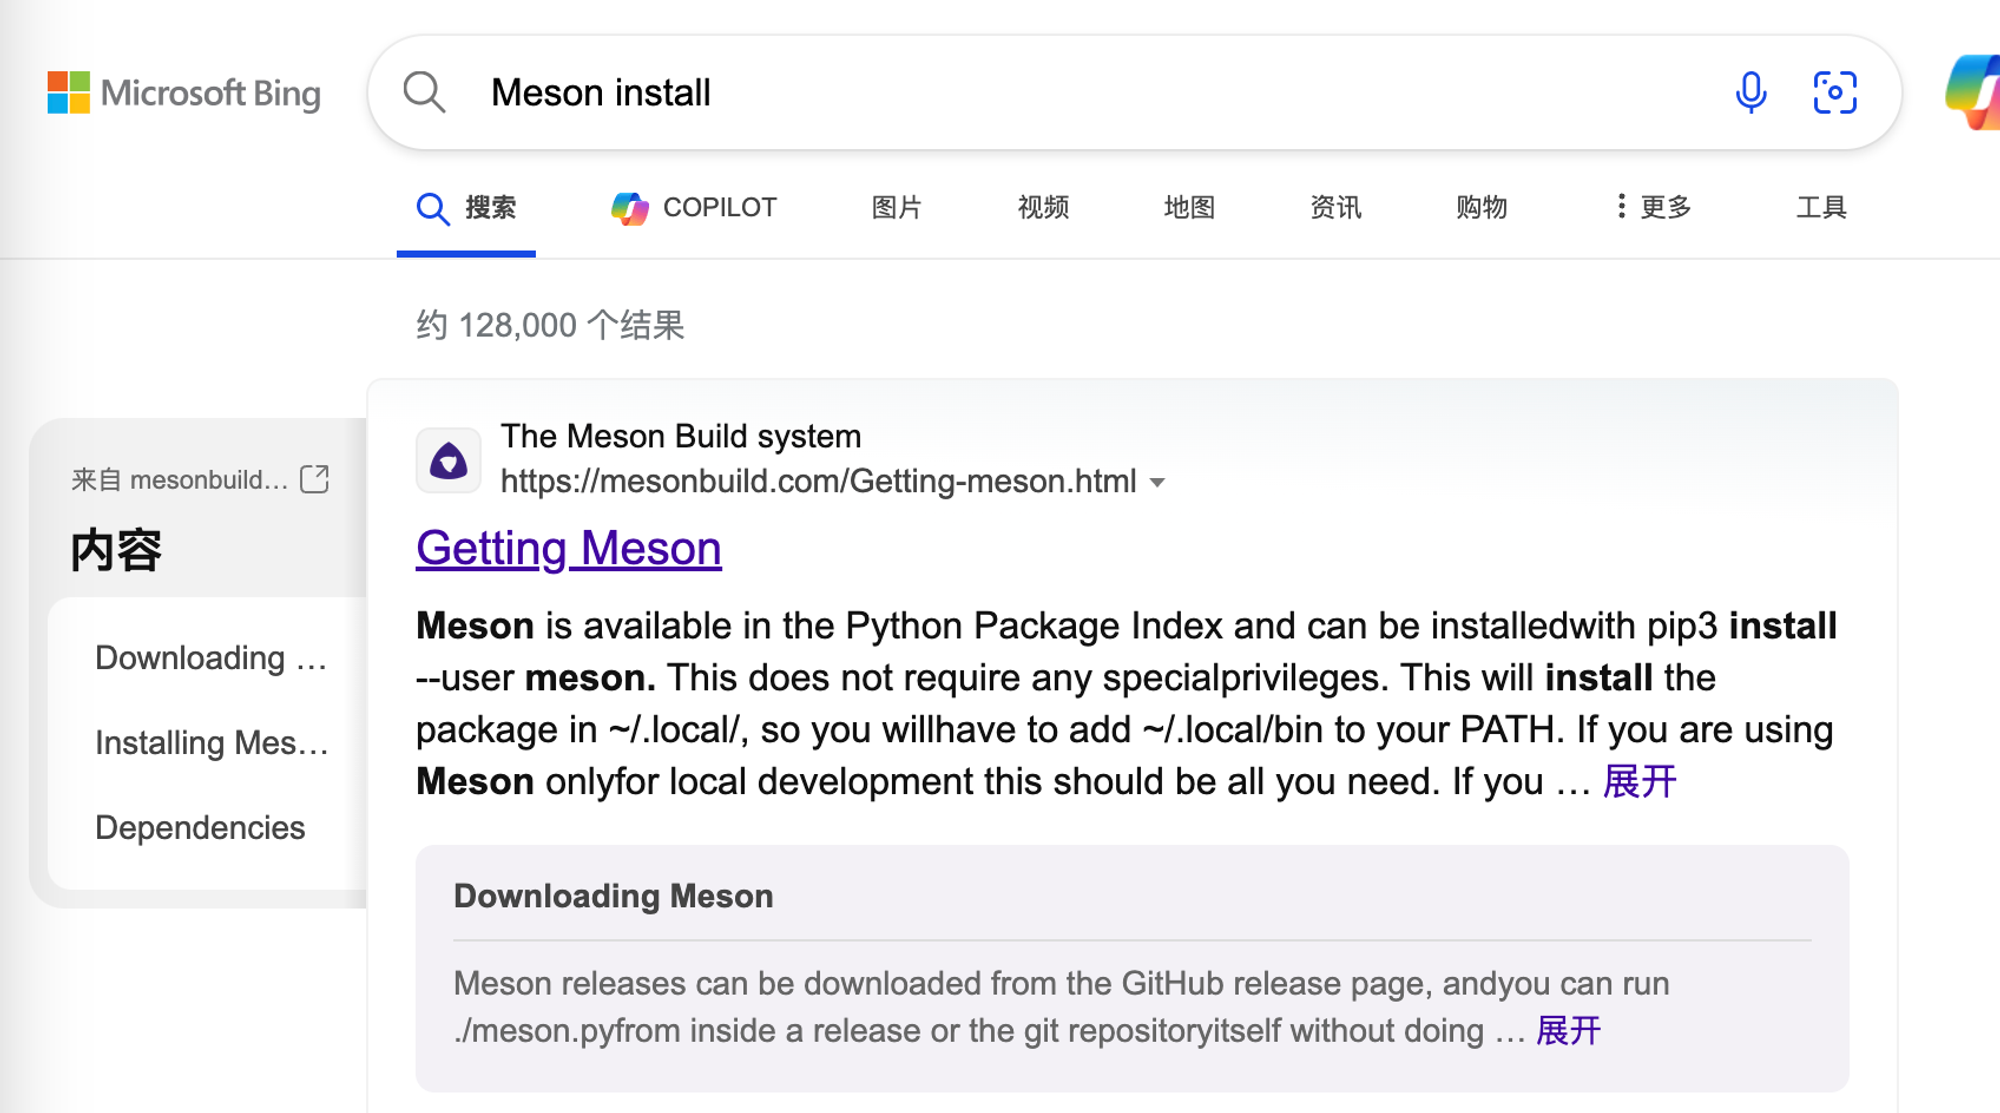
The first few sentences explain how to install meson:
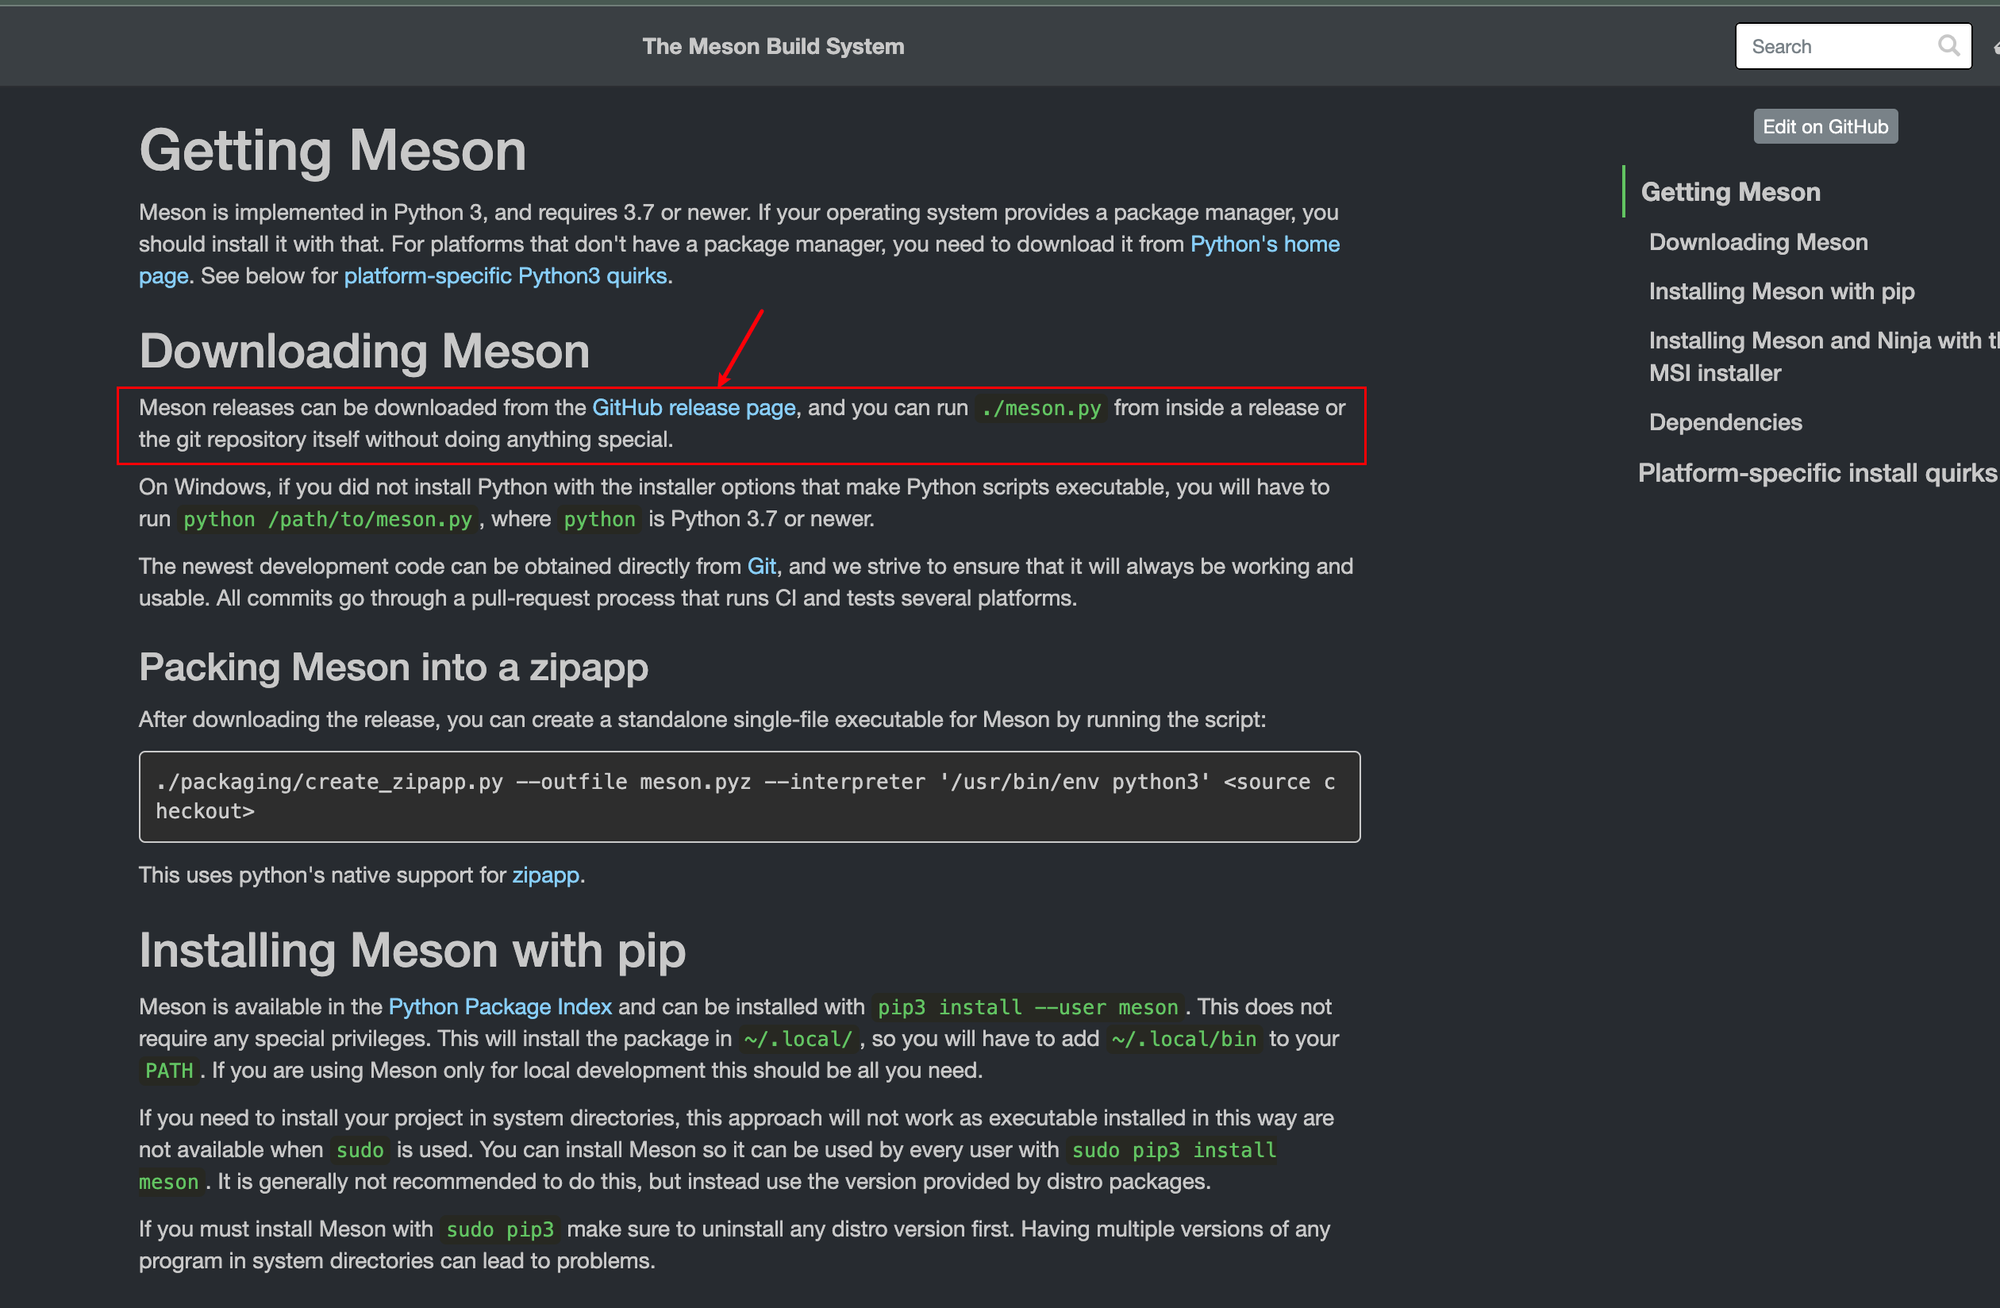
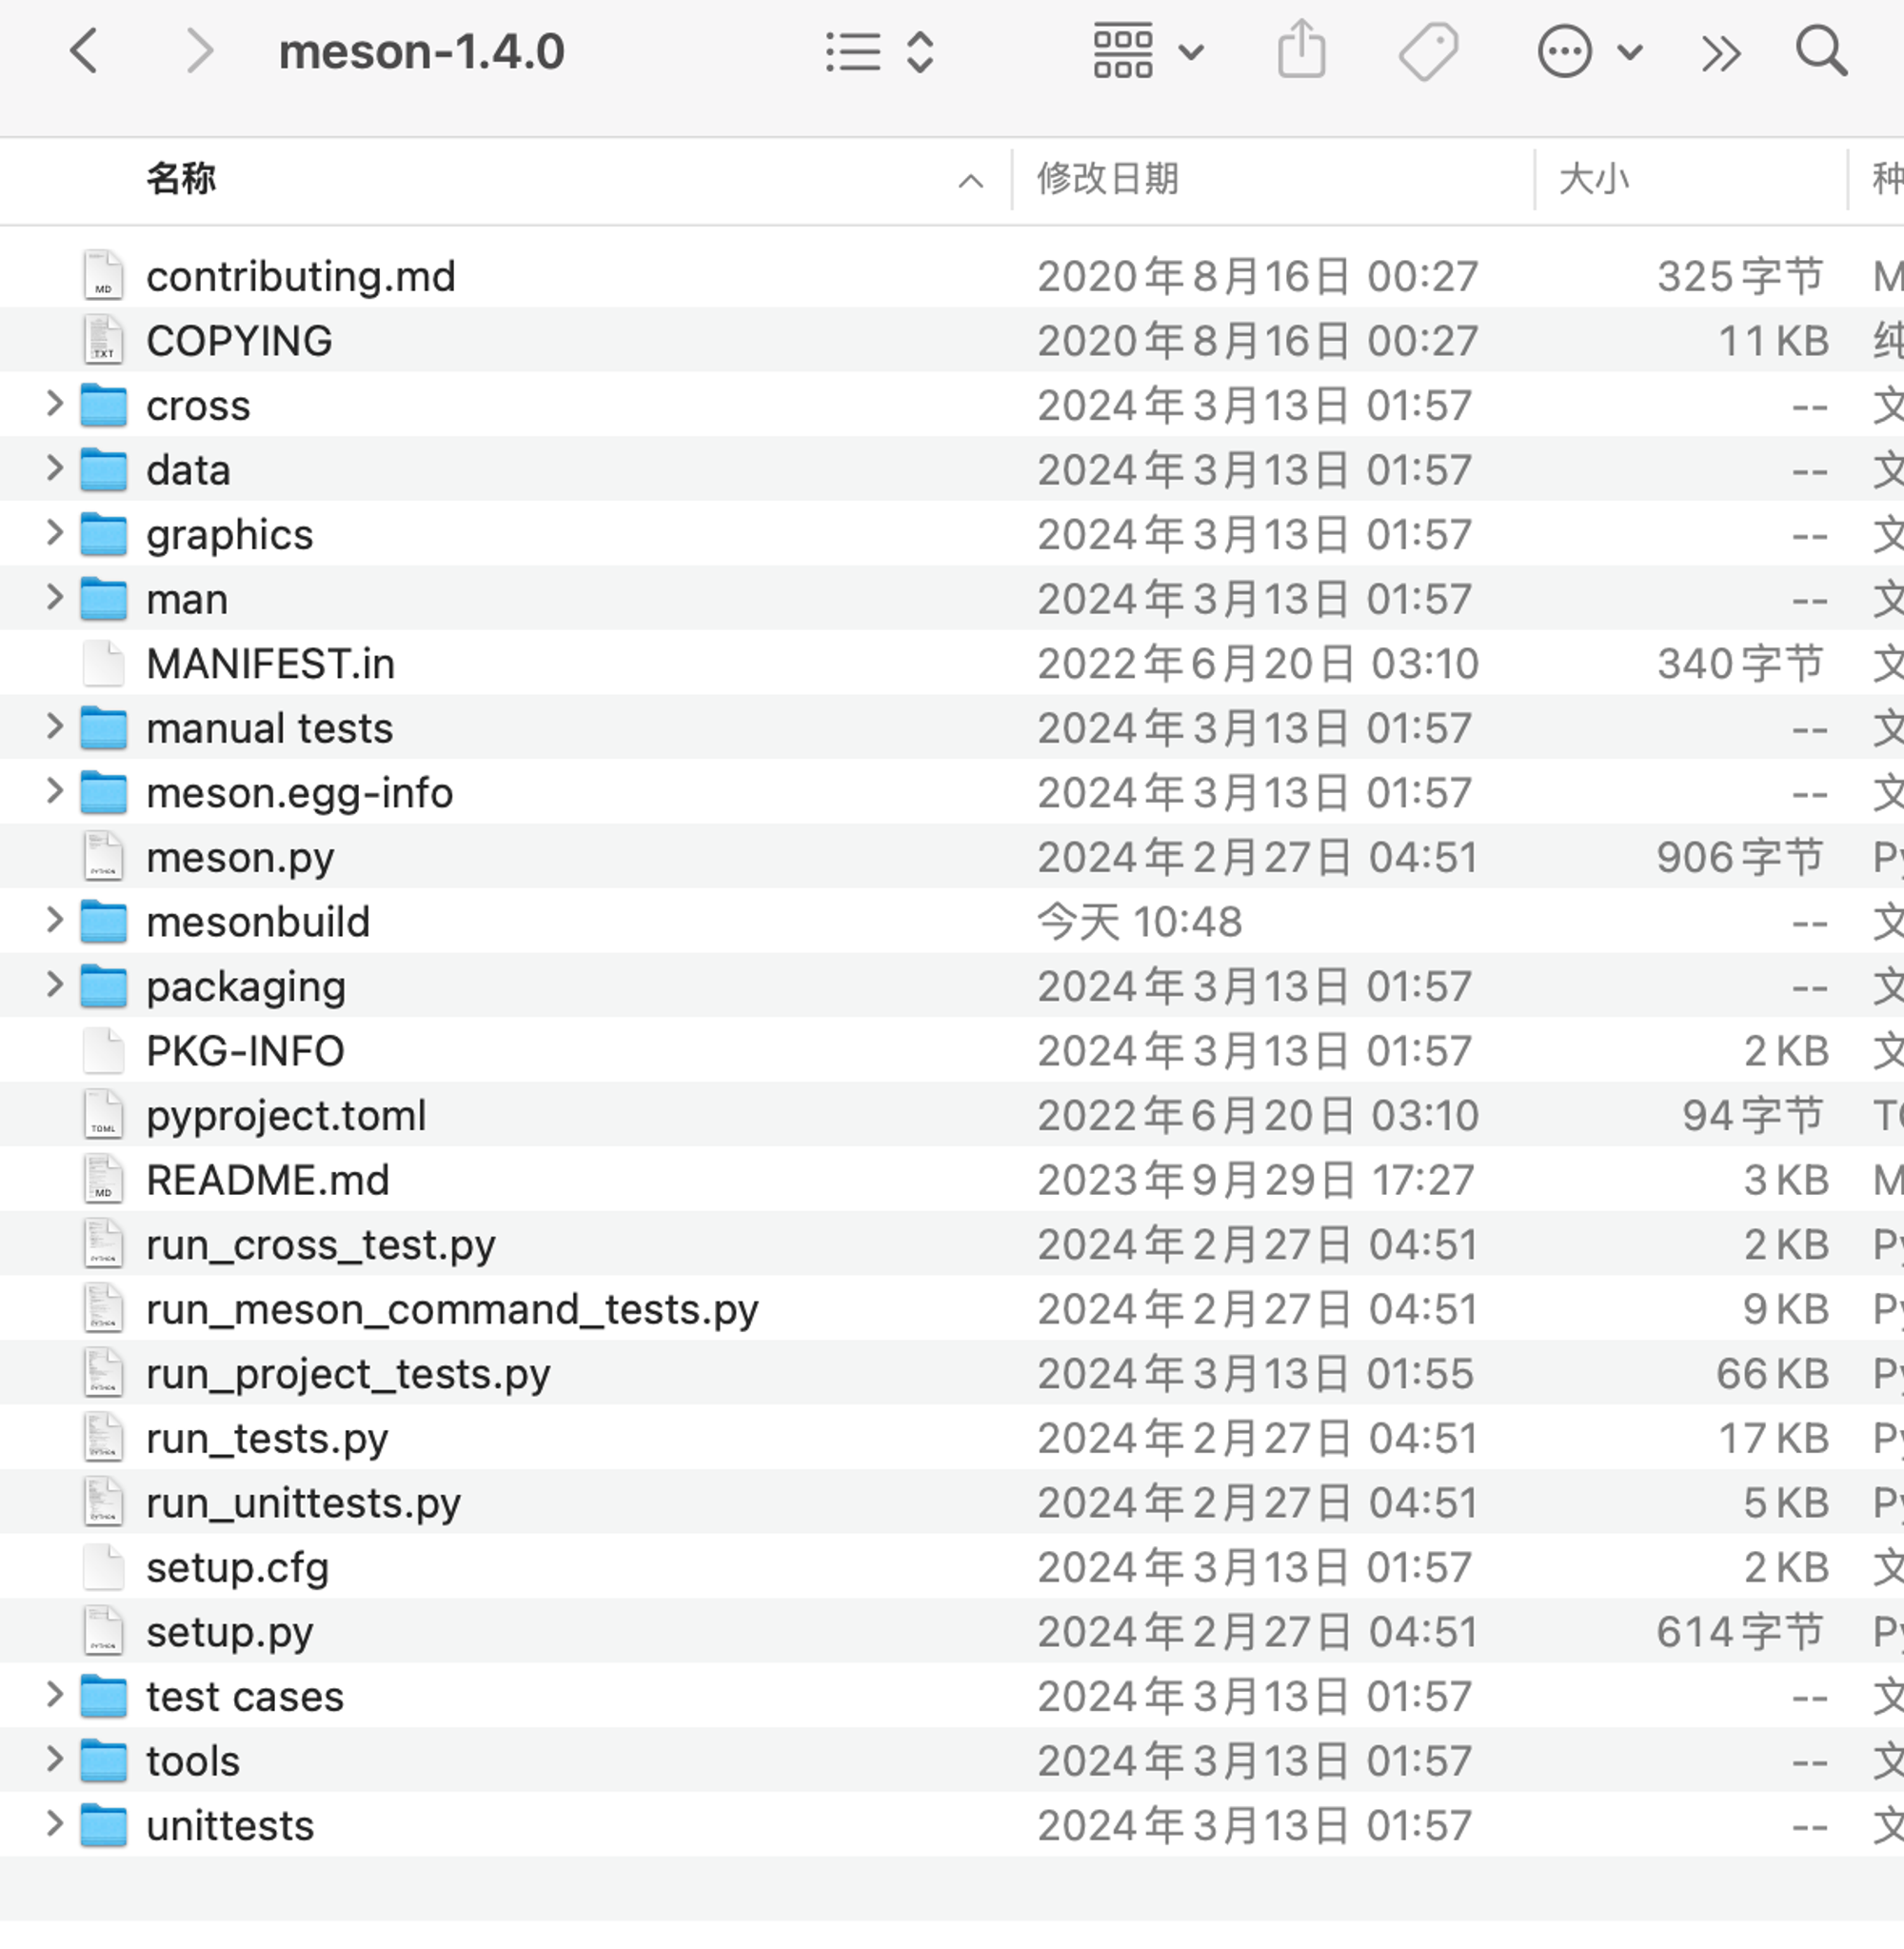
Download from https://github.com/mesonbuild/meson/releases, then extract to your working directory:

After extraction:
4.2 Configuring Meson
Back to CLion, select step by step:
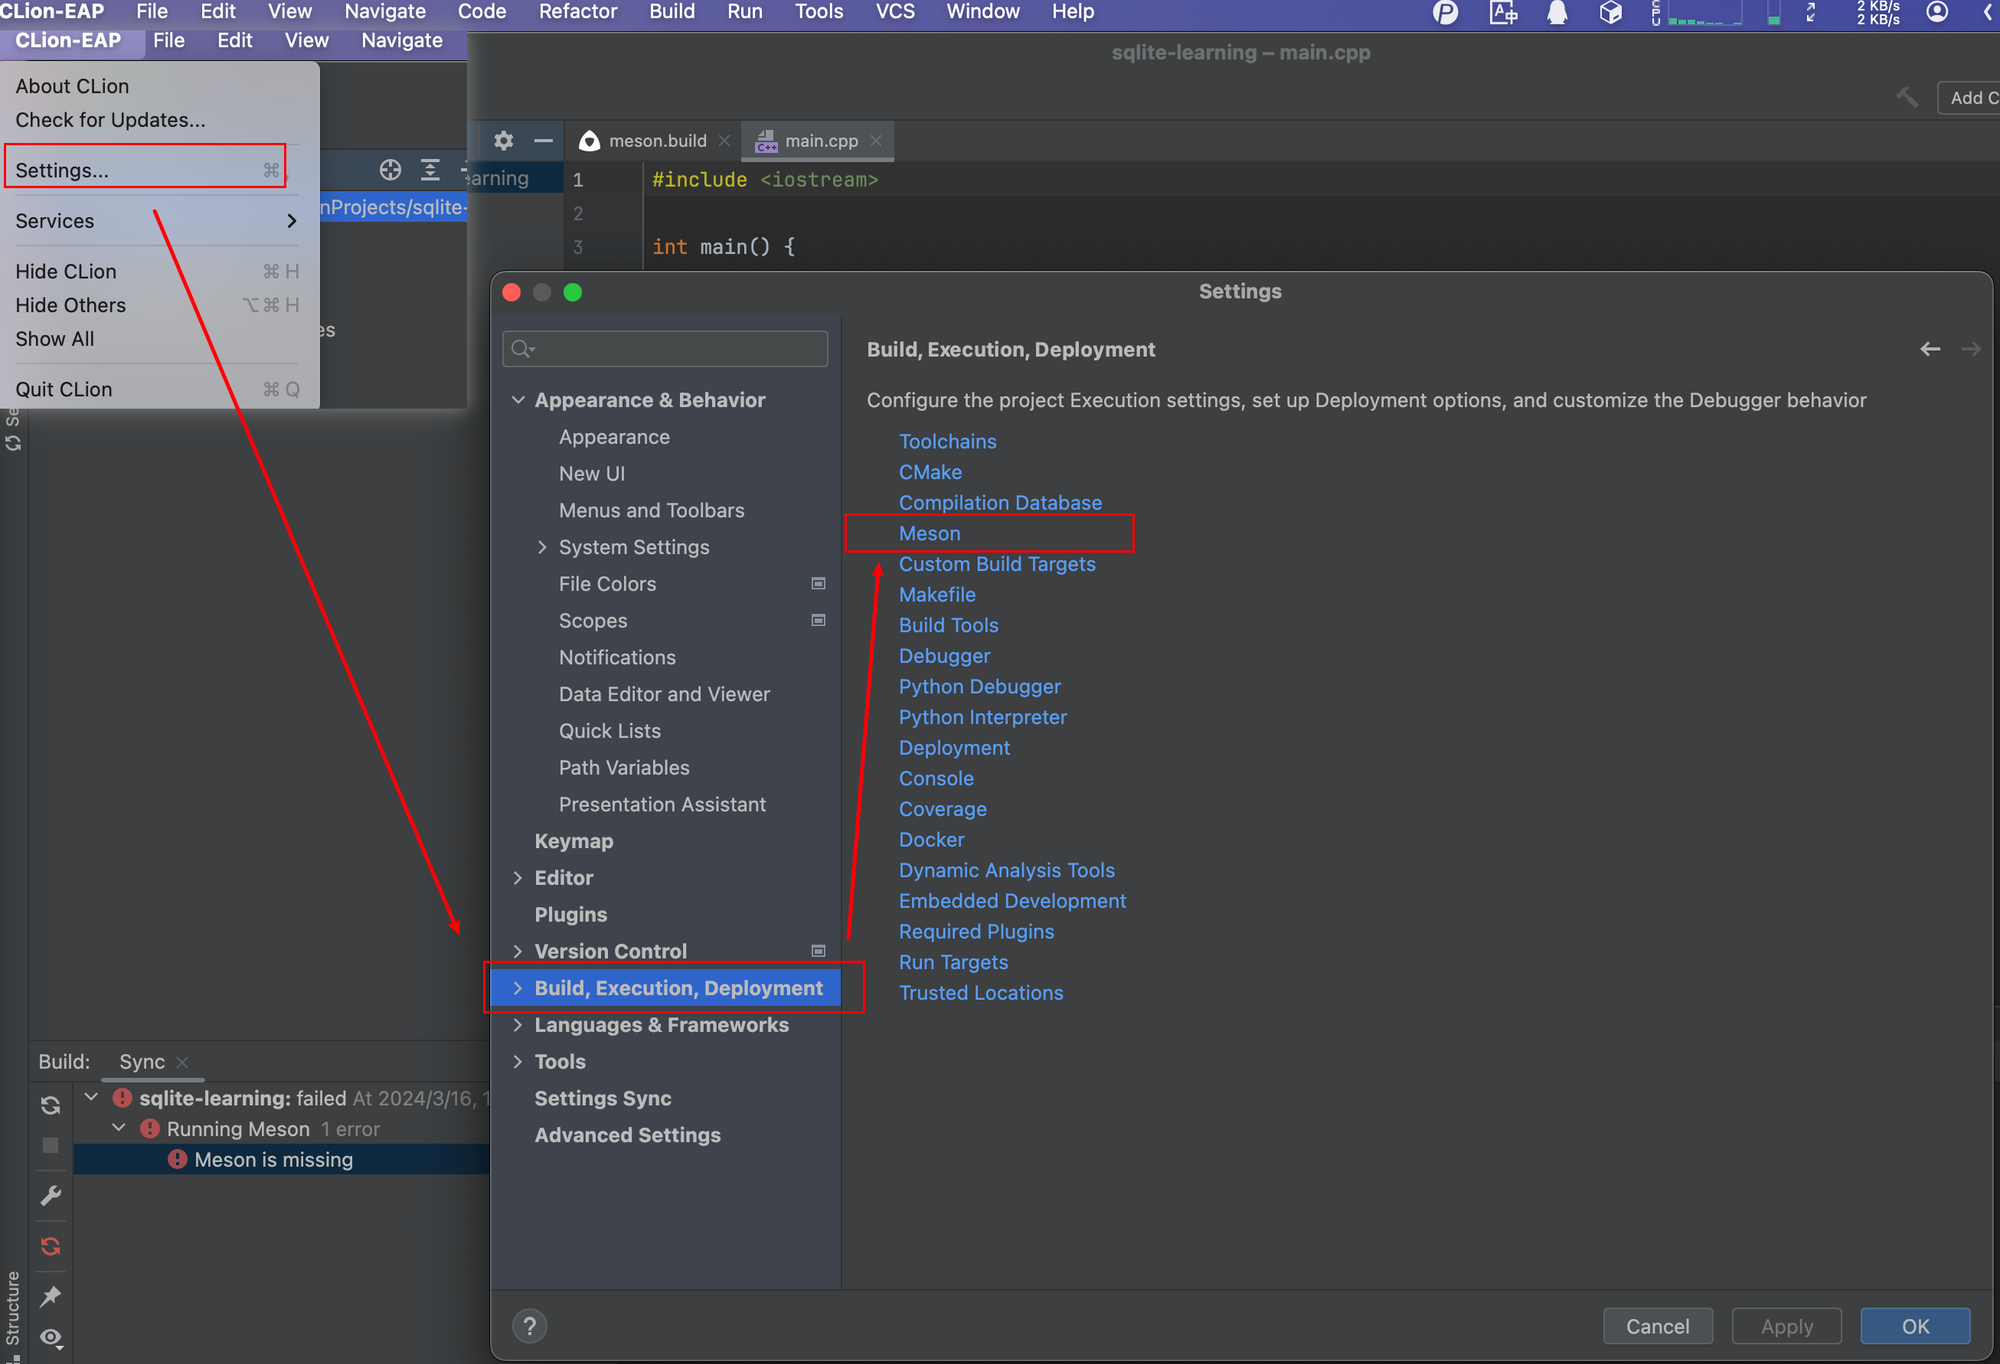
Make sure to select the .py file:
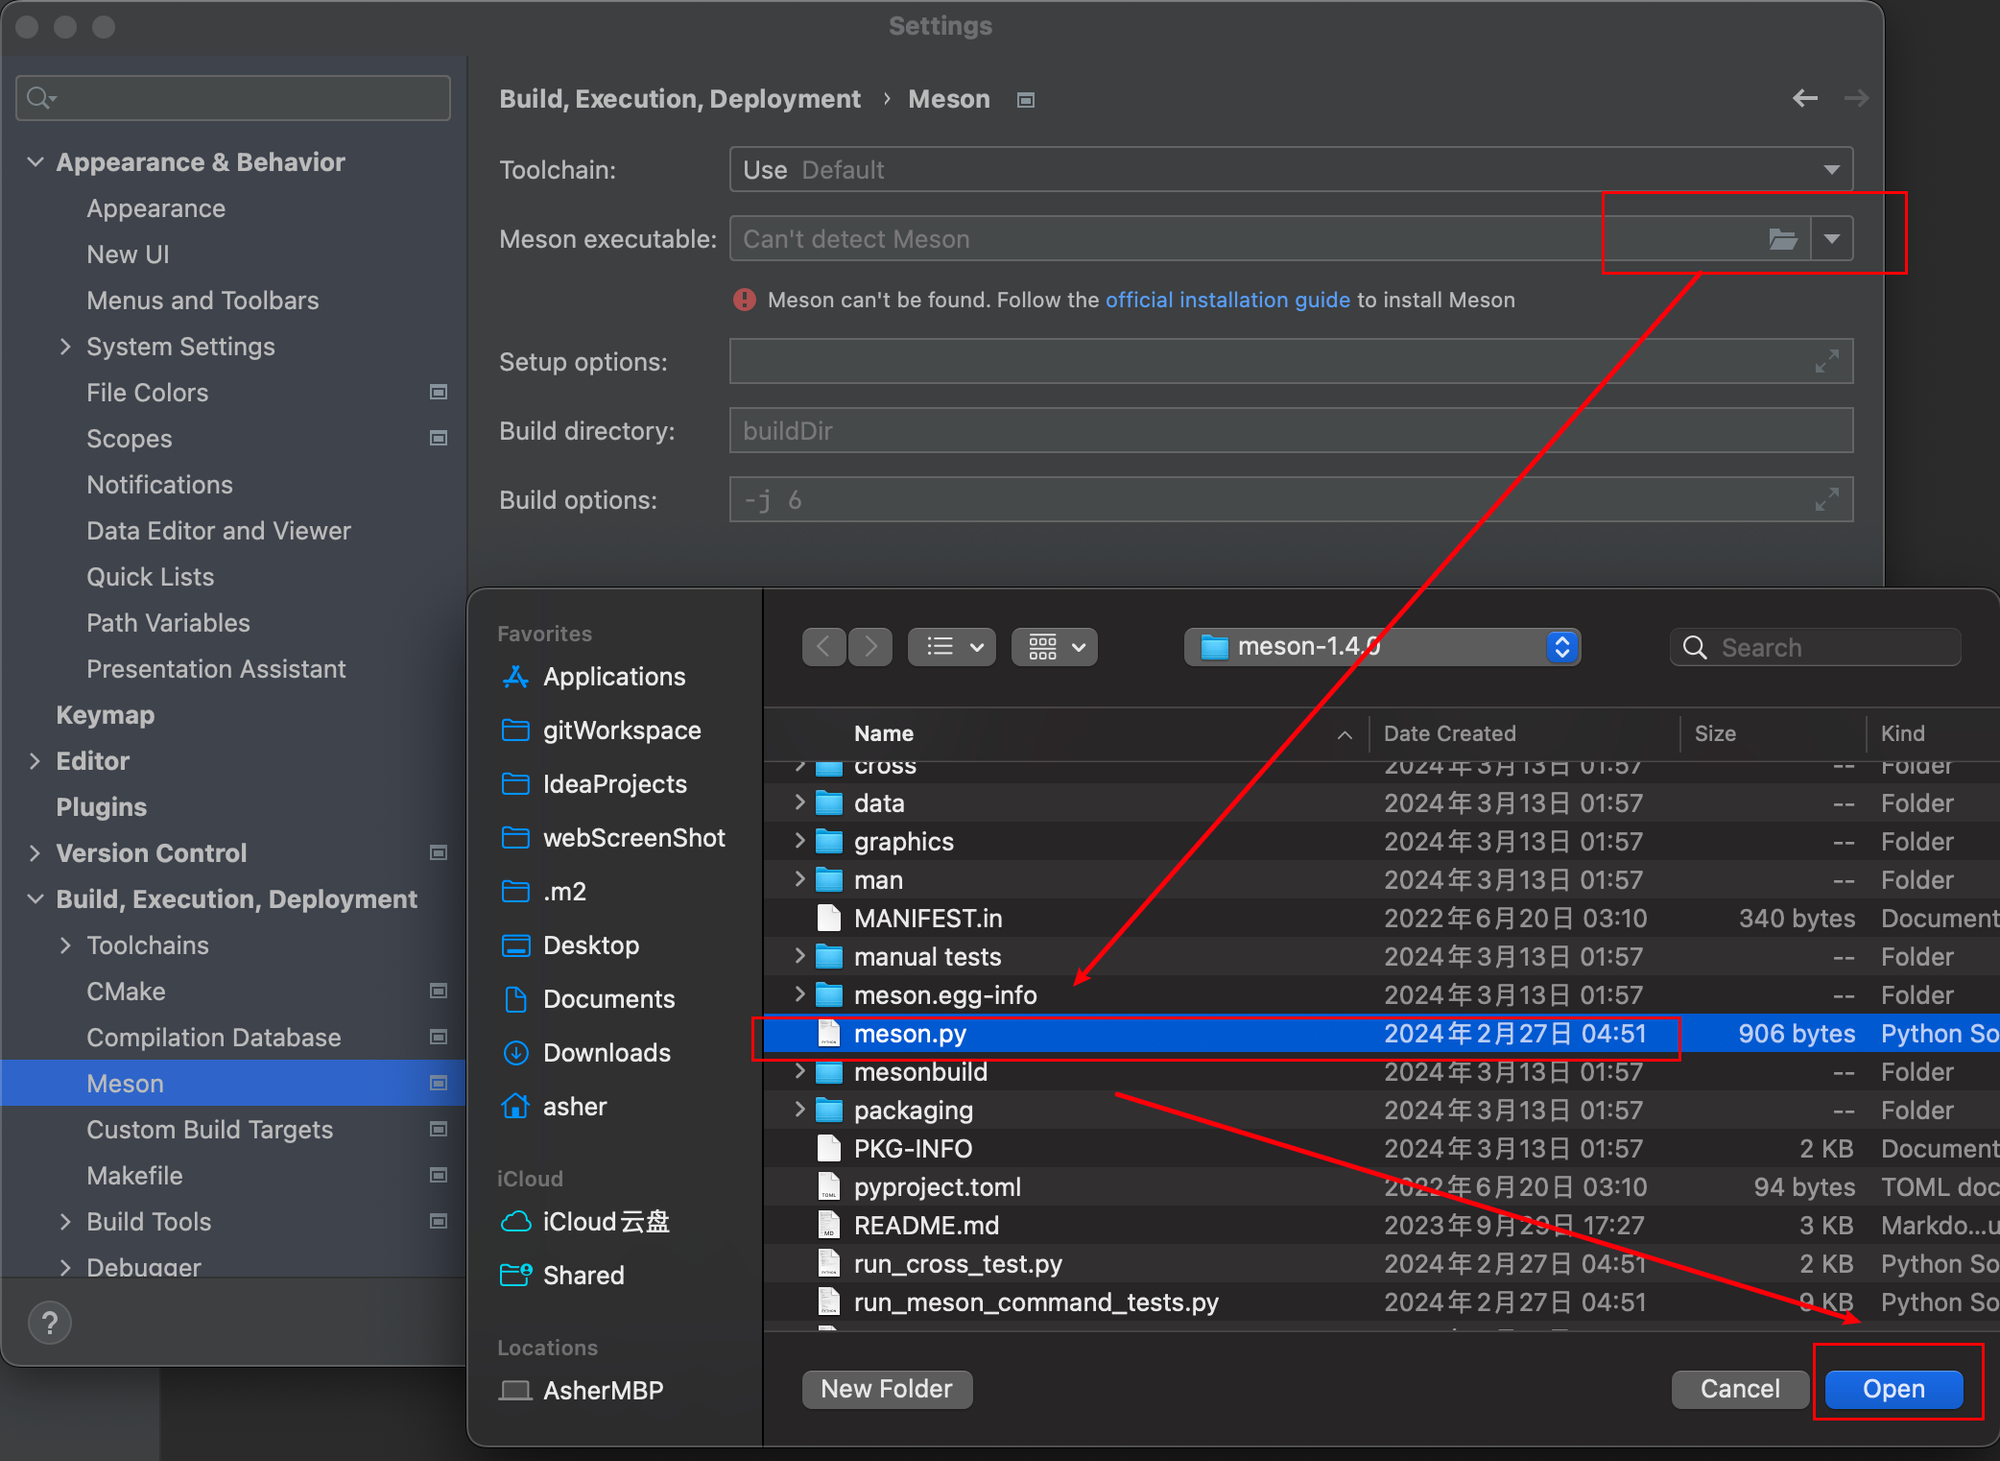
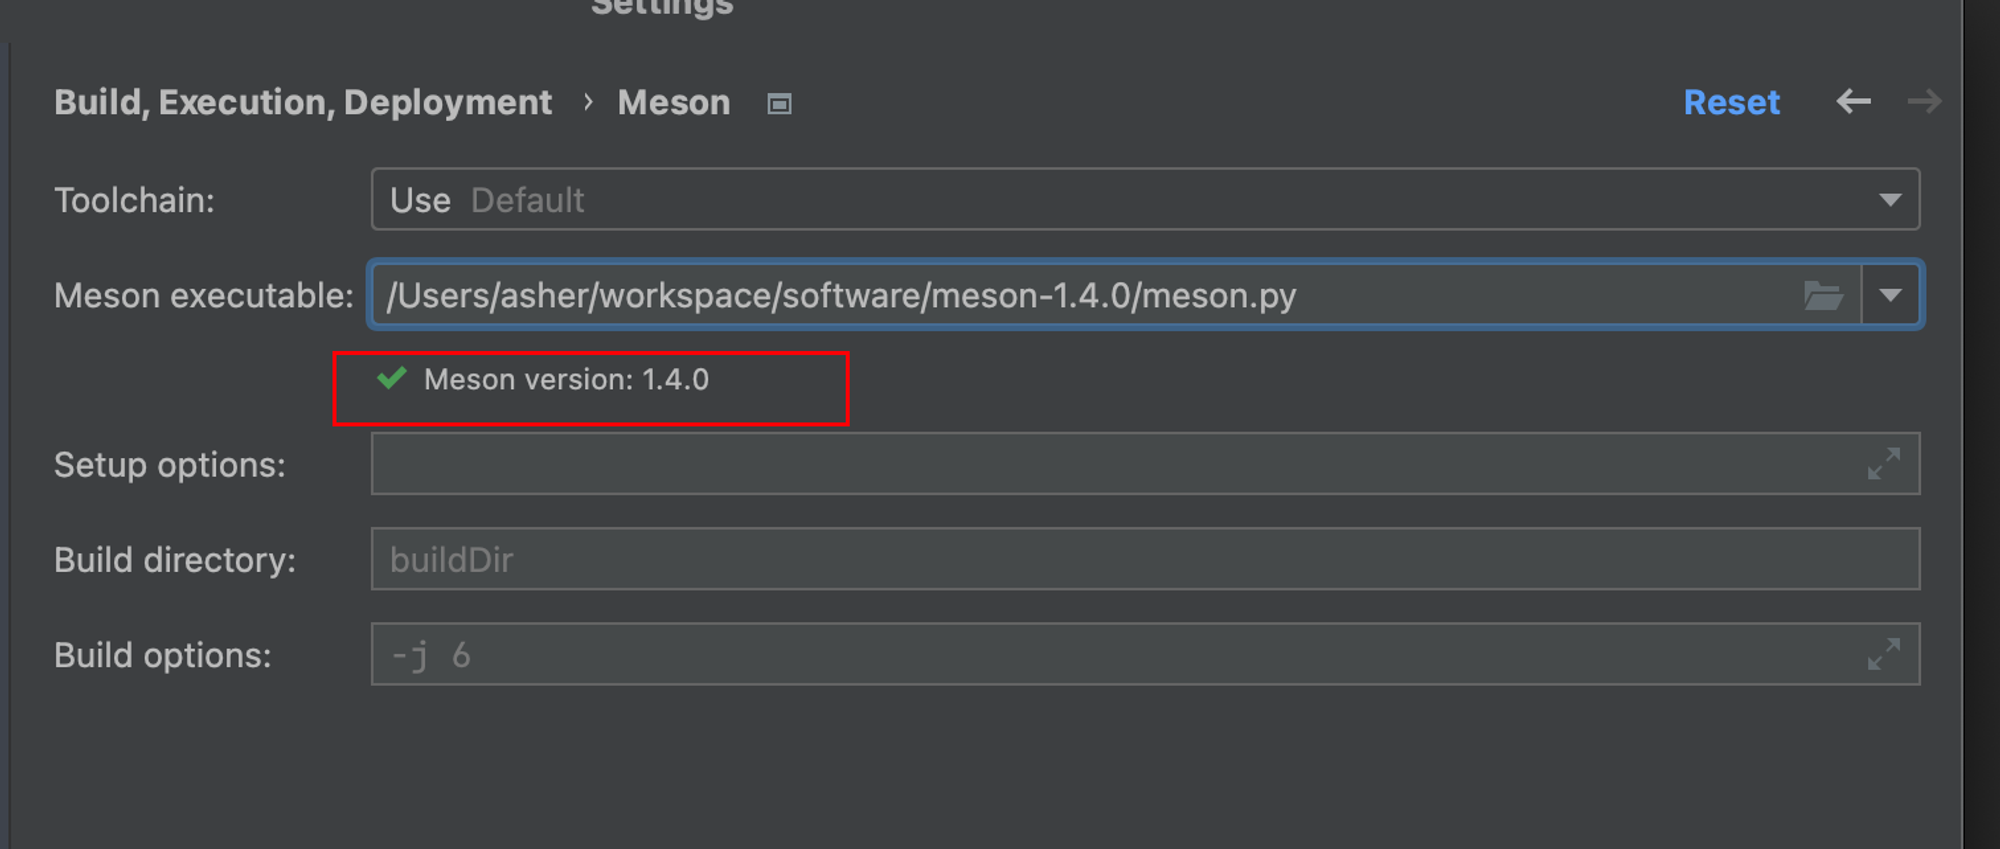
If you can get the version, it's OK:
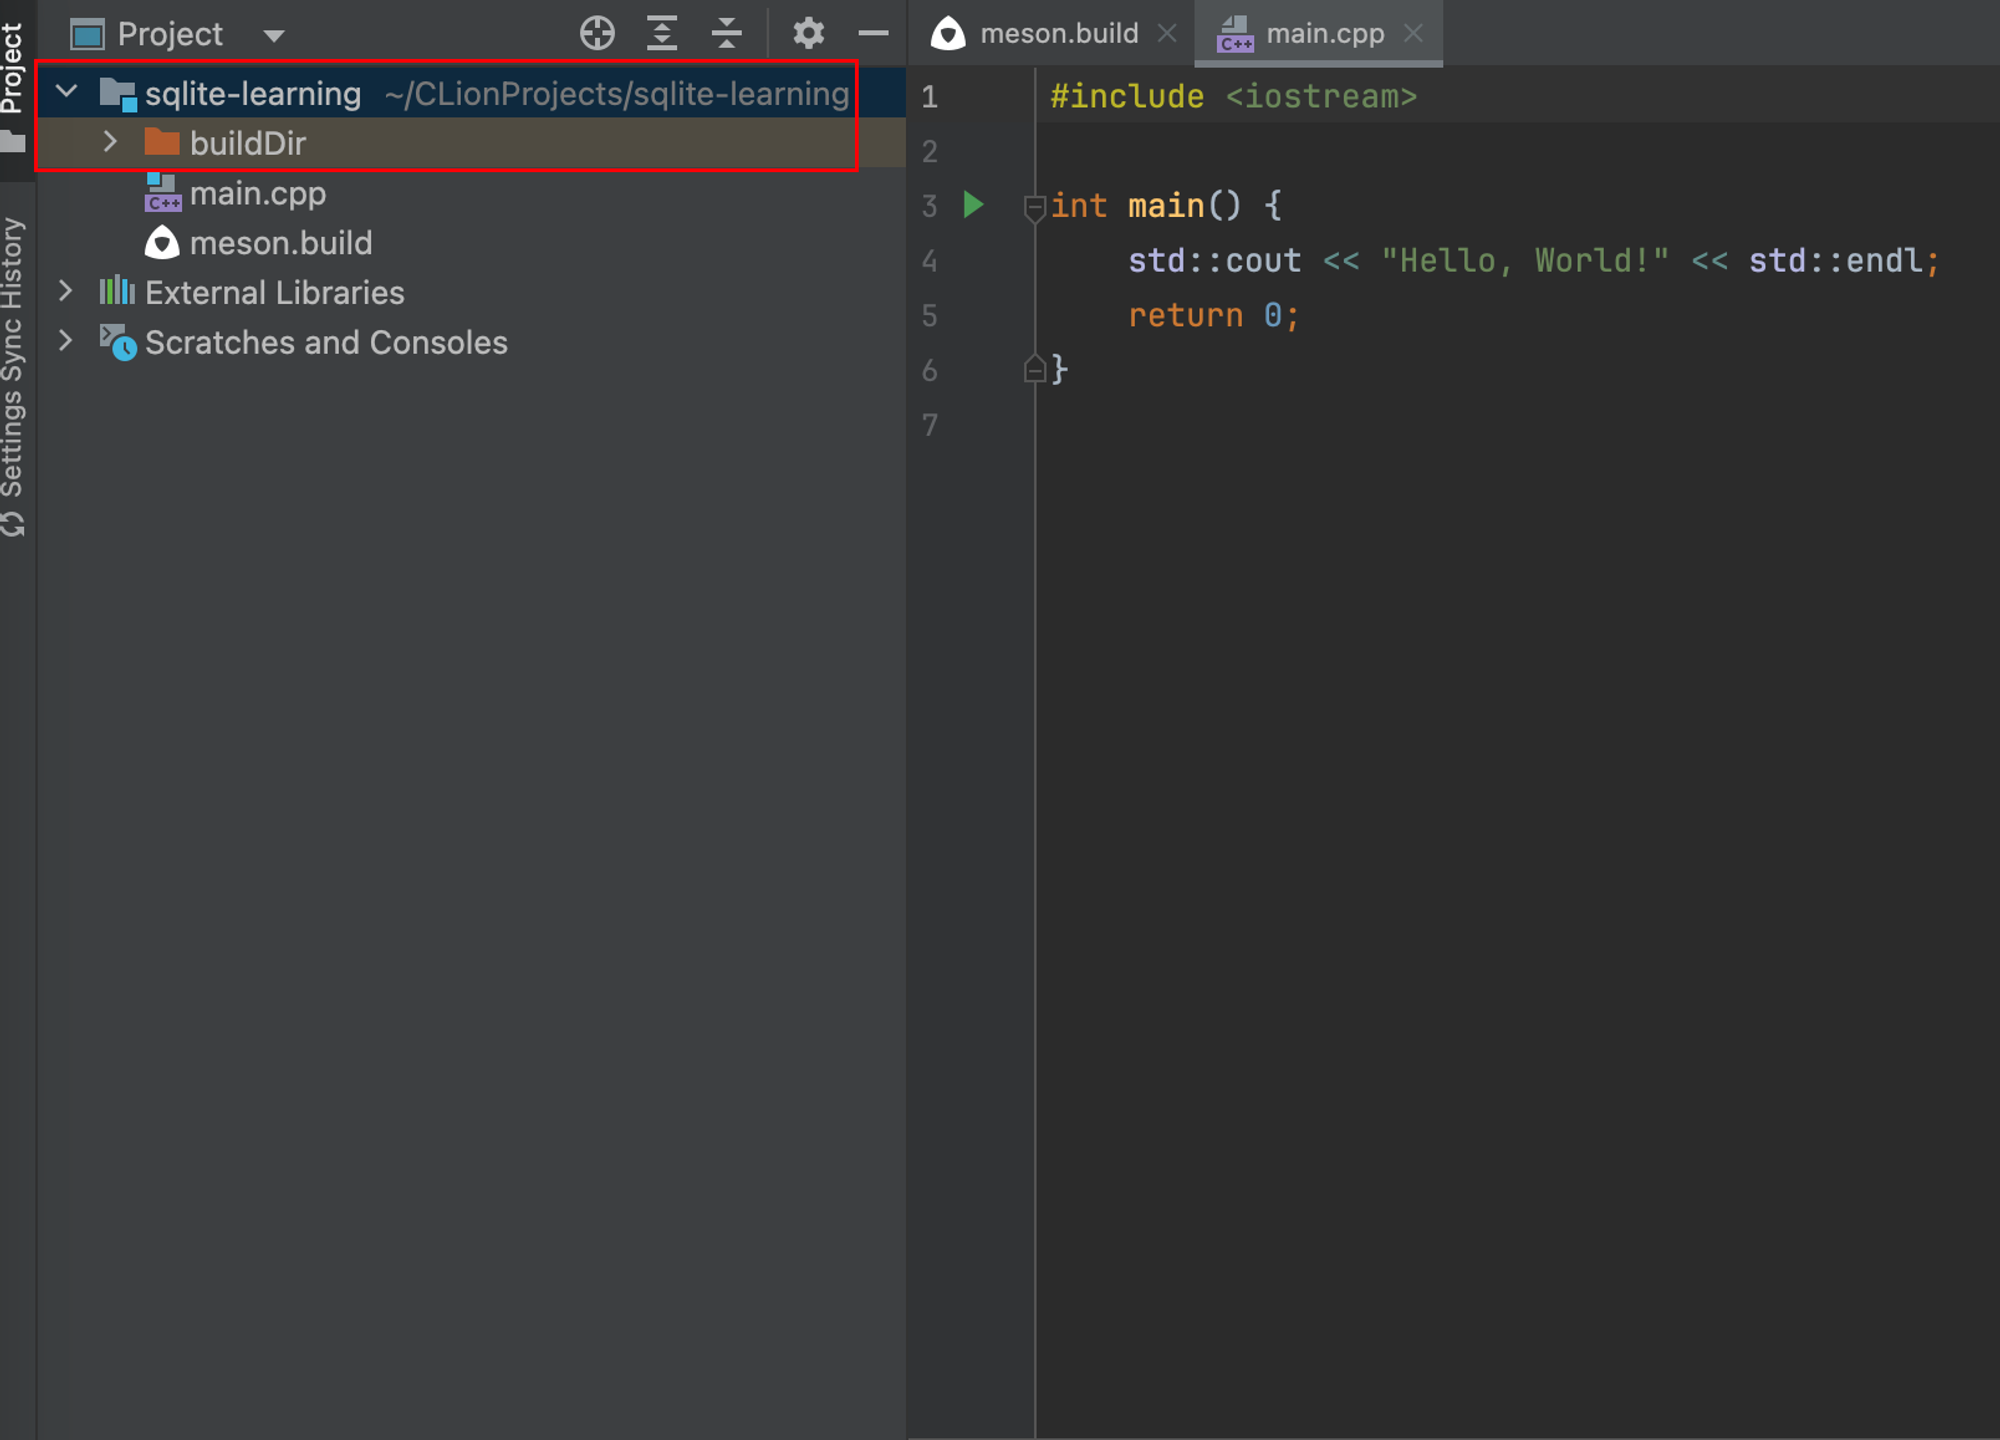
After clicking save, you'll notice a new directory - meson is building your project:
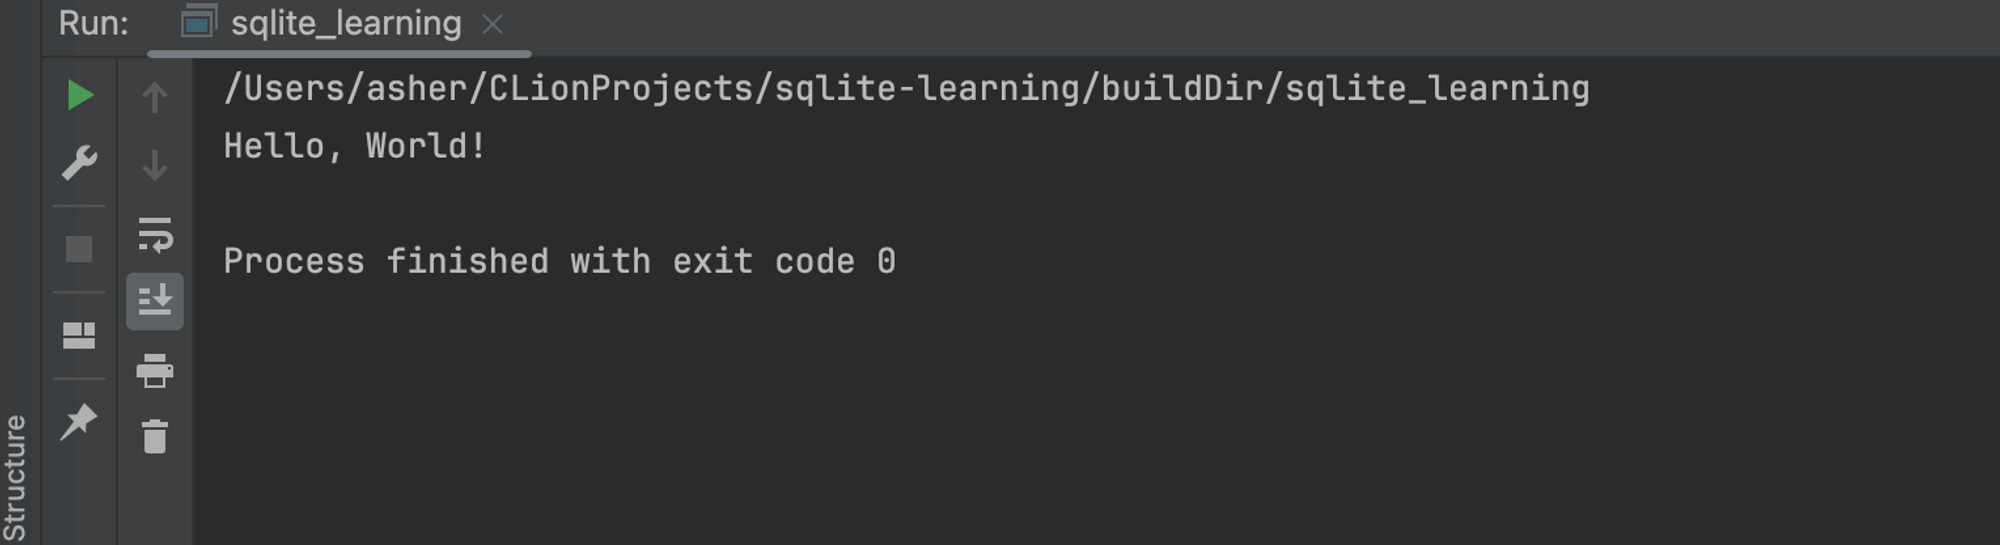
4.3 First C++ Program
Open main.cpp - there's already a program entry point. Click run:
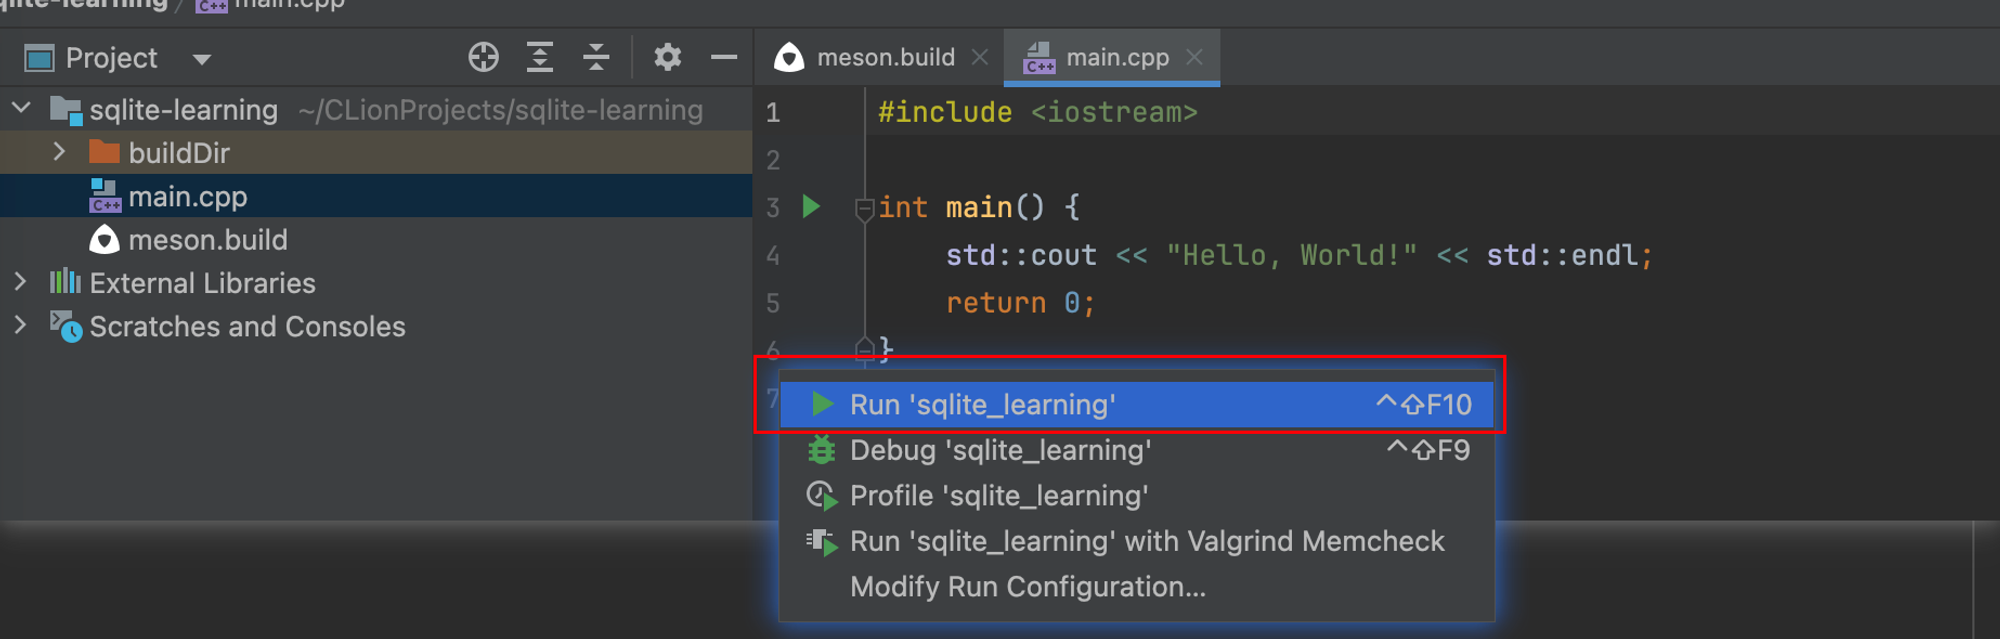
Awesome! First C++ program done!
5. C++ Connecting to SQLite
5.1 Adding Dependencies
What do we do before writing code? Of course, add the SQLite connection dependency to the project.
Open your meson.build file and modify it like this:
project('sqlite-learning', 'cpp',
        version : '1.0.0',
        default_options : ['warning_level=3', 'cpp_std=c++17'])

# Set up dependencies
sqlite_dep = dependency('sqlite3')

# Compile the program
sqlite_learning = executable('sqlite_learning', 'main.cpp', install : true, dependencies : sqlite_dep)
sqlite_dep = dependency('sqlite3')anddependencies : sqlite_depindicate importing the sqlite3 dependency
5.2 Start Writing Code
Back to the main.cpp file. I'm not familiar with C++ syntax myself, but no worries - now we have AI. Let AI output code, then we learn while copying.
Like this:
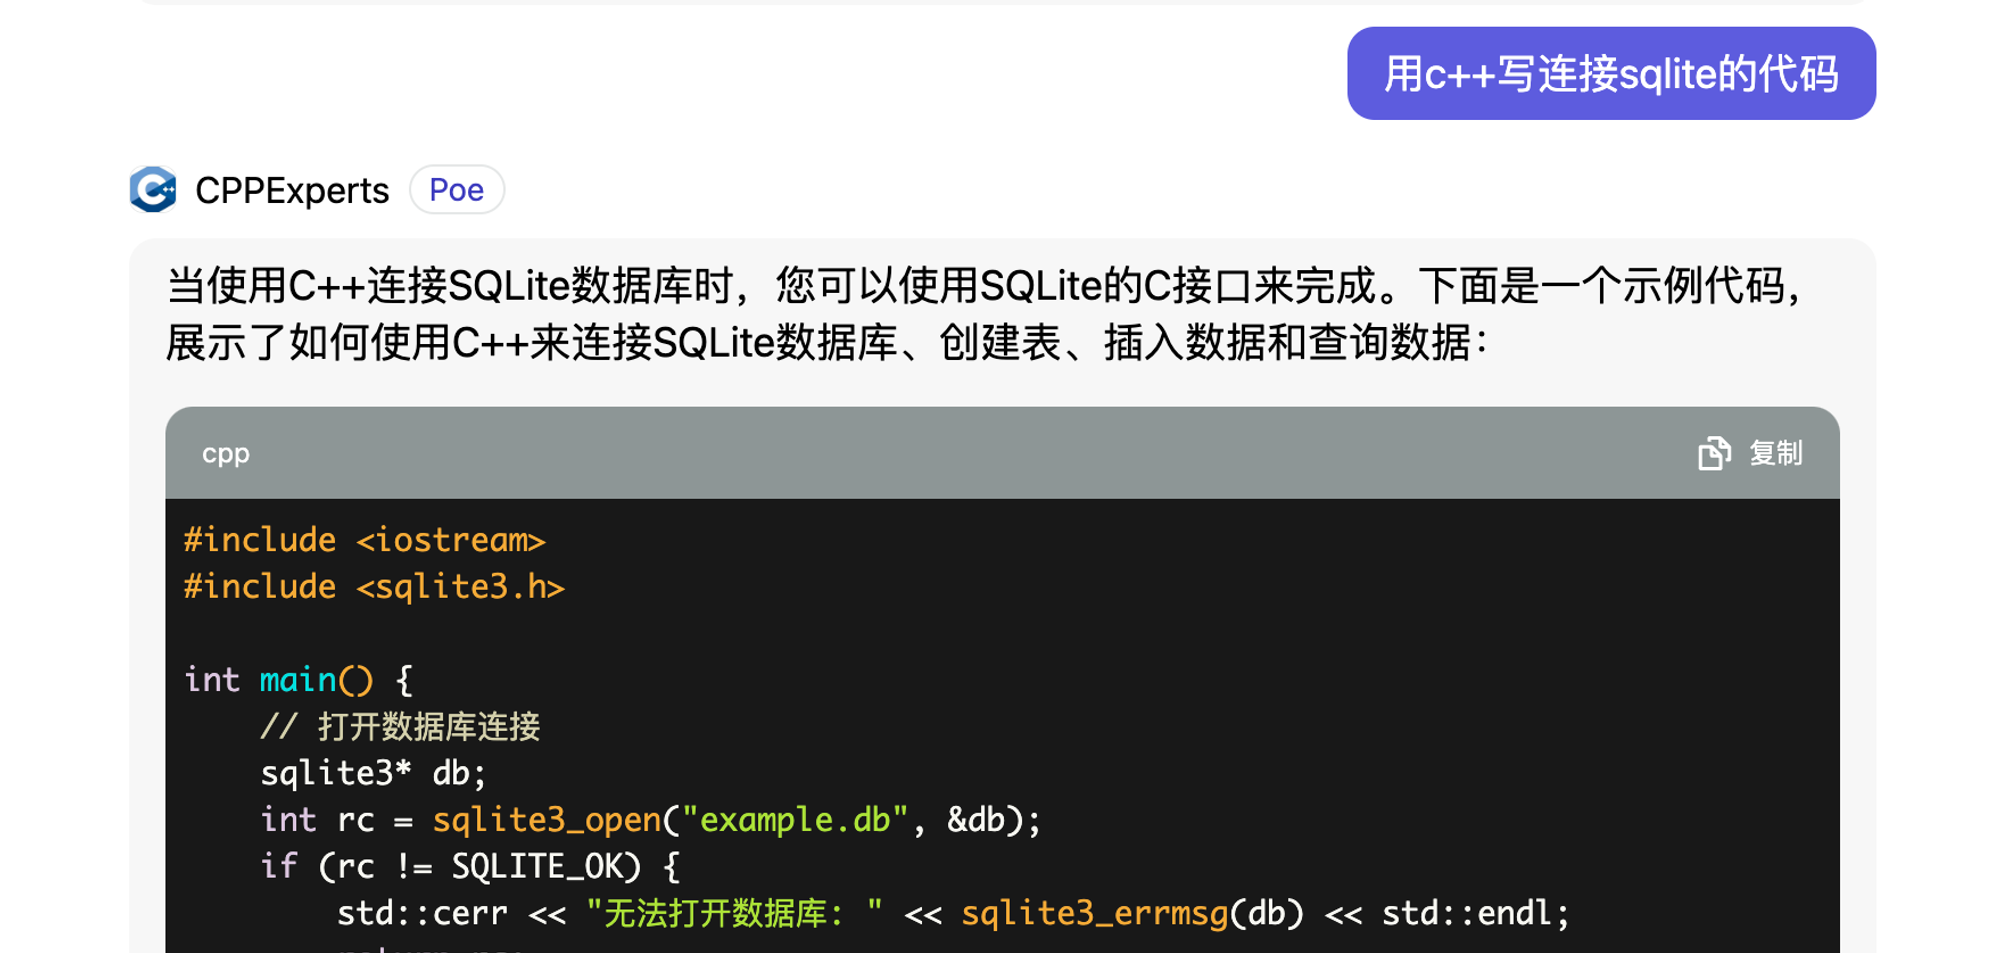
Then one-click copy and modify the filename:

5.3 Code Section
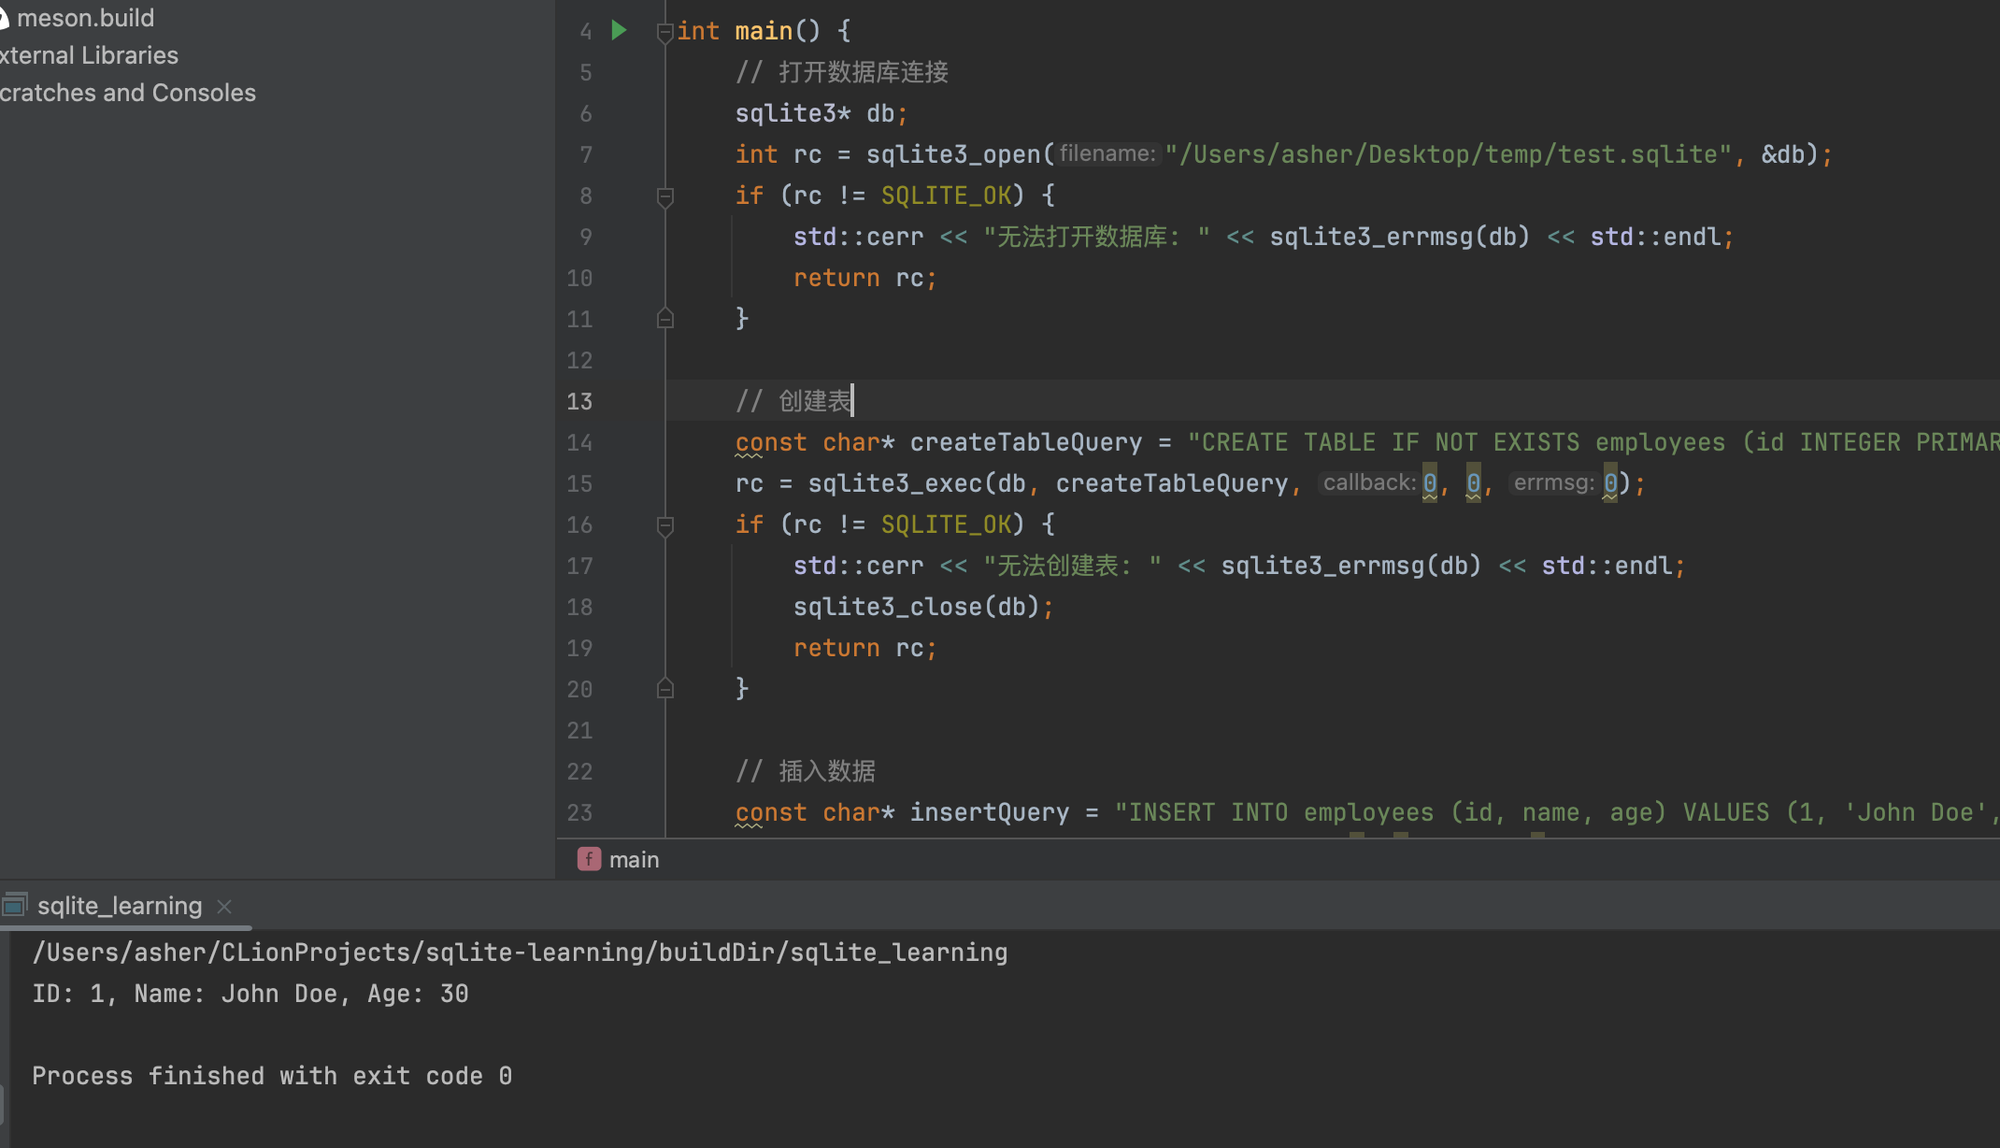
main.cpp
#include <iostream>
#include <sqlite3.h>

int main() {
    // Open database connection
    sqlite3* db;
    int rc = sqlite3_open("/Users/asher/Desktop/temp/test.sqlite", &db);
    if (rc != SQLITE_OK) {
        std::cerr << "Cannot open database: " << sqlite3_errmsg(db) << std::endl;
        return rc;
    }

    // Create table
    const char* createTableQuery = "CREATE TABLE IF NOT EXISTS employees (id INTEGER PRIMARY KEY, name TEXT, age INTEGER)";
    rc = sqlite3_exec(db, createTableQuery, 0, 0, 0);
    if (rc != SQLITE_OK) {
        std::cerr << "Cannot create table: " << sqlite3_errmsg(db) << std::endl;
        sqlite3_close(db);
        return rc;
    }

    // Insert data
    const char* insertQuery = "INSERT INTO employees (id, name, age) VALUES (1, 'John Doe', 30)";
    rc = sqlite3_exec(db, insertQuery, 0, 0, 0);
    if (rc != SQLITE_OK) {
        std::cerr << "Cannot insert data: " << sqlite3_errmsg(db) << std::endl;
        sqlite3_close(db);
        return rc;
    }

    // Query data
    const char* selectQuery = "SELECT * FROM employees";
    sqlite3_stmt* stmt;
    rc = sqlite3_prepare_v2(db, selectQuery, -1, &stmt, 0);
    if (rc != SQLITE_OK) {
        std::cerr << "Cannot prepare query: " << sqlite3_errmsg(db) << std::endl;
        sqlite3_close(db);
        return rc;
    }

    // Iterate through result set
    while (sqlite3_step(stmt) == SQLITE_ROW) {
        int id = sqlite3_column_int(stmt, 0);
        const unsigned char* name = sqlite3_column_text(stmt, 1);
        int age = sqlite3_column_int(stmt, 2);
        std::cout << "ID: " << id << ", Name: " << name << ", Age: " << age << std::endl;
    }

    // Release resources
    sqlite3_finalize(stmt);
    sqlite3_close(db);

    return 0;
}
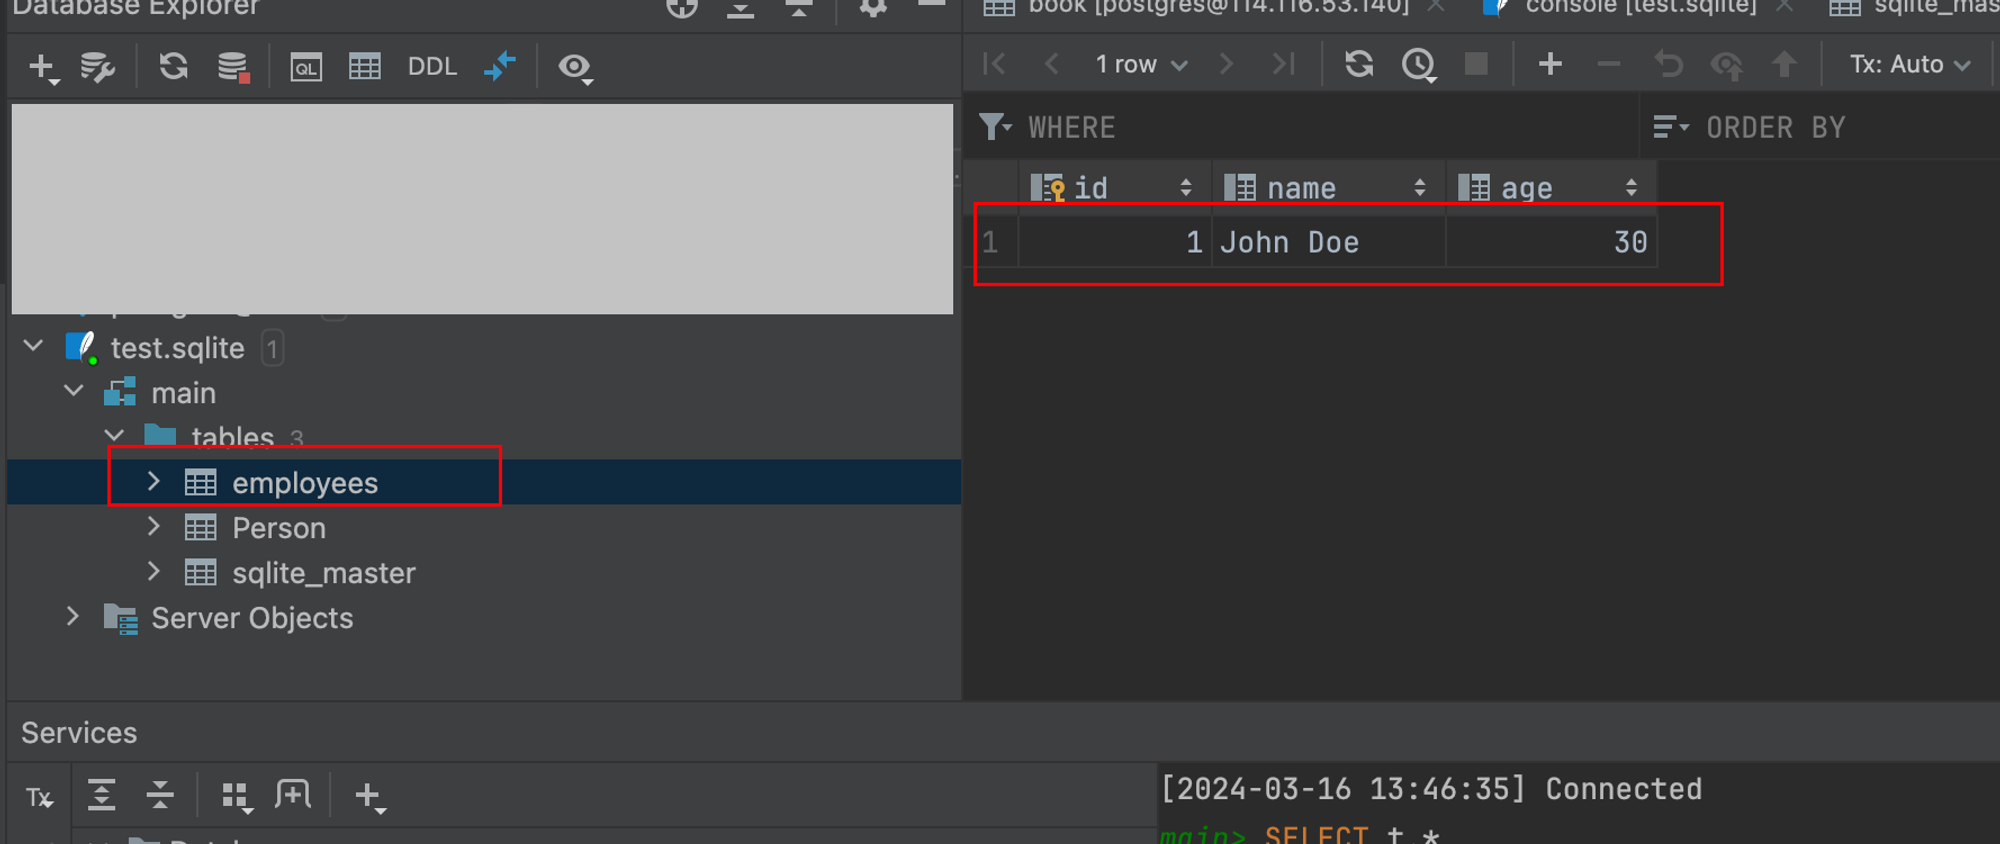
Run it directly! No problems at all:
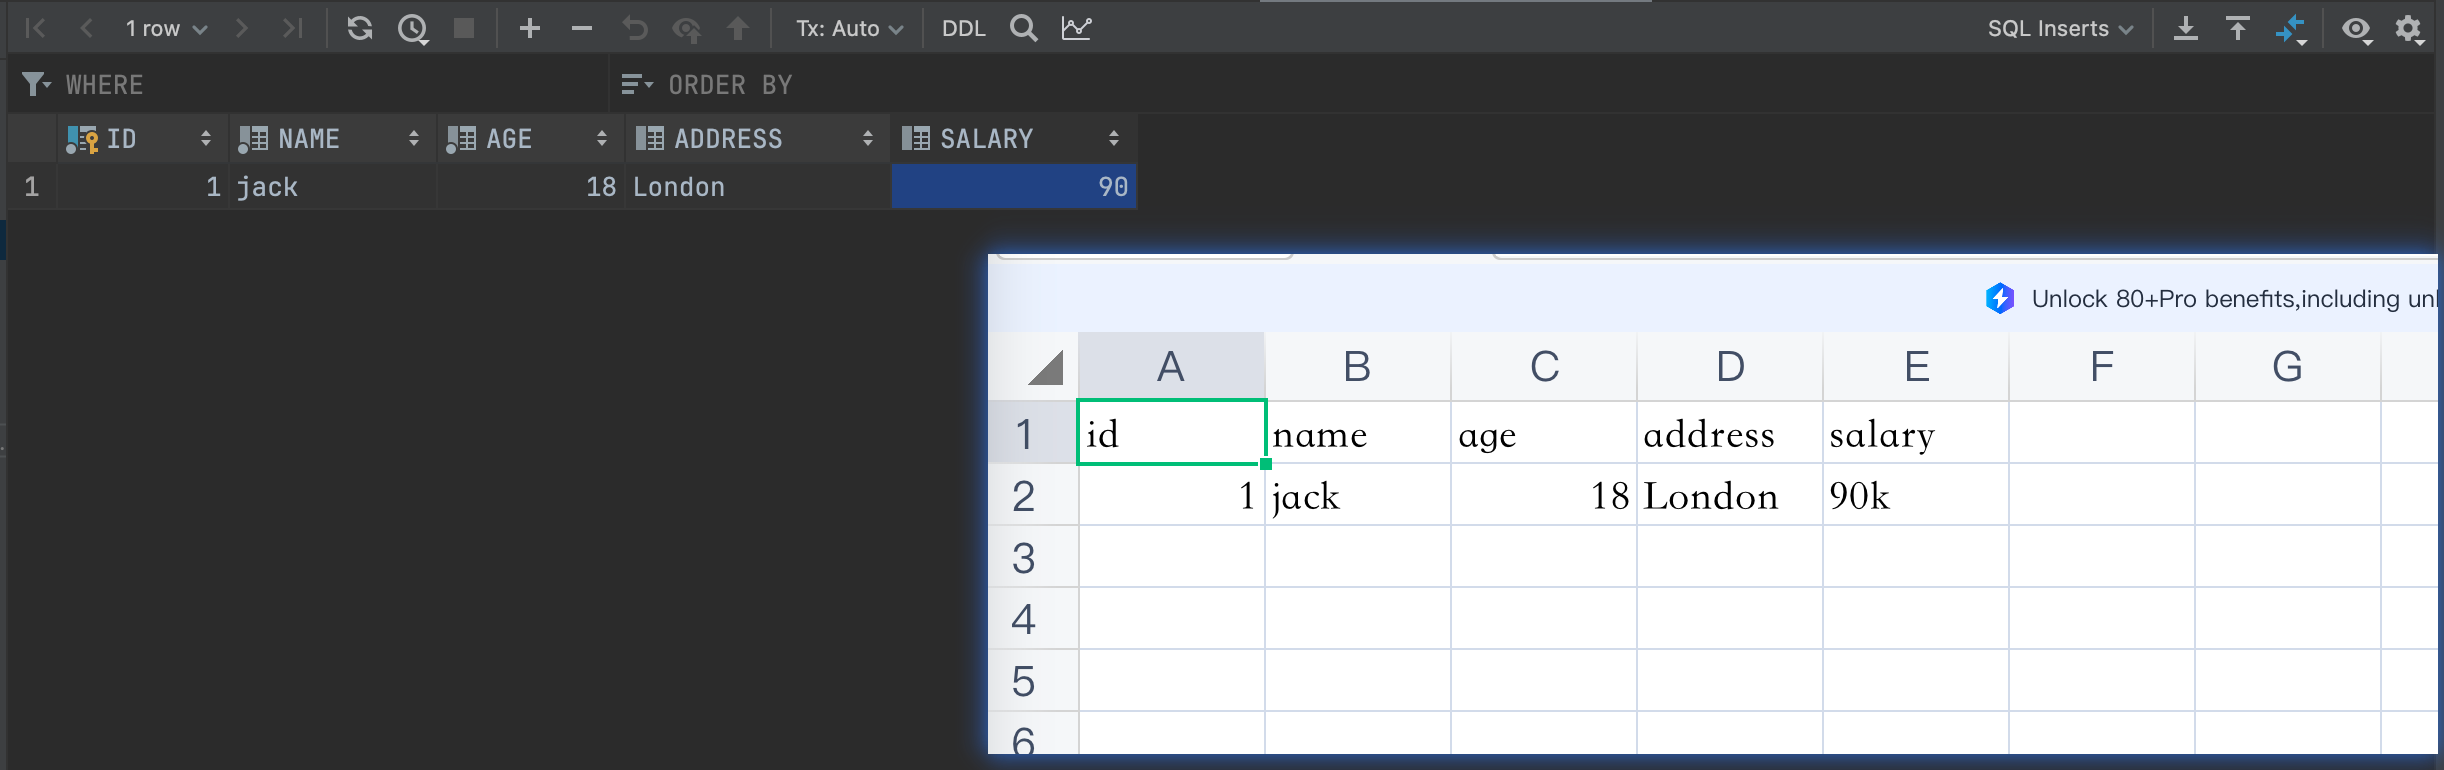
Go back to DataGrip and refresh:

Wow! The table is there, and so is the data:
6. Final Step
Have AI explain the code it just output, and only when you can write it without relying on AI will you truly master it.