Adding a Comment System to Docusaurus
1. Background
Static websites like Docusaurus do not have a built-in comment system, but we can add one using a third-party tool like giscus.
Here is the effect:
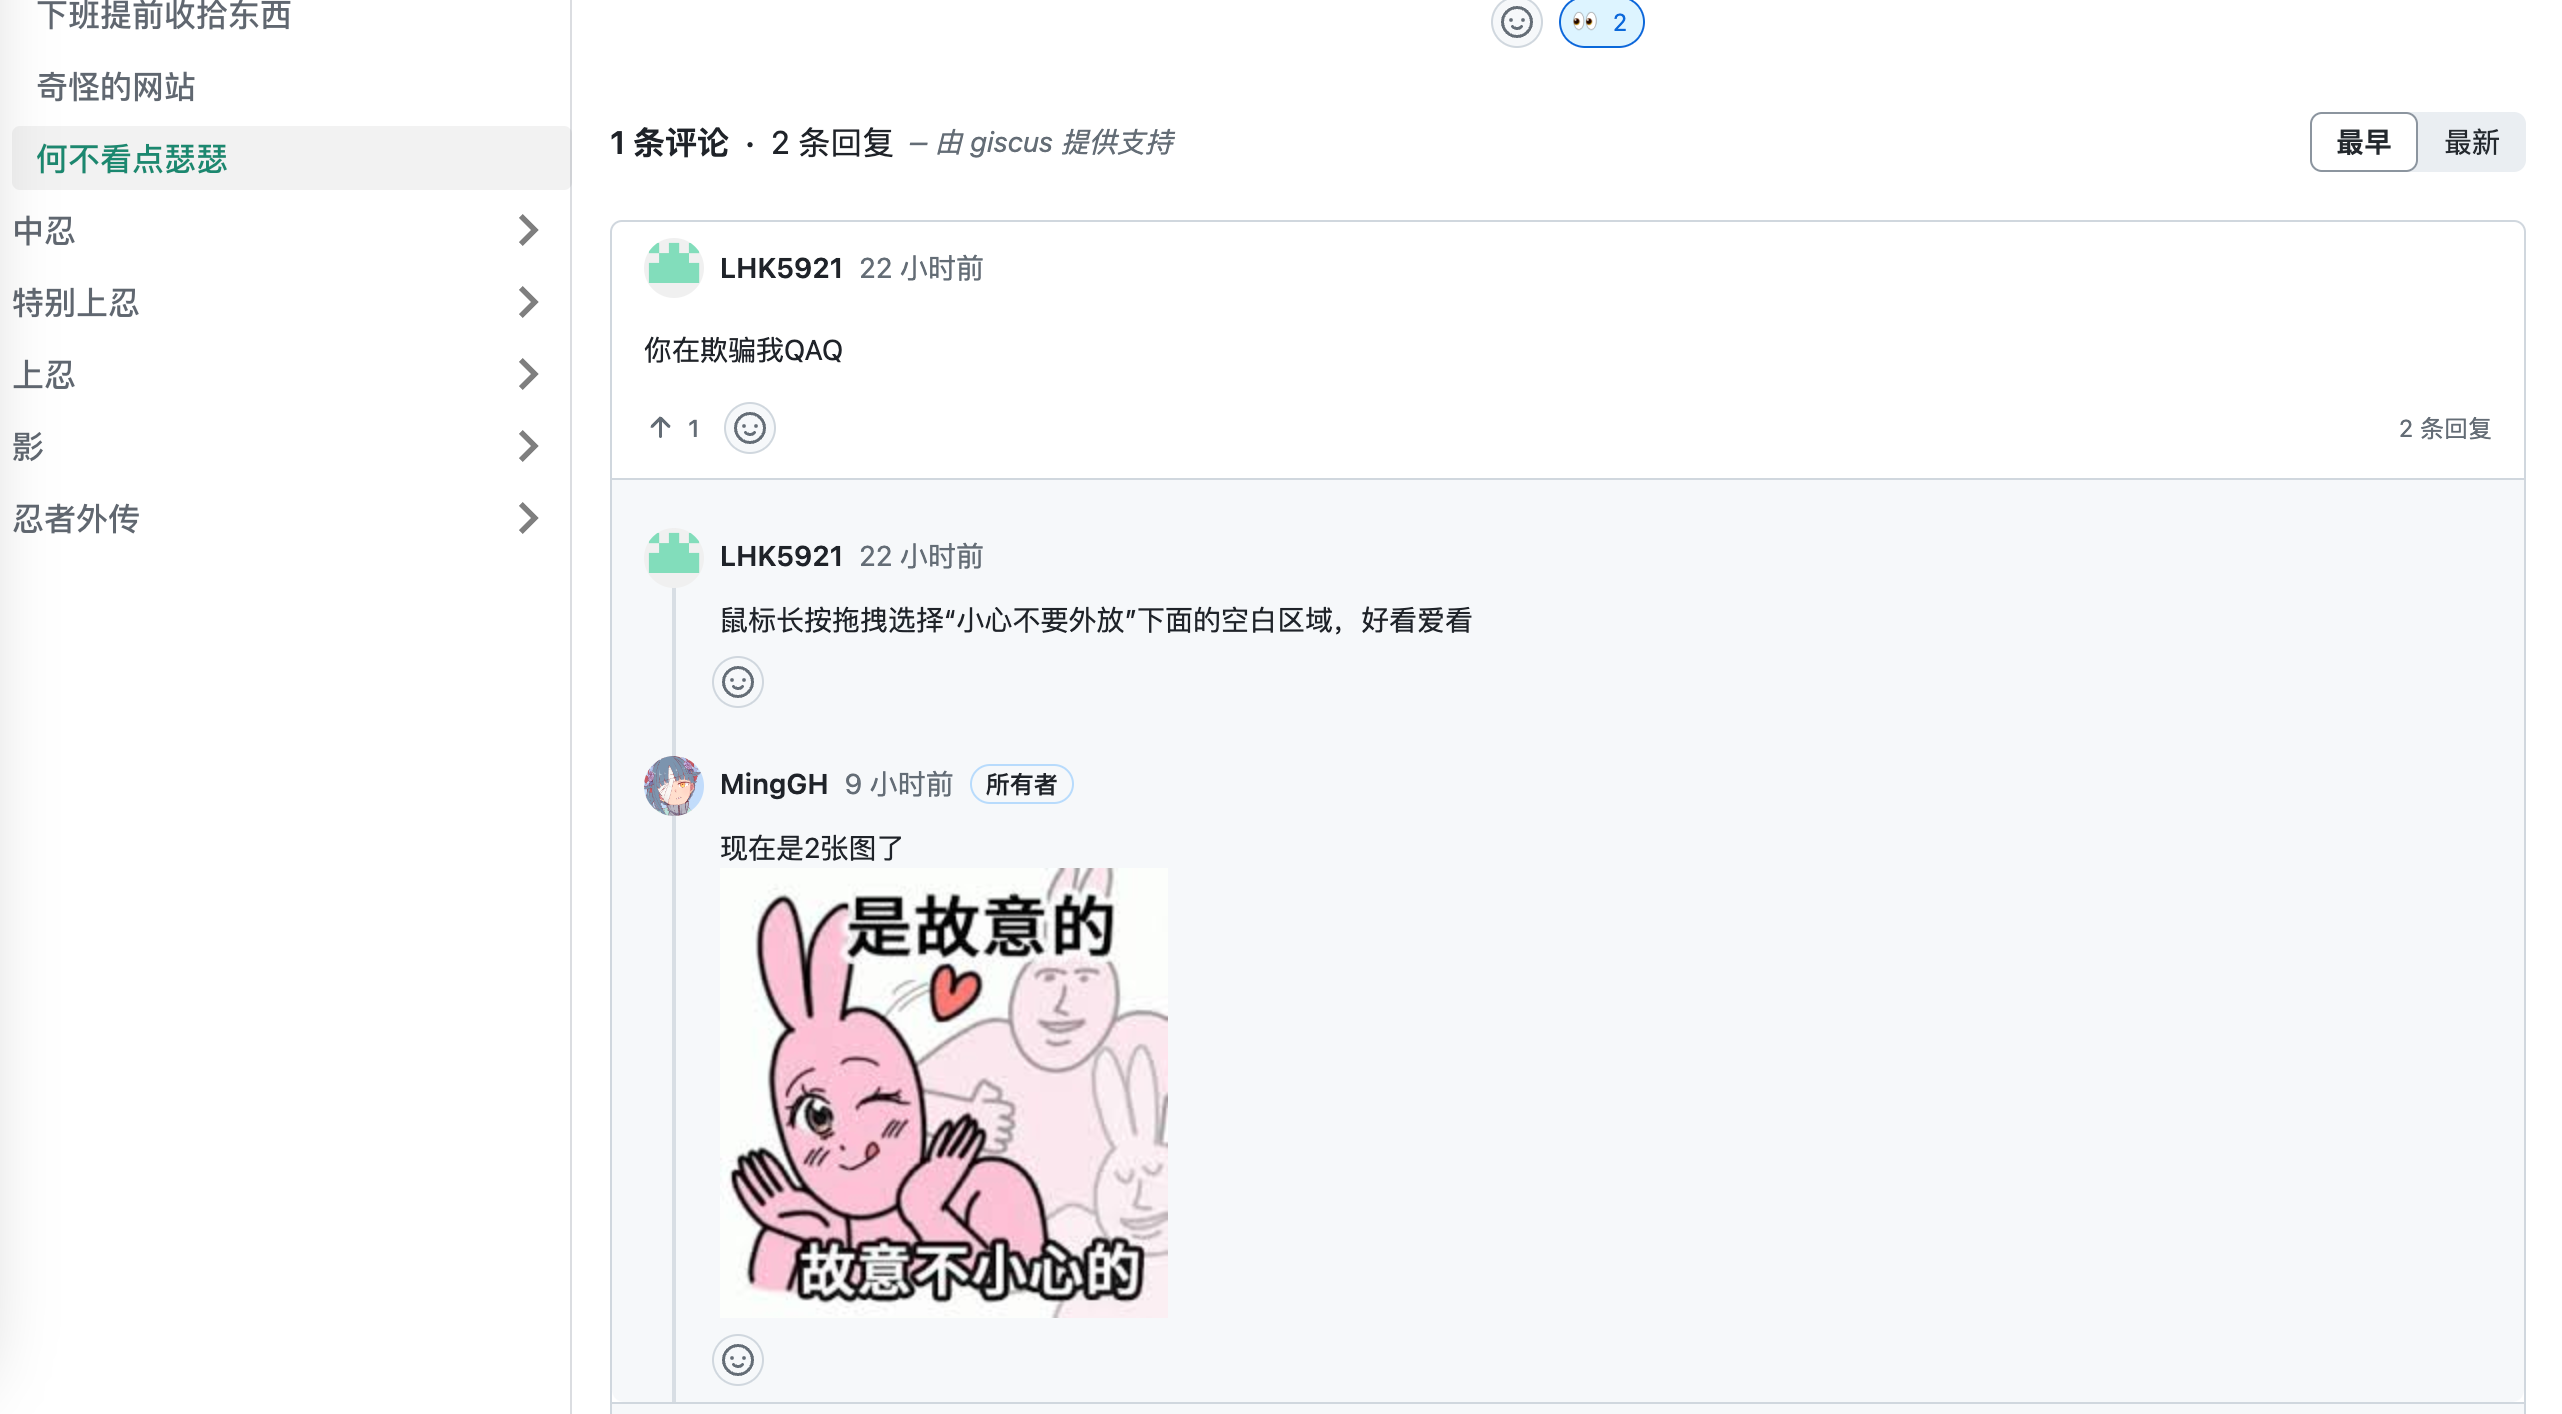
It integrates well with the overall webpage and automatically loads when the page is opened. It can also be configured for lazy loading.
2. Using giscus
The following content is based on the blog post Adding a Comment System to Docusaurus
2.1 Prerequisites
- Your project runs Docusaurus and has at least one blog post or document.
- You are using the
theme classic, which is the default. - Register with the corresponding comment plugin to get the configuration.
2.2 Configuring giscus
First, log in to your GitHub account and install the giscus app: giscus app
Go to the giscus official website and configure the language, the GitHub repository where comments will be posted, the page-to-discussion mapping, select a discussion category, theme, etc.
Pay attention to these three points when configuring:
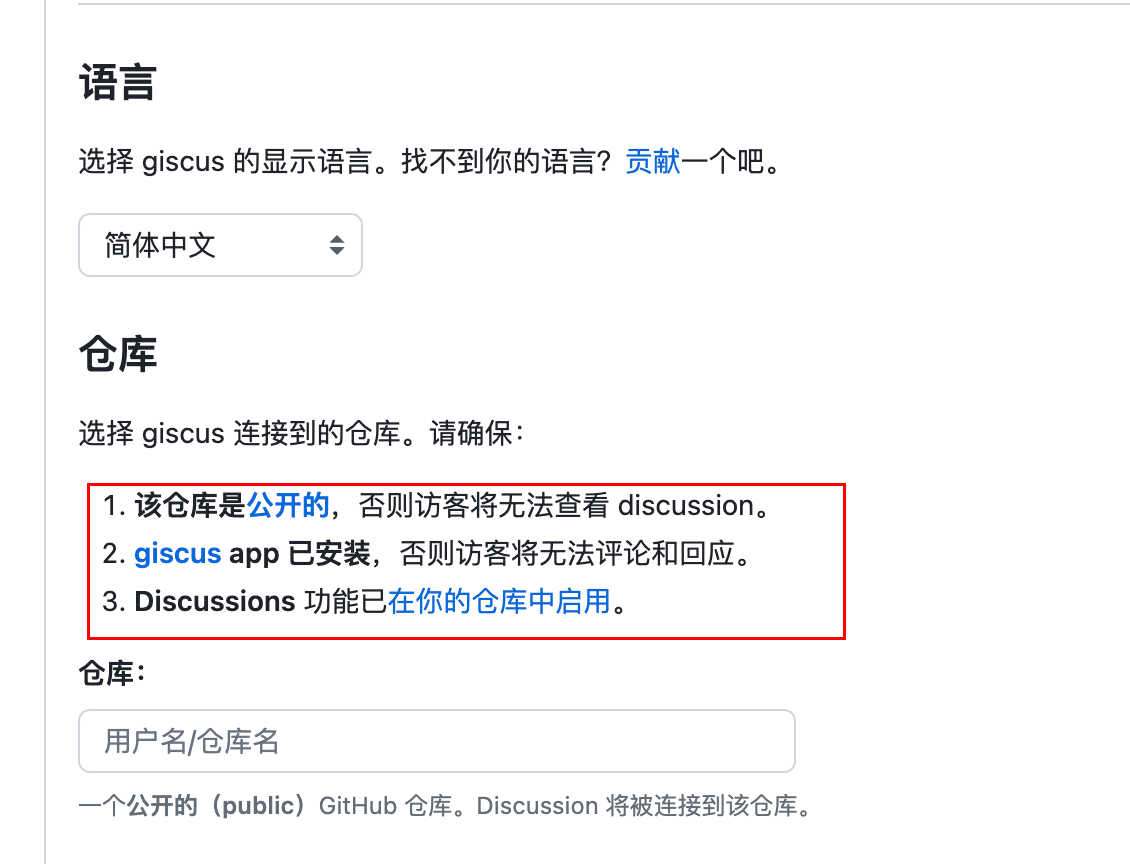
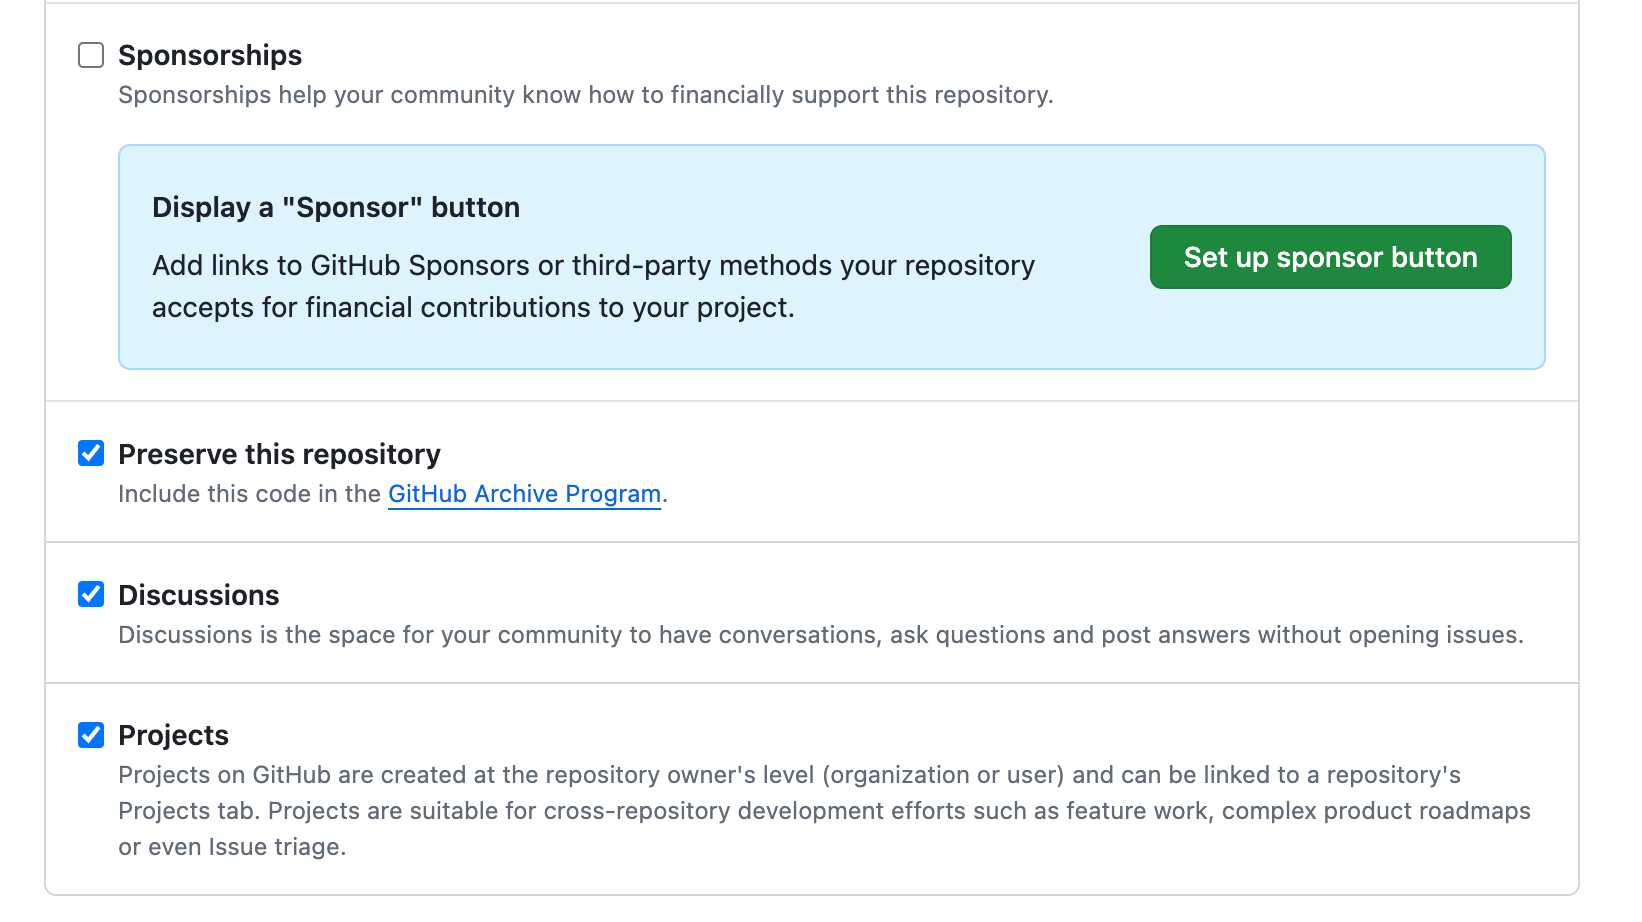
Enable Discussions in the repository Settings:
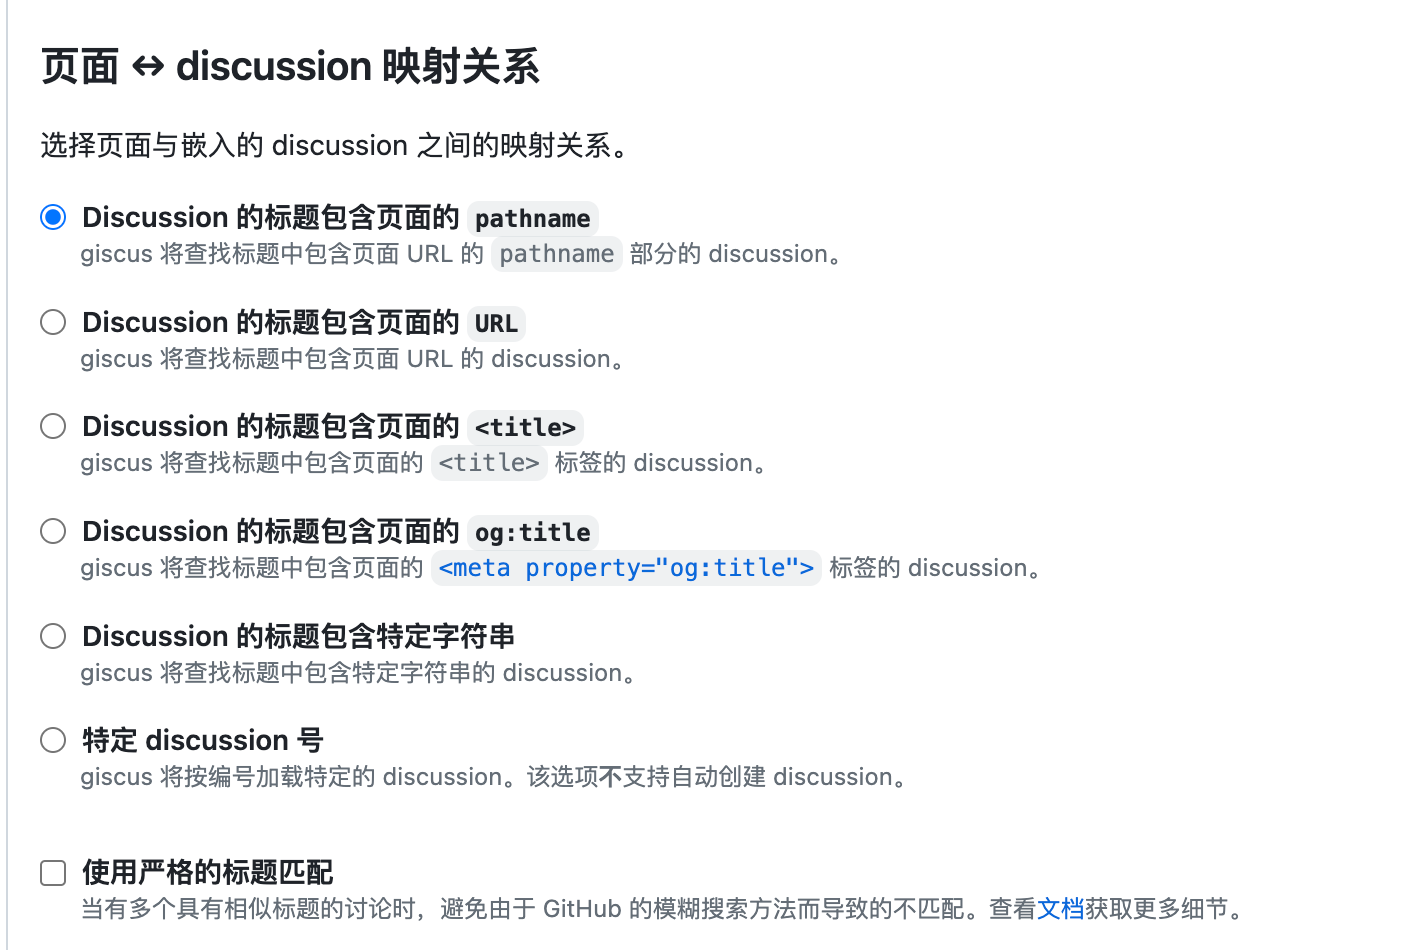
Page ↔️ discussion mapping: Generally, select Pathname. When a comment is generated, a discussion topic similar to your blog request path will be created.
Get the configured <script> tag, similar to:
<script src="https://giscus.app/client.js"
        data-repo="xxxxx"
        data-repo-id="xxxx"
        data-category="xxxx"
        data-category-id="xxxxx"
        data-mapping="pathname"
        data-reactions-enabled="1"
        data-emit-metadata="0"
        data-input-position="bottom"
        data-theme="light"
        data-lang="zh-CN"
        crossorigin="anonymous"
        async>
2.3 Execute in your Docusaurus project root directory
yarn swizzle @docusaurus/theme-classic BlogPostPage
Select Eject (Unsafe) and press Enter.
Select YES: I know what I am doing! and press Enter.
Now, a custom theme file has been generated in your project directory src/theme/BlogPostPage.
Note: The file generated here only inserts the comment system for articles under your Blog directory.
If you also want to insert the comment system in the docs directory, you need to execute the command: yarn swizzle @docusaurus/theme-classic DocItem/Layout
Next, modify the file.
The three highlighted areas below are where we need to modify and add code. Note that configurations may differ depending on the version, so find the position to place the comments based on the highlights.
import React, { useEffect, useRef }  from 'react';

import clsx from 'clsx';
import {HtmlClassNameProvider, ThemeClassNames} from '@docusaurus/theme-common';
import {BlogPostProvider, useBlogPost} from '@docusaurus/theme-common/internal';
import BlogLayout from '@theme/BlogLayout';
import BlogPostItem from '@theme/BlogPostItem';
import BlogPostPaginator from '@theme/BlogPostPaginator';
import BlogPostPageMetadata from '@theme/BlogPostPage/Metadata';
import TOC from '@theme/TOC';
function BlogPostPageContent({sidebar, children}) {
  const {metadata, toc} = useBlogPost();
  const {nextItem, prevItem, frontMatter} = metadata;
  const {
    hide_table_of_contents: hideTableOfContents,
    toc_min_heading_level: tocMinHeadingLevel,
    toc_max_heading_level: tocMaxHeadingLevel,
  } = frontMatter;

  const commentElement = useRef(null);

  useEffect(() => {
    // Update the document title using the browser API
    let s = document.createElement("script");
    s.src = "https://giscus.app/client.js";
    s.setAttribute("data-repo", "[Your Repo]");
    s.setAttribute("data-repo-id", "[Your Repo ID]=");
    s.setAttribute("data-category", "[Your Category Name]");
    s.setAttribute("data-category-id", "[Your Category ID]");
    s.setAttribute("data-mapping", "pathname");
    s.setAttribute("data-reactions-enabled", "1");
    s.setAttribute("data-emit-metadata", "0");
    s.setAttribute("data-input-position", "bottom");
    s.setAttribute("data-theme", "light");
    s.setAttribute("data-lang", "en");
    s.setAttribute("crossorigin", "anonymous");
    s.async = true;
    commentElement.current.appendChild(s);
  }, []);


  return (
    <BlogLayout
      sidebar={sidebar}
      toc={
        !hideTableOfContents && toc.length > 0 ? (
          <TOC
            toc={toc}
            minHeadingLevel={tocMinHeadingLevel}
            maxHeadingLevel={tocMaxHeadingLevel}
          />
        ) : undefined
      }>
      <BlogPostItem>{children}</BlogPostItem>

      {(nextItem || prevItem) && (
        <BlogPostPaginator nextItem={nextItem} prevItem={prevItem} />
      )}

      <div style={{marginTop:'20px'}} ref={commentElement}></div>


    </BlogLayout>
  );
}
export default function BlogPostPage(props) {
  const BlogPostContent = props.content;
  return (
    <BlogPostProvider content={props.content} isBlogPostPage>
      <HtmlClassNameProvider
        className={clsx(
          ThemeClassNames.wrapper.blogPages,
          ThemeClassNames.page.blogPostPage,
        )}>
        <BlogPostPageMetadata />
        <BlogPostPageContent sidebar={props.sidebar}>
          <BlogPostContent />
        </BlogPostPageContent>
      </HtmlClassNameProvider>
    </BlogPostProvider>
  );
}
The comment addition is now complete.
If you just executed yarn swizzle for the docs directory as well.
Then both files under the image need to be modified, and the changes are the same as above.
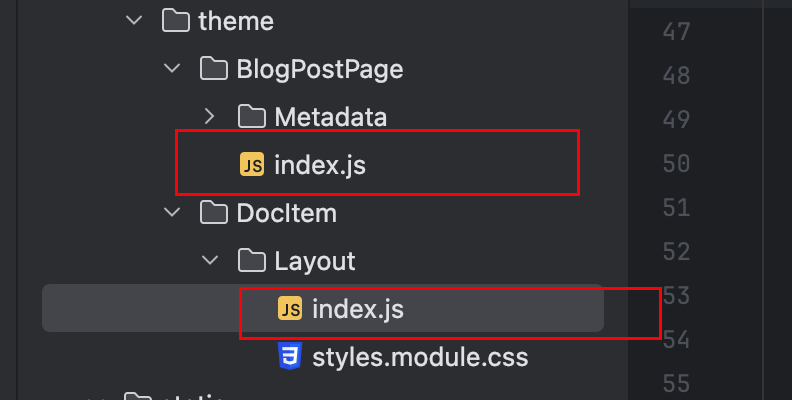
You can refer to my changes:
import React, { useEffect, useRef }  from 'react';
import clsx from 'clsx';
import {useWindowSize} from '@docusaurus/theme-common';
import {useDoc} from '@docusaurus/theme-common/internal';
import DocItemPaginator from '@theme/DocItem/Paginator';
import DocVersionBanner from '@theme/DocVersionBanner';
import DocVersionBadge from '@theme/DocVersionBadge';
import DocItemFooter from '@theme/DocItem/Footer';
import DocItemTOCMobile from '@theme/DocItem/TOC/Mobile';
import DocItemTOCDesktop from '@theme/DocItem/TOC/Desktop';
import DocItemContent from '@theme/DocItem/Content';
import DocBreadcrumbs from '@theme/DocBreadcrumbs';
import Unlisted from '@theme/Unlisted';